Setting up a Blackboard Ultra Module Image (Banner)
Personalising Blackboard courses is a way to provide students with a unique online and educational experience. One way to personalise your Blackboard course is to add a picture or image (Banner) to the top of your module homepage. Banners are also a useful way to indicate which course you are in which is especially helpful if you teach many courses a semester. For the student experience, banners can create a sense of belonging to a module, and allow them to ensure they are in the correct module. In addition, a module banner can be viewed from the Module Home page, again allowing both staff and students to identify individual modules visually.
Previously, Blackboard Ultra recommended a minimum image size of 1200 x 240 pixels should be used. As students will be accessing Blackboard through a variety of devices and platforms, this is a good starting point. If you are planning on using text in your banner image, it is recommended that you place the text in the middle of the banner to ensure maximum visibility.
You can use Adobe Creative Cloud Express to effortlessly create a new module banner image in a very short space of time. A separate blog post has been created to show how this can be done here.
Adding An Image
To add a banner to your module, follow these steps:
-
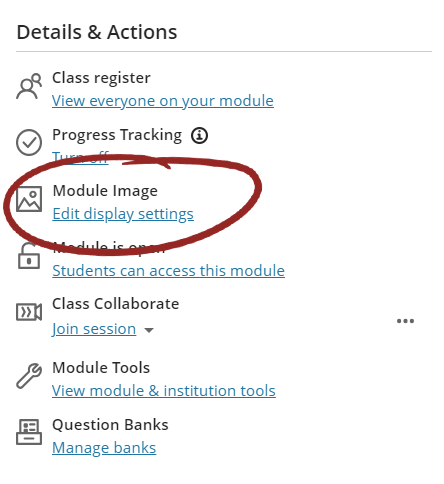
- Open the module where you wish to place your banner
- In the Details & Actions panel, click Edit Display Settings located under Module Image

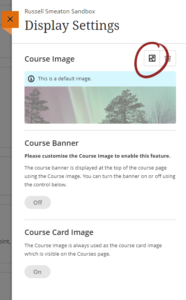
- A side panel labelled Display Settings will appear. All modules have a default image, but by clicking the Insert Image icon, you can upload your own image.
- Once you have uploaded your image, you’ll be presented with a Preview, and assuming everything is okay, click Next
- You can now reposition your image. It is recommended you aim to make any text appear in the middle of the preview.
- When you are happy with the position of your image, click Save
- Whilst the Display Settings side panel is still open, you can explore the options available but it is suggested the default settings are acceptable. You can disable the option to “Mark the image as decorative” and provide some Alt-text which will enable assistive technologies to recognise the image and read out any appropriate descriptions provide. You can also turn off the “Course Banner” option, meaning the image you’ve uploaded won’t appear inside the module, but will appear from the Module Home page.
- When you are ready, click Save to complete the process