
This Learning Support Guide has been created to help academic and support staff at Teesside University understand and begin using Microsoft 365 Copilot Agents to improve productivity, streamline repetitive tasks, and better support students. The guide walks you through what Agentic AI is and how to build your own Copilot Agent, and it provides practical examples of its use in higher education. It also includes clear instructions for editing and maintaining these agents over time.
Contents
- What is Agentic AI?
- Why Use AI Agents at Teesside University?
- Examples of How Agents Can Support You
- How to Get Started: Build an Agent Using Microsoft Copilot
- Updating and amending a previously created M365 Copilot Agent
- Referencing a published Agent
- Tips for Creating Effective Agents
- Example Agent Setup text
- Further Help and Support
1. What is Agentic AI?
Agentic AI refers to a branch of artificial intelligence that can perform multi-step tasks with limited supervision. Unlike traditional AI tools that provide one-off responses, agents can autonomously carry out a series of actions to complete goals based on user-defined instructions, data, and conditions.
In Microsoft Copilot, these agents can be created and used to connect to your data and automate and execute business processes, such as completing tasks and retrieving information on your behalf. There are pre-created free agents, those that are billed based on usage, and Copilot includes the ability to build your Agents.
2. Why Use AI Agents at Teesside University?
At Teesside University, academic and support staff can at times need to manage high workloads and complex administrative systems. AI agents in Microsoft Copilot offer a way to:
- Automate routine or repetitive tasks (e.g. responding to FAQs, drafting emails, organising meeting notes)
- Support student engagement by providing consistent responses to common queries
- Assist with academic tasks such as retrieving documents, summarising feedback trends, or preparing reports
- Free up time for research, curriculum development, and student support by delegating operational work to AI agents
3. Examples of how Agents can support you
- A School Administrator could build an agent that helps onboard new students by answering FAQs and directing them to key services.
- A Course Leader could create an agent to carry out Sentiment Analysis, to summarise module evaluation feedback and identify recurring themes.
- A member of a support team could deploy an agent to retrieve documents or automatically generate responses to service desk queries.
- An Academic could configure an agent to surface past assignment feedback to inform future teaching strategies.
- An Academic could create an AI Agent that has access to the documents relating to a specific module (for example, the module guide, assignment and assessment rubric to provide instant answers and feedback to student questions.
4. How to Get Started: Build an Agent Using Microsoft Copilot
Step 1: Access Microsoft Copilot
Ensure you are signed into your Teesside University Microsoft 365 work account. Then navigate to Microsoft Copilot (available via web or Teams) and open the Copilot interface.
Step 2: Open Copilot Studio
In Microsoft Copilot, open Copilot Studio. This is the environment where you will build, manage, and publish your custom agents.
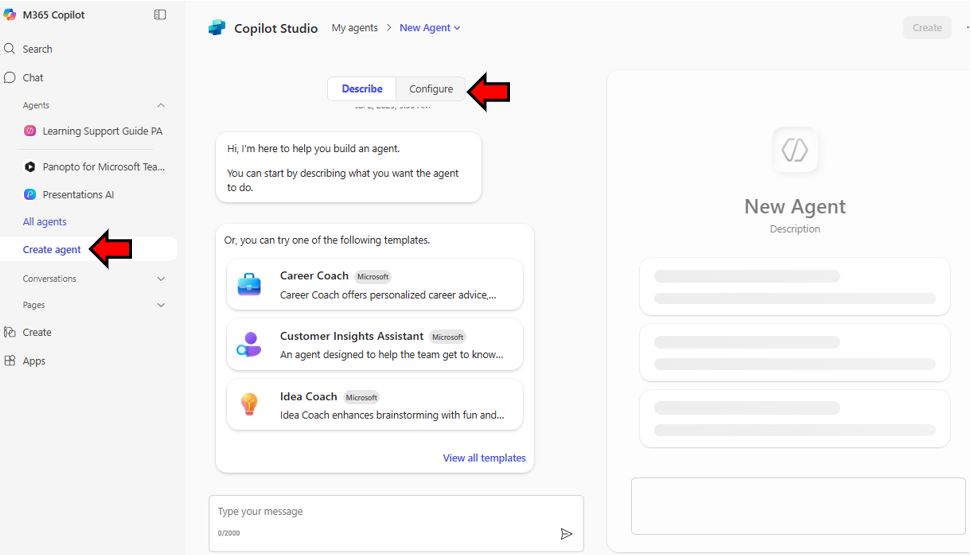
Step 3: Select ‘Build an Agent’
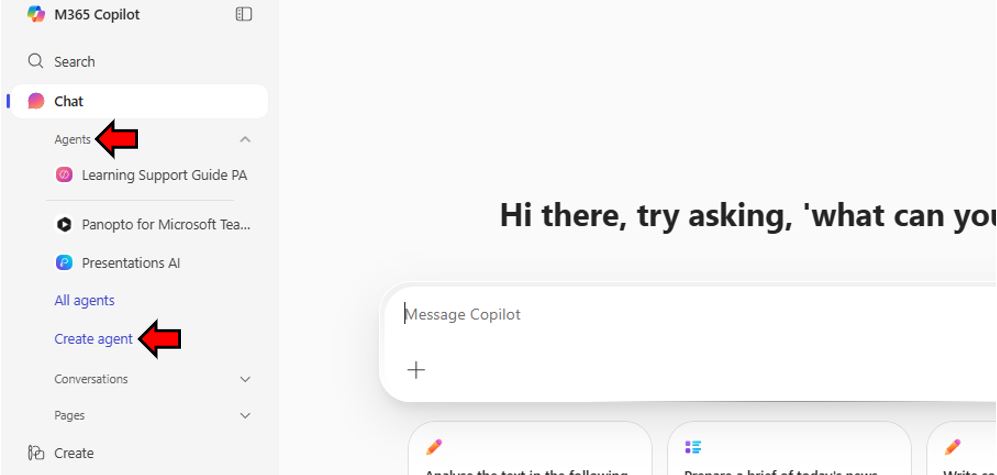
From the Copilot Studio dashboard:
- Click Create Agent (Microsoft Copilot Studio will open)
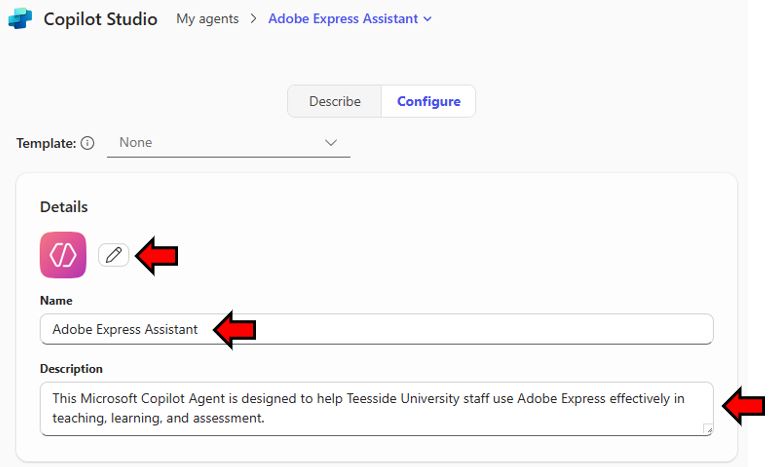
- Choose a name for your agent (e.g., “Adobe Express Assistant”)
- Define the purpose or topic area the agent will support (e.g., Module Support, assignment deadlines, contacts etc.)
Step 4: Define Topics and Capabilities
You will now add the “Instructions” for how the agent should operate. These can include:
- Instructions
- Capabilities
- Tone and Style

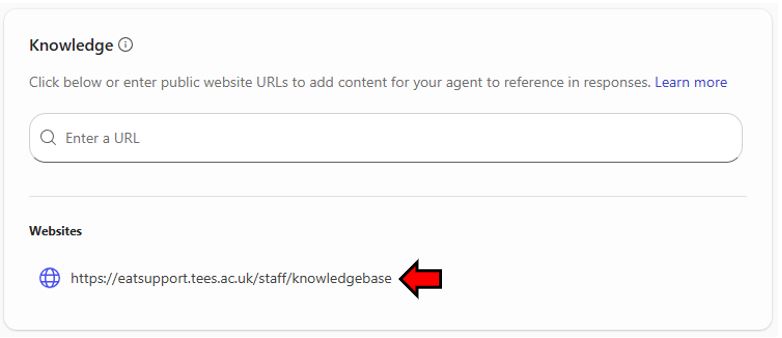
Step 5: Add Knowledge (Optional)
You can share links to public website resources that your agent can be instructed to access and specifically interrogate and reference.
Step 6: Add Suggested Prompts
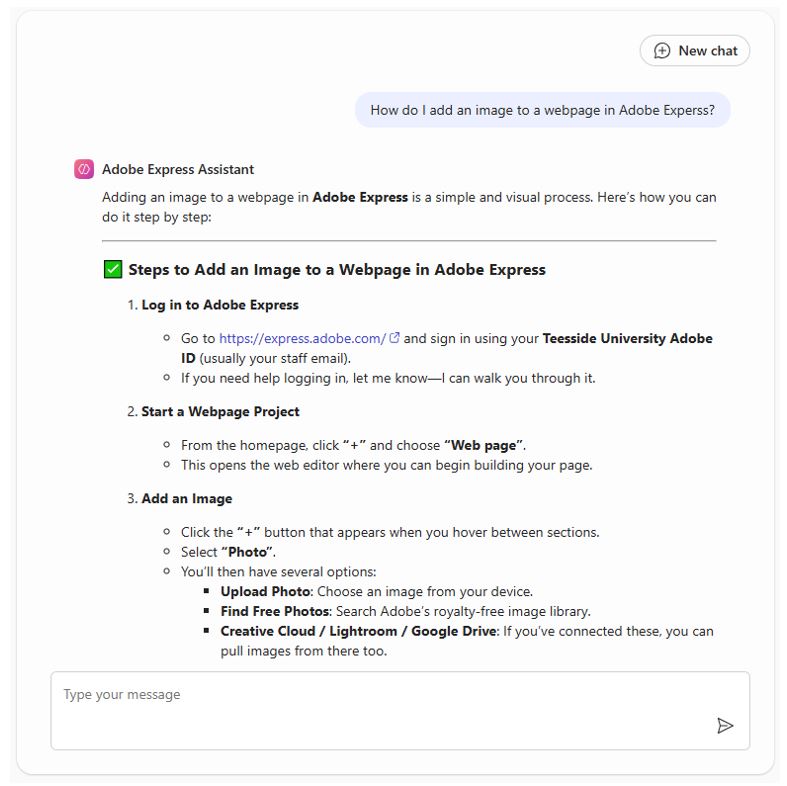
Use this feature to add suggested ways to start conversations with the AI Agent; these suggested prompts will show up when the Agent is first used. For example,
- What is Adobe Express? Adobe Express is a user-friendly design tool that allows you to quickly create and customise graphics, videos, and presentations using templates, images, and text, perfect for education and creative projects.
- Why use Adobe Express? Adobe Express makes it easy to create professional-quality visual content quickly, helping educators and students enhance communication, creativity, and engagement with minimal design experience required.
- Can students use Adobe Express? Students at Teesside University can use Adobe Express for free as part of the university’s Adobe Creative Campus subscription, enabling them to create engaging visuals, presentations, and other digital content.
Once added, the prompts will appear below the Agent title once published, as shown in the right-hand Copilot Studio preview.

Step 7: Test the Agent
Use the built-in test panel on the right-hand side of Copilot Studio to simulate user interaction and test how the agent responds. You can edit conversation logic and responses until you are satisfied.
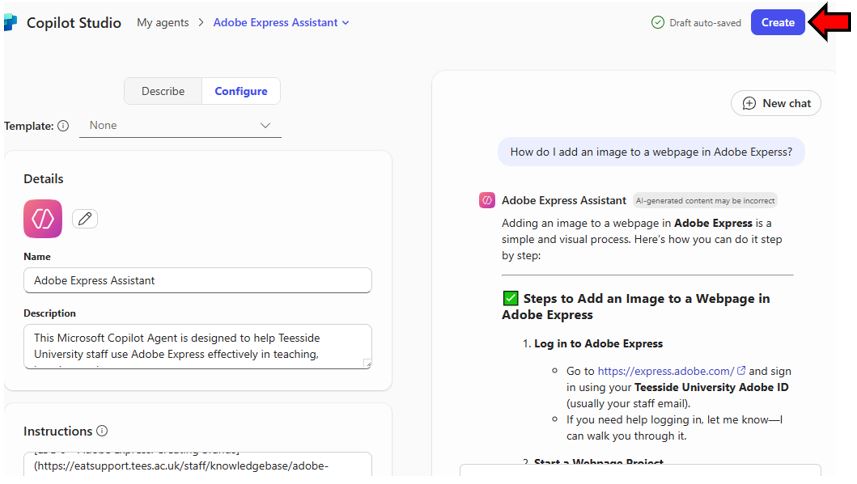
Step 8: Publish the Agent
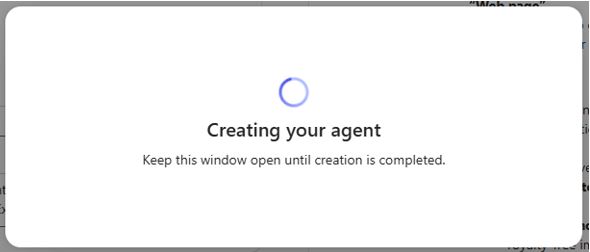
When you’re ready, publish your agent so it can be used. Click Create to publish the agent and make it available for use.
 |
 |
| Creating the Agent | Published Agent link |
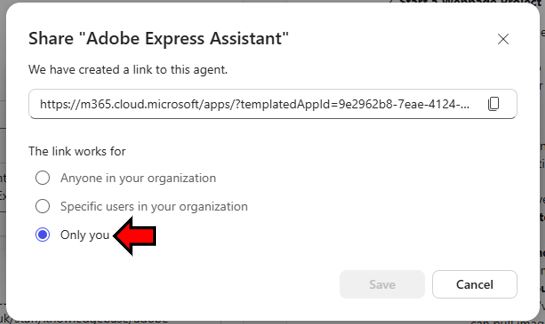
It is possible to change the sharing settings for the newly created AI agent.
 |
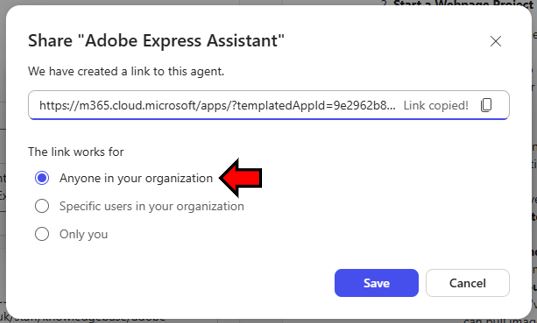 |
| Default share position | Updated share permissions to allow all staff within Teesside University to access the AI agent. |
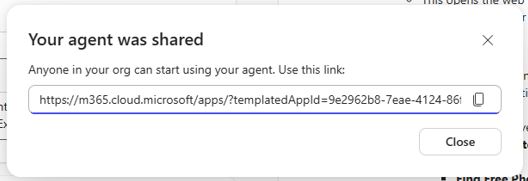
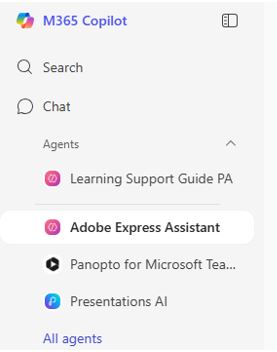
Once the agent has been configured with the correct share permissions, a link to the Agent will be shown, as well as it becoming available below the M365 Copilot Chat Agents.
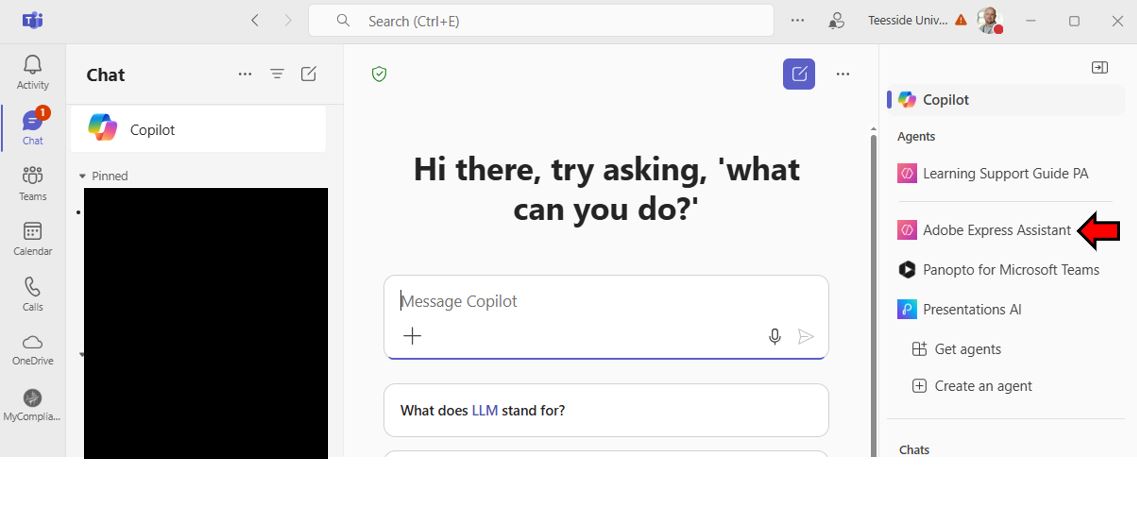
Published agents will also become available from within Microsoft Teams.
5. Updating and amending a previously created M365 Copilot Agent
Once you have created an M365 Copilot Agent, you may wish to update or refine it based on user feedback, workflow changes, or evolving requirements. Microsoft Copilot Studio makes it straightforward to manage and maintain your existing agents.
Steps to Update a Copilot Agent
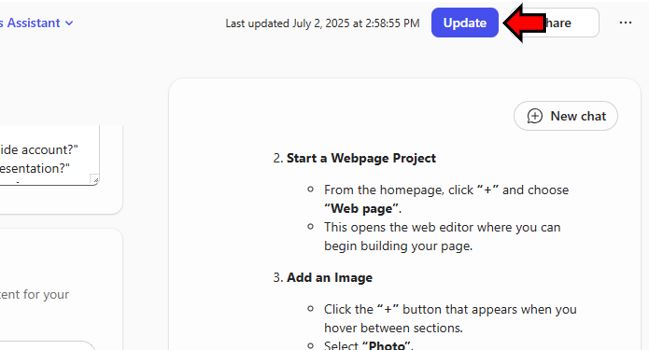
Open the Agent for Editing: Click on the name of the agent you want to update. This opens the Agent Builder interface where you can edit and update any of the settings, such as Name, Description, Instructions, Knowledge, Websites and Suggested Prompts and workflows.
Once complete (remember to test the updates work as expected), simply click the Update button located in the top right-hand corner of the screen.
6. Referencing a published Agent
It is also possible to reference a specific agent within a standard Copilot chat. This allows the staff member to ask specific questions that only the agent would be able to answer based on their specific training and connection to services and resources within Teesside University.
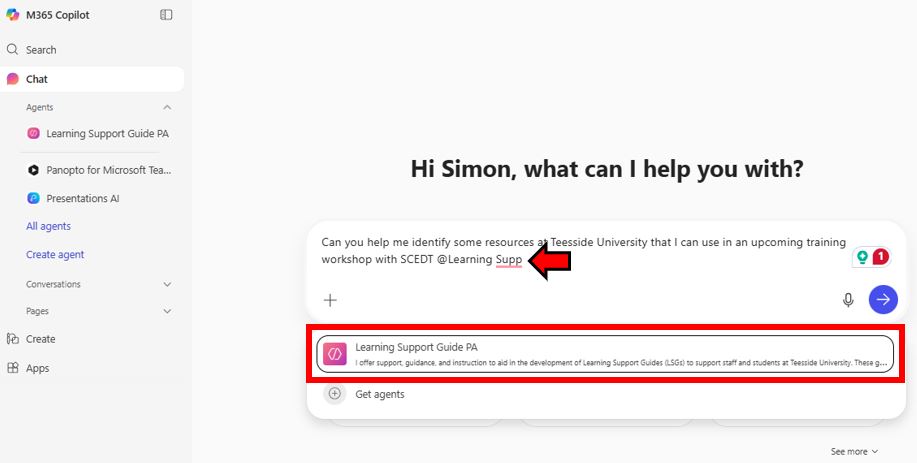
Using this workflow would allow multiple AI Agents to be called upon and used within a single prompt.
7. Tips for Creating Effective Agents
- Be specific in naming and topic design to avoid confusion.
- Use plain language to make your agent accessible to all staff and students.
- Start small – design your agent around one key use case and grow from there.
- Collaborate – agents can be co-designed across academic teams and support departments.
8. Example Agent Setup text
Title: Adobe Express Assistant
Description: This Microsoft Copilot Agent is designed to help Teesside University staff use Adobe Express effectively in teaching, learning, and assessment.
Instructions: The agent provides clear, friendly guidance based on official internal Learning Support Guides (LSGs), enabling staff to get started with Adobe Express, create engaging visual content, and understand key features that support digital pedagogy. It offers tailored responses based on staff needs, whether they’re creating presentations, designing graphics, or supporting students with visual storytelling.
Capabilities:
- Offer step-by-step guidance on setting up and accessing Adobe Express via the University’s Adobe Creative Campus license.
- Explain how to use key tools within Adobe Express (e.g. creating presentations, posters, social media content).
- Provide support based on best practices for using Adobe Express in education.
- Share links to official Teesside University Learning Support Guides and explain their relevance.
Tone and Style: Supportive, clear, and non-technical where possible. Assume the user may be unfamiliar with Adobe Express or digital design tools.
Knowledge Source Materials to reference by the Agent):
- Adobe Express: Creating a Poster Project (https://eatsupport.tees.ac.uk/staff/knowledgebase/adobe-express-creating-a-poster-project/)
- Adobe Express: Creating a Webpage (https://eatsupport.tees.ac.uk/staff/knowledgebase/create-a-web-page-using-creative-cloud-express/)
- Adobe Express: Creating a Presentation (https://eatsupport.tees.ac.uk/staff/knowledgebase/adobe-express-creating-a-presentation/)
- Adobe Express: Creating a Video (https://eatsupport.tees.ac.uk/staff/knowledgebase/adobe-express-creating-a-video-project/)
- Adobe Express: Creating an Animated Character (https://eatsupport.tees.ac.uk/staff/knowledgebase/create-an-animated-character-from-audio-using-adobe-express/)
- Adobe Express: Creating Brands (https://eatsupport.tees.ac.uk/staff/knowledgebase/adobe-express-creating-a-brand/)
Suggested prompts
- “How do I log into Adobe Express with my Teesside account?”
- “Can I use Adobe Express to make a teaching presentation?”
- “Where can I find a guide on using Adobe Express for assessment?”
- “What templates are best for making student posters?”
9. Support and Further Reading
Microsoft Resources:
- Get started with agents in Microsoft Copilot
- Build your own agent with Microsoft Copilot
- Build agents with Copilot Studio
For more information, please contact the Digital Learning Specialist team via email elearning@tees.ac.uk.