This guide introduces the performance monitoring included within Blackboard Ultra. It also includes an explanation as to what this feature is and why you would use it.
Reviewing student performance can give you a better understanding of your student’s engagement with a module. In the “Module Activity” area of your module, you can view how active your students are in relation to how long they spend in the module as well as course clicks inside the module.
With this data, you can identify and assist students who are working hard but still struggling. Additionally, you can congratulate students whose hard work is paying off!
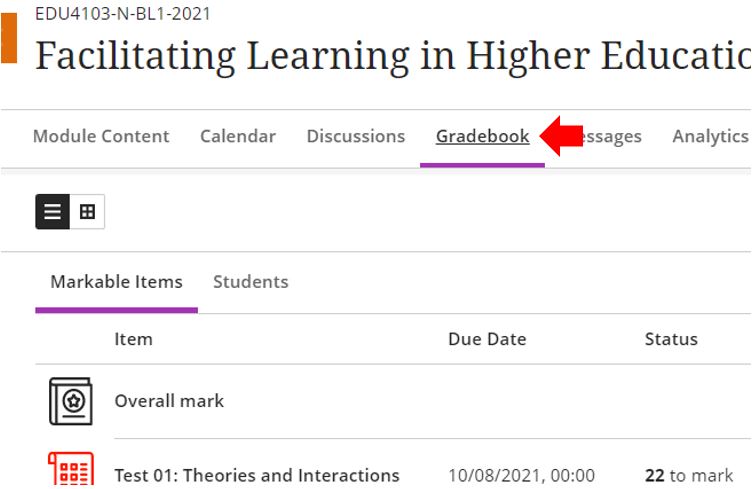
To access and view class and individual student performance data open the module in question and access the “Gradebook”.
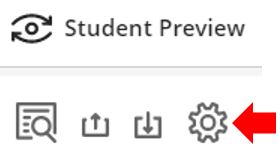
Click on the settings cog.
In the “Student Performance” section, click the “View module activity” link text.
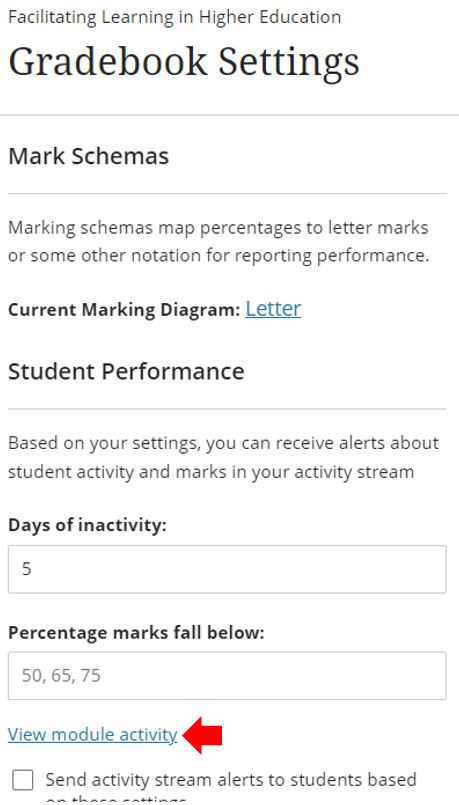
This will load the “Module Activity Related to Marks” page.
There are two views: “Graph View” and “List View”. If an “Overall Mark” has been set up in the “Gradebook”, you will be given an option to view the data presented as either a graph or as a list. You can switch between these views to gain a better understanding of student progress. If no “Overall Mark” has been set up, only the list view will be available.
Graph View
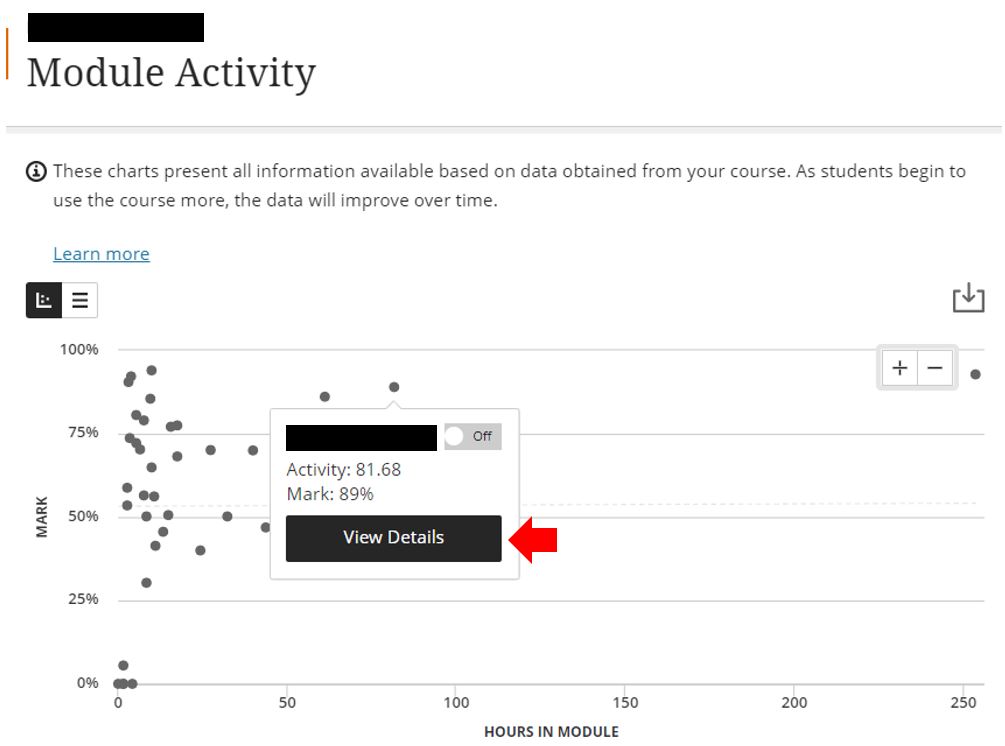
The graph view presents a scatter plot of students based on the number of “Hours” spent logged into the Blackboard Ultra module cross-referenced to their current “Mark”. Each student is represented by a dot (see example below). Clicking on any of the dots will open a basic information dialogue box that displays the student’s “Activity” and “Mark”. Once you have clicked on a specific dot on the chart you can then click “View Details” to load further information that relates to that specific student.
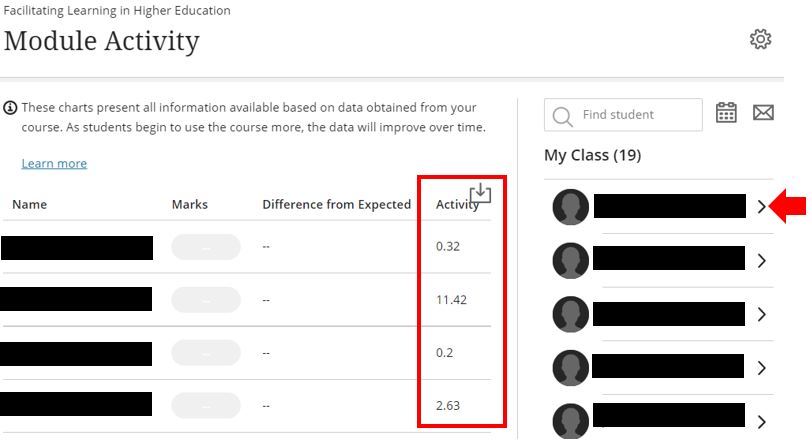
List View
In the list view, the students are presented in alphabetical order on their first name. You can click on any of the column titles to sort by that criteria. This can be a useful technique to provide a simple and clear view of the most or least active students on a module.
From this page, you can select a number of students if you wish to communicate with them via a message. Either click on their name from the main list or click on their name in the “My Class” list and they will move to a new “Selected Students” list. With these students selected, you can now send them a message if appropriate.
To get more details about a specific student, first select them as above. Once selected, click the > icon to the immediate right of their name to take you to a full-page relating to that student. Information can be displayed graphically or numerically.
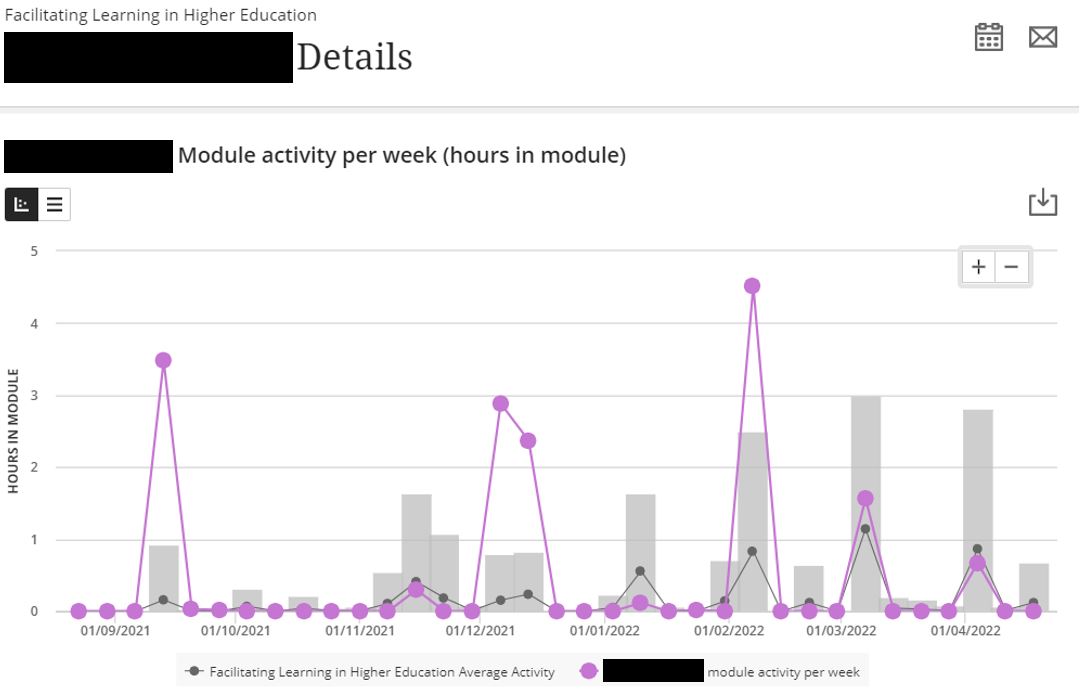
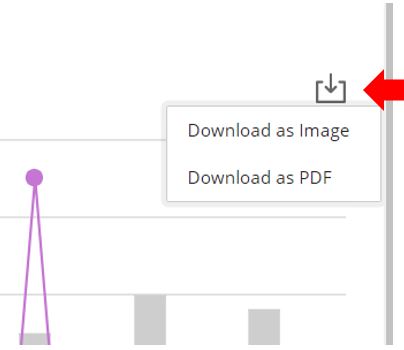
These charts present all information available based on data obtained from your course. As students begin to use the course more, the data will improve over time. The activity report can be downloaded as either an image or a PDF.
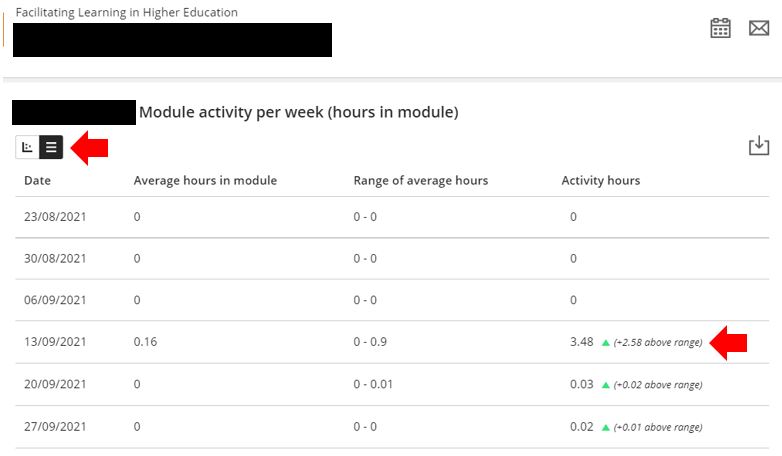
You can also change the view from “Graph” to “List” view for a better breakdown of “Average hours in the module”, “Range of Average hours” and “Activity hours”. This includes an indication of whether the number of hours the student has been active is above or below the average range.
From the individual student page, you have the option to “Schedule an appointment” or “Send a message”. It is currently recommended to use the “Send a message” as this will go directly to the selected student.
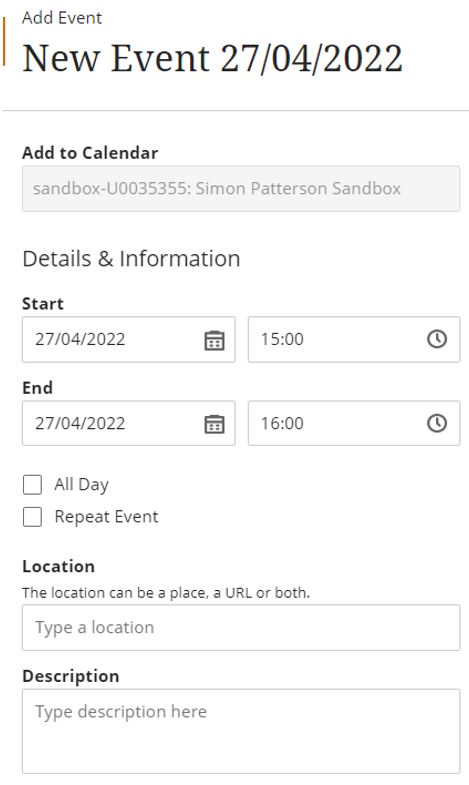
If you choose to arrange an appointment, Blackboard Ultra will open the “Add Event” window. Once you have entered the required event details you can click “Save” (Currently, this event will only be placed in the calendar of the specific Blackboard module (for all learners) and not the specific student in question).
If you want to contact a specific student, it is advised that you use the “New Message” function. From the individual student page, this will automatically send just to that student. Add the message content, decide whether to send an email copy to recipients and if you want to allow replies to the message.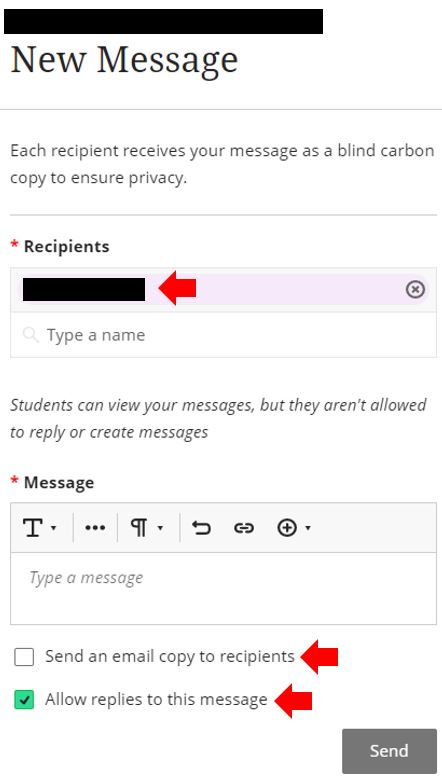
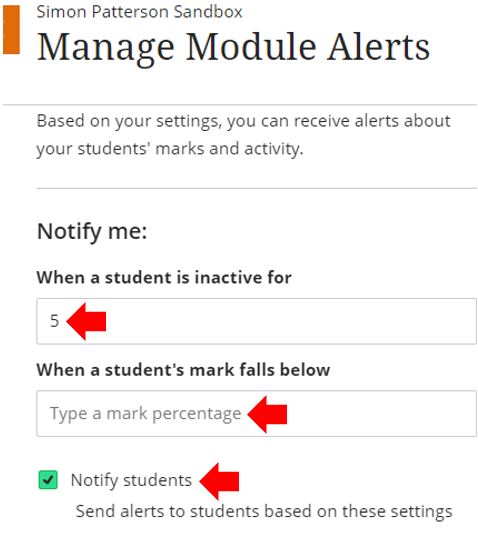
Manage Module Alerts
From within the “Module Activity” screen click on the settings “Cog”, you can apply and manage module alerts including being notified when:
- A student is inactive for a specific number of days
- A student’s mark falls below
There is also an option to notify and send alerts to students based on these settings.