
Understanding Accessibility in Microsoft PowerPoint
This guide has been created to assist lecturers to develop fully accessible Microsoft PowerPoint presentations.
Checking the accessibility options in the application of origin (in this case Microsoft PowerPoint) means that the accessibilities problem won’t be identified by Ally once the presentation is uploaded to Blackboard Ultra. It is also a useful solution if you plan to set up your Blackboard Ultra document to show the PowerPoint inline.

Click here for more information on how to embed a Powerpoint presentation in a Blackboard Ultra.
Introduction to PowerPoint and Accessibility
Accessibility is about making sure people can access the content you create. As a presenter, ensuring your PowerPoint is accessible means that your entire audience is going to be able to fully engage with and learn from the content you are creating.
Any student viewing a presentation should be able to perceive and understand the information within it as your classes may include individuals with visual, auditory, motor, and/or cognitive disabilities.
PowerPoint can help with lots of different accessibility issues. PowerPoint presentations tend to be highly visual, so creating them with accessibility in mind can help people with visibility problems to understand them more easily. This includes people who are blind or have low vision, as well as individuals with processing disorders that make it difficult to understand and integrate visual information. Ensure that meaningful visual content is provided in a way that someone could access without vision, either textually or audibly. Visual information doesn’t just mean images or text; if you are using colours, font size, or animations to convey meaning, that information should also be provided in a non-visual format such as a written description.
Some people may have difficulty accessing the audio component of your slides and presentation. This could be due to deafness, being hard of hearing, having a disability that interferes with auditory information processing, or even being in a noisy environment. In this case, you will need to provide captions and transcripts for videos and audio files respectively.
PowerPoint Accessibility in Context
To make an accessible PowerPoint, you should consider not just the types of information in the file, but also the ways in which students will access and consume the content.
Check accessibility while you work
The Accessibility Checker is a tool that reviews your content and flags accessibility issues it identifies. It explains why each issue might be a potential problem for someone with a disability. The Accessibility Checker also suggests how you can resolve the issues that appear.
In Microsoft PowerPoint, the Accessibility Checker runs automatically in the background when you’re creating a presentation. If the Accessibility Checker detects accessibility issues, you will get a notification in the status bar.
 |
 |
| When a PowerPoint presentation has no accessibility issues a message relating the to current accessibility status of the document will display as “Good to go” | If new content is added to the PowerPoint presentation that is identified as creating possible accessibility-related problems the status of the document will display “Accessibility: Investigate”. Clicking on this alert status will open the Accessibility checker wizard. |
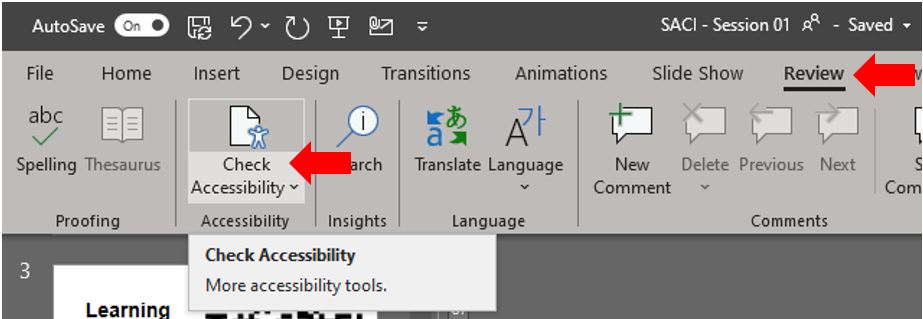
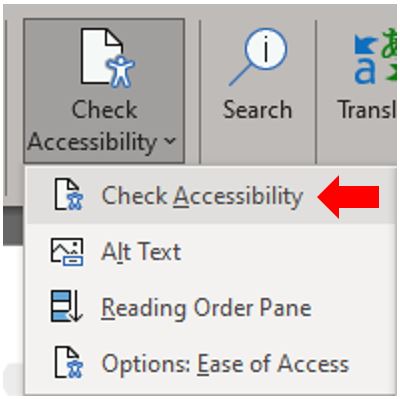
To manually launch the Accessibility Checker, select Review > Check Accessibility. The Accessibility pane opens, and you can now review and fix accessibility issues.
Use the Accessibility Checker
On the ribbon of the Microsoft Office app, select the Review tab and select the Check Accessibility button. The Accessibility pane opens to the right of the screen.
Apply recommended actions
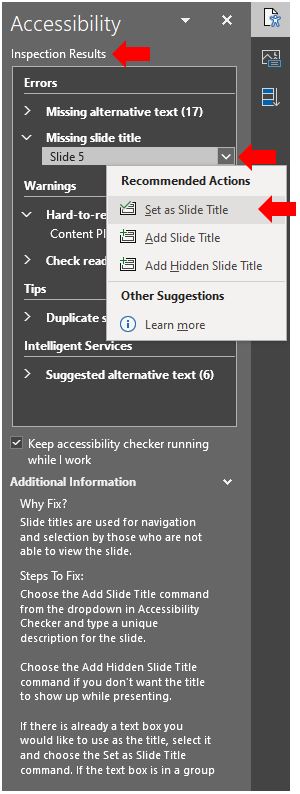
In the Accessibility pane, you’ll see a list of errors, warnings, and tips with “how-to-fix” recommendations for each. To quickly fix the issues, apply one of the recommended actions. For more information on how the findings are categorized, go to Rules for the Accessibility Checker.
In the Accessibility pane, select an issue under Warnings or Errors. The list expands and shows the items and objects affected by the issue.
To address the issue, select the down arrow button next to it. The Recommended Actions list opens.
To apply a one-click fix, select an action from the Recommended Actions list. To view more options, select the right arrow button next to an action (if available).
Once an issue has been resolved it will be removed from the Accessibility inspection results.
Go through and resolve each issue under Warnings and Errors.
Accessibility Checker limitations
There are some accessibility issues the Accessibility Checker can’t detect. Also, some issues listed in the Accessibility Checker findings aren’t necessarily accessibility issues that need to be fixed.
- Colour: Information is conveyed using colour alone.
- Closed captions: The Accessibility Checker reports missing closed captions in a video, but if your video already has in-band closed captions, open captions, or has no dialogue, then there might be no accessibility issue with the video.
Additional Accessibility considerations for PowerPoint
In addition to using the inbuilt accessibility checking features incorporated with Microsoft PowerPoint, there are also several design practices that can be used to reduce the possibility of accessibility issues occurring within your PowerPoint presentation.
The following are strategies that should be considered when creating a new PowerPoint presentation or updating existing documents. Some of these suggestions also include links to Microsoft support articles that offer additional related support and guidance.
Use an accessible presentation template
Use one of the accessible PowerPoint templates to make sure that your slide design, colours, contrast, and fonts are accessible for all audiences. They are also designed so that screen readers can more easily read the slide content.
- To find an accessible template, select File> New.
- In the Search for Online templates and themes text field, type accessible templates and press Enter.
- In the search results, select a suitable template.
- In the template preview, select Create.
Give every slide a title
One simple step towards inclusivity is having a unique, descriptive title on each slide, even if it isn’t visible. A person with a visual disability that uses a screen reader relies on the slide titles to know which slide is which.
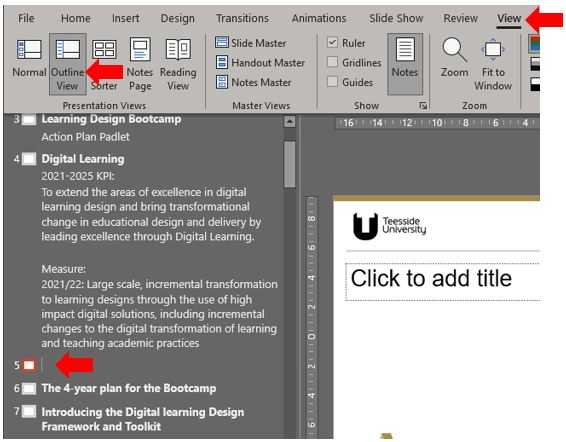
Use the Accessibility ribbon to make sure every slide has a title. The different versions of Microsoft Office have different workflows for adding slide titles. For instructions, go to Title a slide and expand the “Use the Accessibility ribbon to title a slide” section. Using the View ribbon and Outline View option is one of the simplest ways of adding missing slide titles.
Set the reading order of slide contents
When you create slides, putting the objects in logical reading order is crucial for screen reader users to understand the slide.
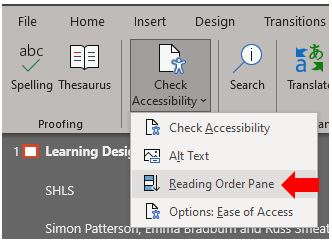
Use the Accessibility Checker and the Reading Order pane to set the order in which the screen readers read the slide contents. When the screen reader reads the slide, it reads the objects in the order they are listed in the Reading Order pane.
For the step-by-step instructions on how to set the reading order, go to Make slides easier to read by using the Reading Order pane.
Using the Review ribbon > Check Accessibility and Reading order Pain option is one of the simplest ways of adding missing slide titles.
Avoid using complex and embedded tables
Avoid using complex tables where possible and consider exploring alternative techniques to present the data in other ways, such as paragraphs with headings. More complete tables with fixed widths might prove difficult to read for people who use Magnifier because this forces the content to a specific size. This makes the font very small, which forces Magnifier users to scroll horizontally, especially on mobile devices.
The inclusion of simple tables can work extremely well in PowerPoint and some guidelines are suggested here to make sure your table is as accessible as possible:
- Avoid fixed-width tables.
- Test to ensure that tables render properly on all devices, including phones and tablets.
- If you have hyperlinks in your table, edit the link texts, so they make sense and don’t break mid-sentence.
- Make sure the slide content is easily read with Magnifier. View it on a mobile device to make sure people won’t need to horizontally scroll the slide on a phone, for example.
- Use table headers.
- Test accessibility with Immersive Reader.
Use table headers
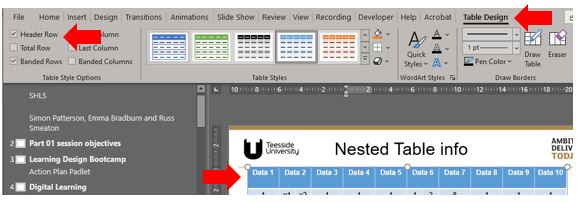
Screen readers keep track of their location in a table by counting table cells. If a table is nested within another table or if a cell is merged or split, the screen reader loses count and can’t provide helpful information about the table after that point. Blank cells in a table could also mislead someone using a screen reader into thinking that there is nothing more in the table. Use a simple table structure for data only and specify column header information. Screen readers also use header information to identify rows and columns.
- Place the cursor anywhere on the table in question.
- On the Table Design tab, in the Table Styles Options group, select the Header Row
- Type your column headings.
Add alt text to visuals
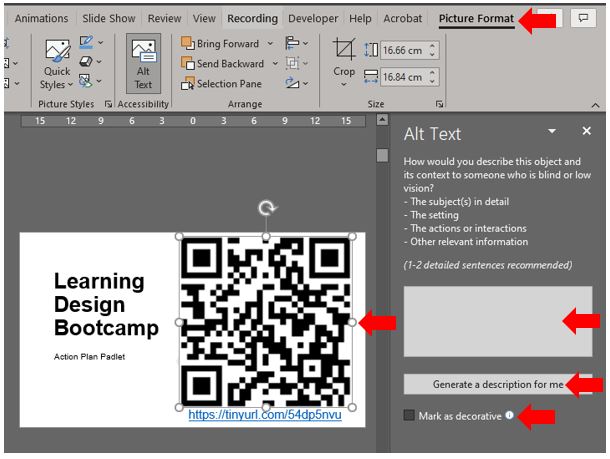
Alt text helps people who use screen readers to understand what’s important in the visuals in your slides. Visual content includes pictures, SmartArt graphics, shapes, groups, charts, embedded objects, ink, and videos.
In alt text, briefly describe the image, its intent, and what is important about the image. Screen readers read the description to users who can’t see the content.
PowerPoint in Microsoft 365 can automatically generate alt texts for photos, stock images, and PowerPoint icons. It is recommended to check any autogenerated alt texts to ensure they convey the right message. For charts, SmartArt, screenshots, or shapes, you will need to manually add the alt text.
Using the Picture Format ribbon and Alt Text option is one of the simplest ways of adding alternative text. Remember that the image will need to be selected for the Picture Format ribbon to appear.
For the step-by-step instructions on how to add or edit alt text, go to Add alternative text to a shape, picture, chart, SmartArt graphic, or other object and Video: Improve image accessibility in PowerPoint.
Create accessible hyperlink text and add ScreenTips
People who use screen readers sometimes scan a list of links. Links should convey clear and accurate information about the destination. For example, avoid using link texts such as “Click here“, “See this page“, “Go here” or “Learn more“. Instead include the full title of the destination page.
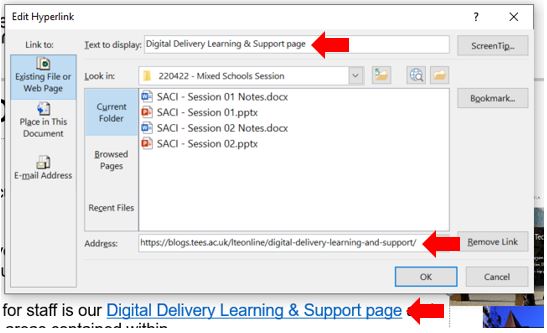
You can also add ScreenTips that appear when your cursor hovers over text or images that include a hyperlink.
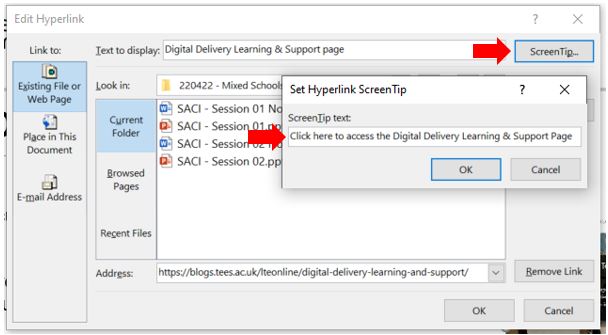
Now when the cursor hovers over the link the ScreenTip will appear.

For the step-by-step instructions on how to create hyperlinks and ScreenTips, go to Add a hyperlink to a slide.
Use accessible font format and colour
An accessible font doesn’t exclude or slow down the reading speed of anyone reading a slide, including people with low vision or reading disability or people who are blind. The right font improves the legibility and readability of the text in the presentation.
Use accessible font format
To reduce the reading load, select familiar sans serif fonts such as Arial or Calibri. Avoid using all capital letters and excessive italics or underlines.
A person with a vision disability might miss out on the meaning conveyed by particular colours. For example, add an underline to colour-coded hyperlink text so that people who are colourblind know that the text is linked even if they can’t see the colour. For headings, consider adding bold or using a larger font.
Use accessible font colour
Here are some ideas to consider:
- The text in your presentation should be readable in a high contrast mode. For example, use bright colours or high-contrast colour schemes on opposite ends of the colour spectrum. White and black schemes make it easier for people who are colourblind to distinguish text and shapes.
- Use the pre-designed Office Themes to make sure that your slide design is accessible. For instructions, go to Use an accessible presentation template or Use built-in slide designs for inclusive reading order, colours, and more.
Test accessibility with a screen reader
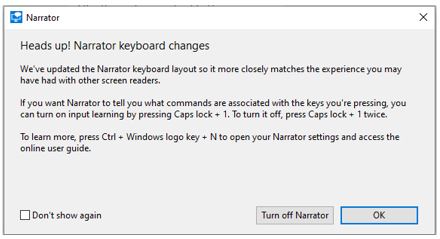
When your presentation is ready and you’ve run the Accessibility Checker to make sure it is inclusive, you can try navigating the slides using a screen reader, for example, Narrator. Narrator comes with Windows, so there’s no need to install anything. This is one additional way to spot issues in the navigation order, for example.
- Start the screen reader. For example, to start Narrator, press Ctrl+Windows logo key+Enter.
- Press F6 until the focus, the blue rectangle, is on the slide content area.
- Press the Tab key to navigate the elements within the slide and fix the navigation order if needed. To move the focus away from the slide content, press Esc or F6.
- Exit the screen reader. For example, to exit Narrator, press Ctrl+Windows logo key+Enter.
Best practices for making PowerPoint presentations accessible
The following table summarises the key best practices for creating PowerPoint presentations that are accessible to people with disabilities.
| What to fix | How to find it | Why fix it | How to fix it |
| Include alternative text with all visuals. | To find missing alternative text, use the Accessibility Checker. | Alternative text helps people who can’t see the screen to understand what’s important in images and other visuals. | Add alt text to visuals |
| Make sure slide contents can be read in the order that you intend. | Use the Accessibility Checker to find slides that have possible problems with reading order.
Try navigating your slides with a screen reader. |
A screen reader reads the elements of a slide in the order they were added to the slide, which might be very different from the order in which things appear. | Set the reading order of slide contents
Use built-in slide designs for inclusive reading order, colours, and more |
| Add meaningful and accurate hyperlink text and ScreenTips. | To determine whether hyperlink text makes sense as standalone information, visually scan the slides in your presentation. | People who use screen readers sometimes scan a list of links.
Tip: You can also add ScreenTips that appear when your cursor hovers over text or images that include a hyperlink. |
Create accessible hyperlink text and add ScreenTips |
| Ensure that colour is not the only means of conveying information. | Select Start > Settings > Ease of Access > Colour filters. Turn on the Colour filter switch, and then select Grayscale. Visually scan each slide in your presentation for instances of color-coding. | People who are visually impaired, or are colourblind might miss out on the meaning conveyed by particular colours. | Use an accessible presentation template
Use built-in slide designs for inclusive reading order, colors, and more |
| Use sufficient contrast for text and background colours. | To find insufficient colour contrast, use the Accessibility Checker.
The PowerPoint presentation can also be checked for text that’s hard to read or to distinguish from the background. |
Strong contrast between text and background makes it easier for people with low vision or colour-blindness to see and use the content. | Use accessible font colour
Use built-in slide designs for inclusive reading order, colours, and more |
| Give every slide a unique title | To find slides that do not have titles, use the Accessibility Checker. | People who are blind, have low vision, or a reading disability rely on slide titles to navigate. For example, by skimming or using a screen reader, they can quickly scan through a list of slide titles and go right to the slide they want. | Give every slide a title |
| If you must use tables, create a simple table structure for data only, and specify column header information. | To ensure that tables don’t contain split cells, merged cells, or nested tables, use the Accessibility Checker. | Screen readers keep track of their location in a table by counting table cells.
Screen readers also use header information to identify rows and columns. |
Avoid using tables |
| Use a larger font size (18pt or larger), sans serif fonts, and sufficient white space. | To find potential issues related to fonts or white space, review your slides for areas that look crowded or illegible. | People who have dyslexia describe seeing text merge or distort. | Use an accessible presentation template |