This guide explains how you can create Turnitin assignment rubrics, attach them to Turnitin assignments within your modules and how to mark using the attached rubric.
You might find it easier to start with this quickstart video:
The guide covers a multitude of options relating to these rubrics:
-
- Basics of rubrics in assignment
- Methods to locate and attach a rubric to a Turnitin assignment
- Types of rubrics available
- How to add content to a rubric
- Rubric scoring methods
- Adding a rubric to a previously created Turnitin assignment
- Additional Turnitin rubric considerations
- Marking with a Turnitin assignment rubric
- Over-riding the calculated rubric grade
- Modifying rubrics
What is a rubric?
A rubric can be used to evaluate students’ work based on defined criteria and scales. Instructors can create and share rubrics, allowing other instructors to upload the rubrics to their modules.
How can students use rubrics?
Students can use a rubric to organise their efforts to meet the requirements of the graded work. When you allow students access to rubrics before they complete their work, you provide transparency into your grading methods.
How do I create or import a Turnitin Rubric?
A Turnitin submission must be created before you can add/edit a rubric. For more information regarding the creation of Turnitin assignments please see the following knowledge base article.
Adding a rubric to a Turnitin assignment.
Using the above knowledge base article or clicking here, complete the steps outlined that are required to set up the standard Turnitin assignment. Once you have added the assignment title, max grade, instructions, start and due date etc. click the Optional Setting button in the bottom left of the screen.

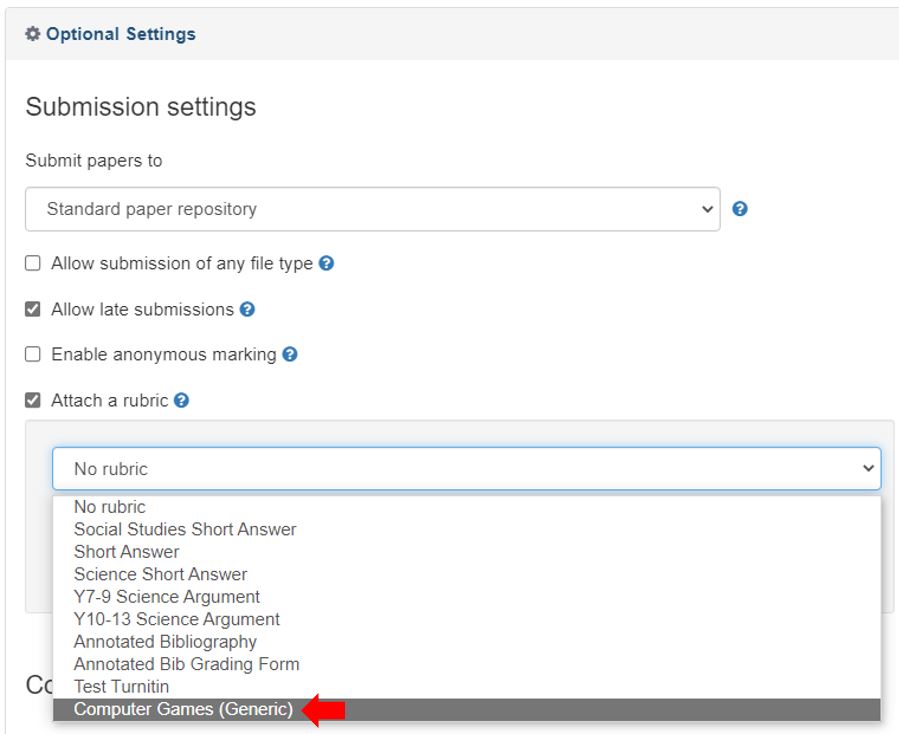
Select the Attach a rubric tick box option listed under the Submission settings. An additional set of options will appear relating to rubrics.
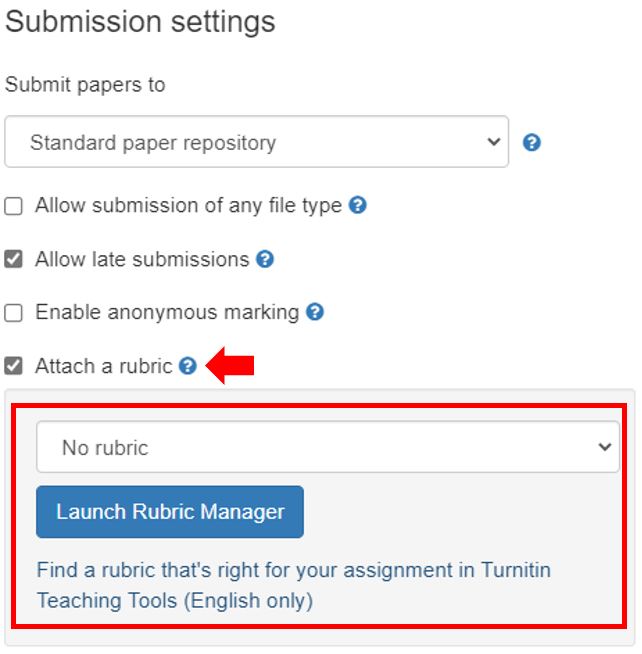
From the new options box, there are several ways to attach a rubric to the Turnitin assignment. These include:
- Selecting a default or previously created rubric from the dropdown list
- Launching the Turnitin Rubric Manager to create a new rubric or edit an existing rubric
- Importing & exporting Turnitin rubrics
- Searching for previously created and shared rubrics from other users
The techniques listed here are covered in detail in the following sections of this knowledge base. Please click on any of the hyperlinks to be taken to the specific technique. Alternatively continue to scroll through the document.
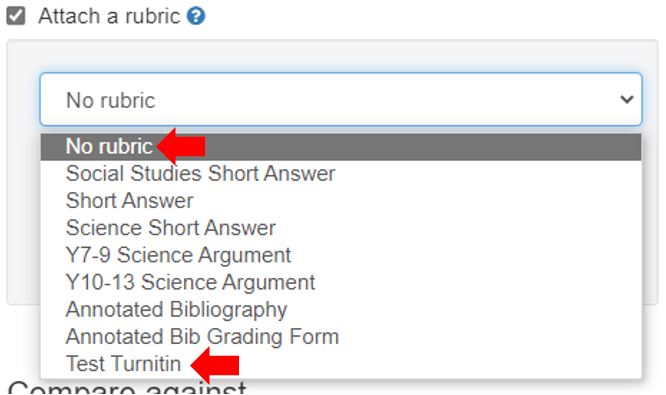
Selecting a default or previously created rubric from the dropdown list (including rubrics you previously created)
Select a pre-created default rubric from the drop-down list, by default the No rubric option is selected. This list will also include any rubrics that you have previously created, in the screenshot below you can see the “Test Turnitin” that was created however, all other rubrics are predefined.
Launching the Turnitin Rubric Manager to create a new rubric or edit an existing rubric
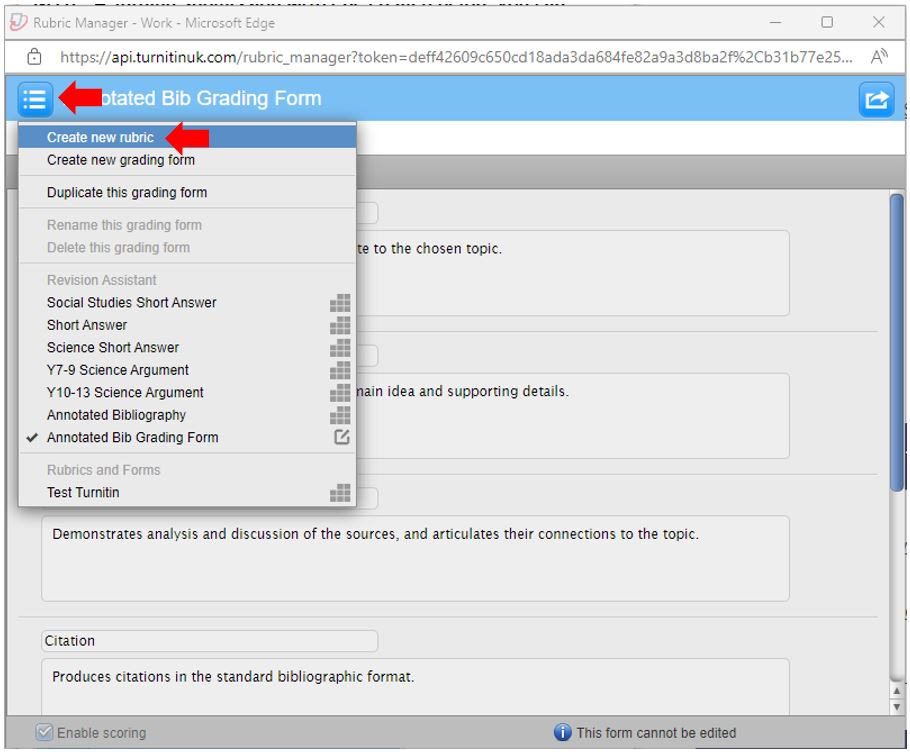
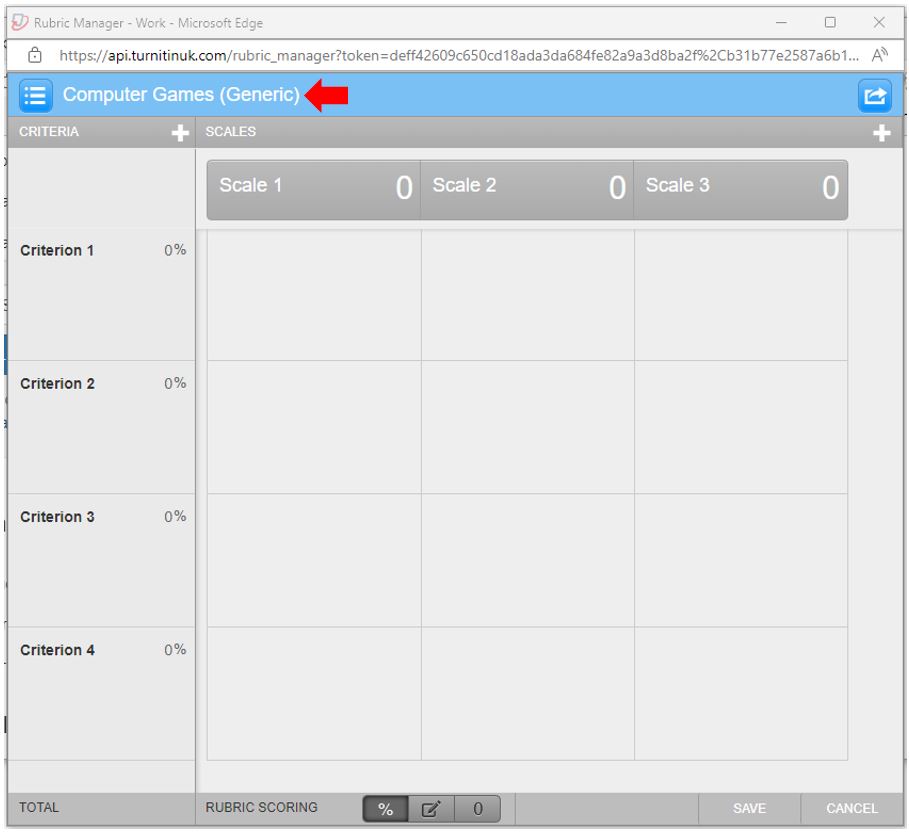
Select the ‘Launch Rubric Manager’ to create/edit a rubric.
![]()
Choosing this option will launch a new window that displays a standard “Annotated Bib Grading Form”. Clicking the button in the top left corner of the window will present several options. From here you can create or edit previously created rubrics. To create a new rubric, click on “Create new rubric”
The new rubric will need to be given a title. This can be a module code, or, if the rubric will be used across different modules, a more generic title should be used (you are limited to a maximum of 30 characters for the rubric title).
You can also choose which type of rubric to use; there are three types to choose from:

Types of rubric
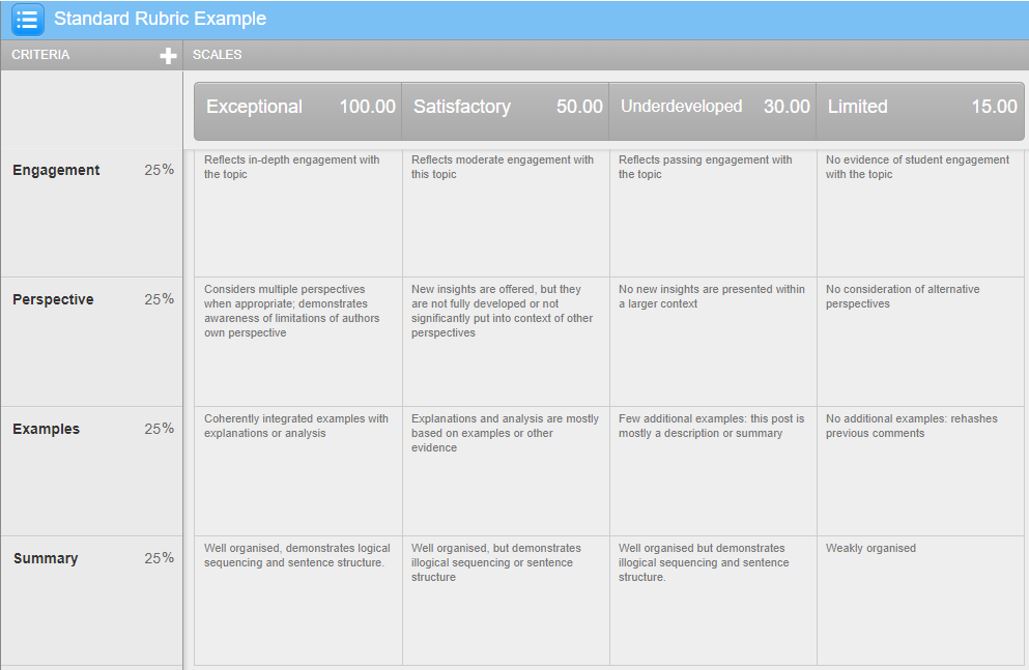
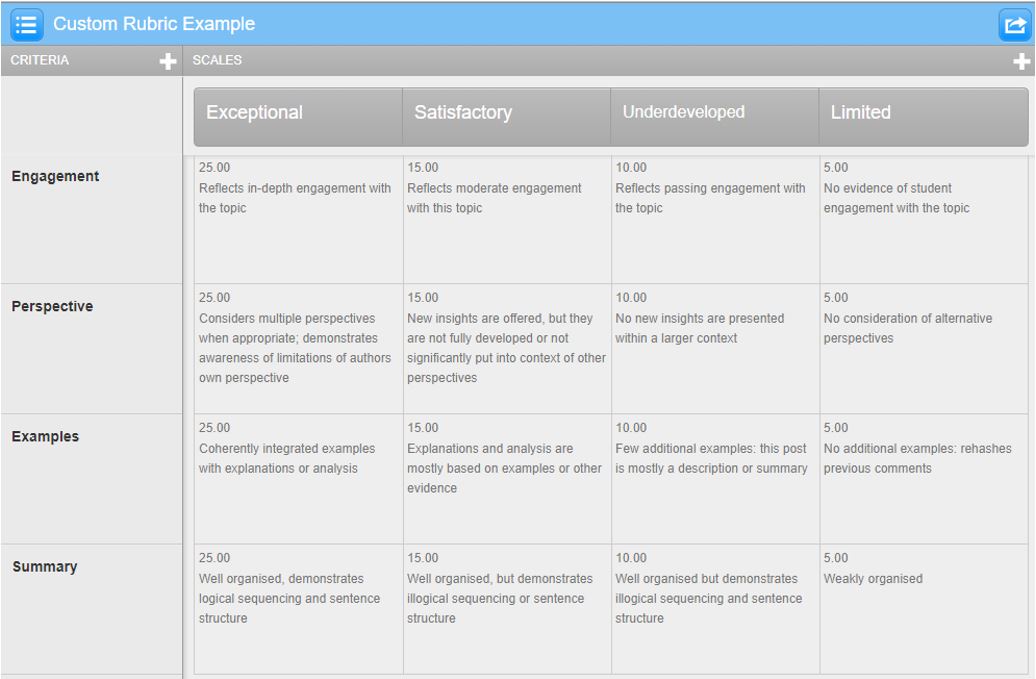
You can then choose the type of rubric; there are three types to choose from:
![]() Each type of rubric is shown below including the corresponding rubric scoring icon, a view of them being initially setup and how as an assessor they will be viewed to assess student work.
Each type of rubric is shown below including the corresponding rubric scoring icon, a view of them being initially setup and how as an assessor they will be viewed to assess student work.
 |
Standard rubric: Enter scale values for each column (usually out of 100) and weight your criteria rows using percentage. | ||
 |
 |
||
 |
Custom rubric: Enter any value directly into each rubric cell. | ||
 |
 |
||
 |
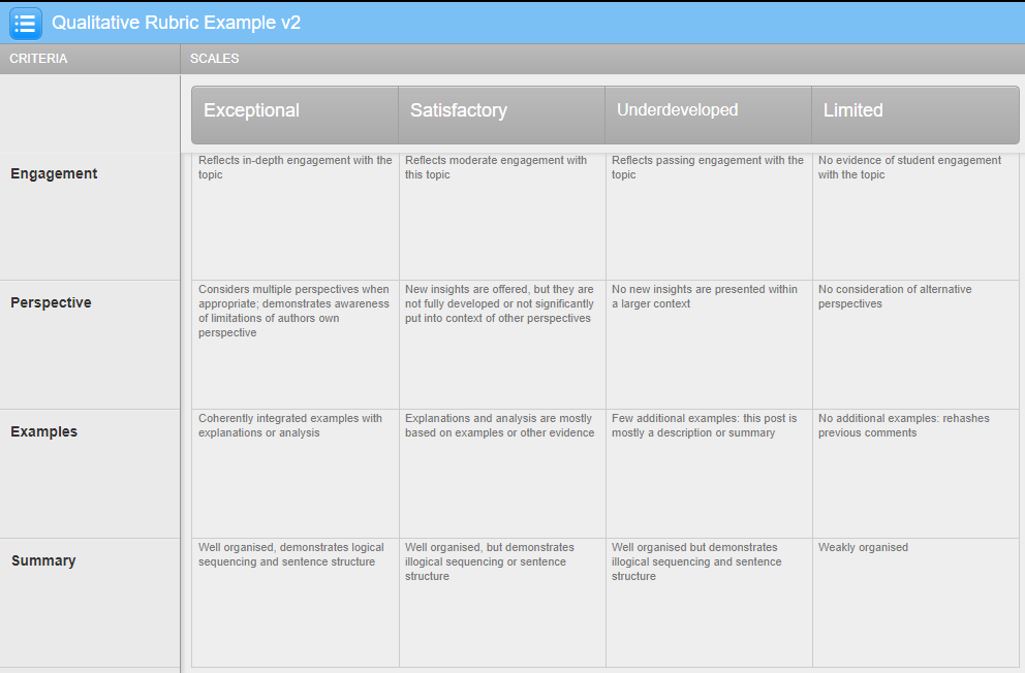
Qualitative rubric: a rubric that provides standard feedback but has no numeric scoring | ||
 |
 |
||
Once you have selected the type of rubric, the table will adjust and edit each scale and criterion to add the headings you wish.
Importing & exporting Turnitin rubrics
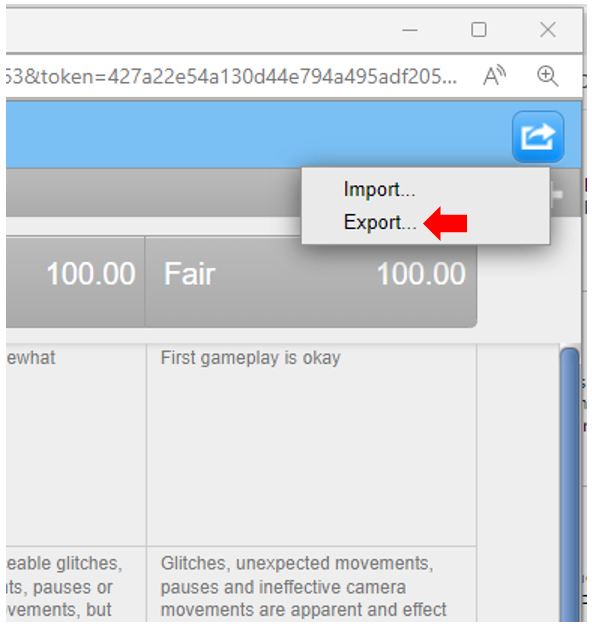
You can also import rubrics via the top-right icon of the Rubric Manager window.
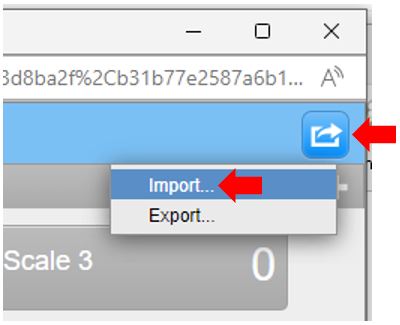
If you are wanting to import a previously created (and previously exported rubric) click Import, browse your computer and upload the .RBC (Turnitin rubric) file. Other accepted file types are .xls and .xlsx.
Please note that, if using Microsoft Excel, the following restrictions will apply:
- Criteria titles must be 13 characters or less
- There is a limit of 20 scale columns and 50 criteria rows
- Scoring can be included once the rubric is imported
You can also download a sample rubric template for Turnitin here.
Searching for previously created and shared rubrics from other users
Turninit also includes an option to access Turnitin Teaching Tools, this is an online repository of shared rubrics. Using this resource you can search and located rubrics that can then be downloaded, imported and attached to your Turnitin assignment. Clicking the link text “Find a rubric that’s right for your assignment in Turnitin Teaching tools (English only) in the optional settings of the Turnitin assignment will open this website using your default browser. The website can also be accessed at any other time by simply visiting https://www.turitin.com/resources/rubrics.
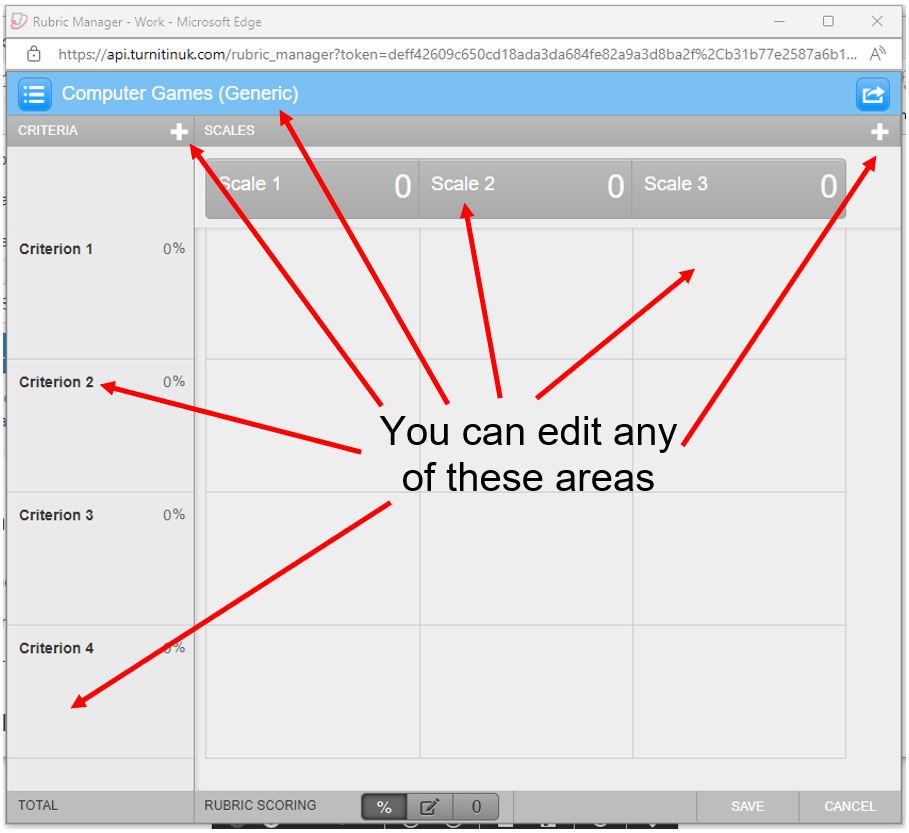
Adding/Editing content in a rubric
You can edit any text field areas including name/criteria/scale. You can also add additional criteria and scales by clicking on either of the plus buttons.
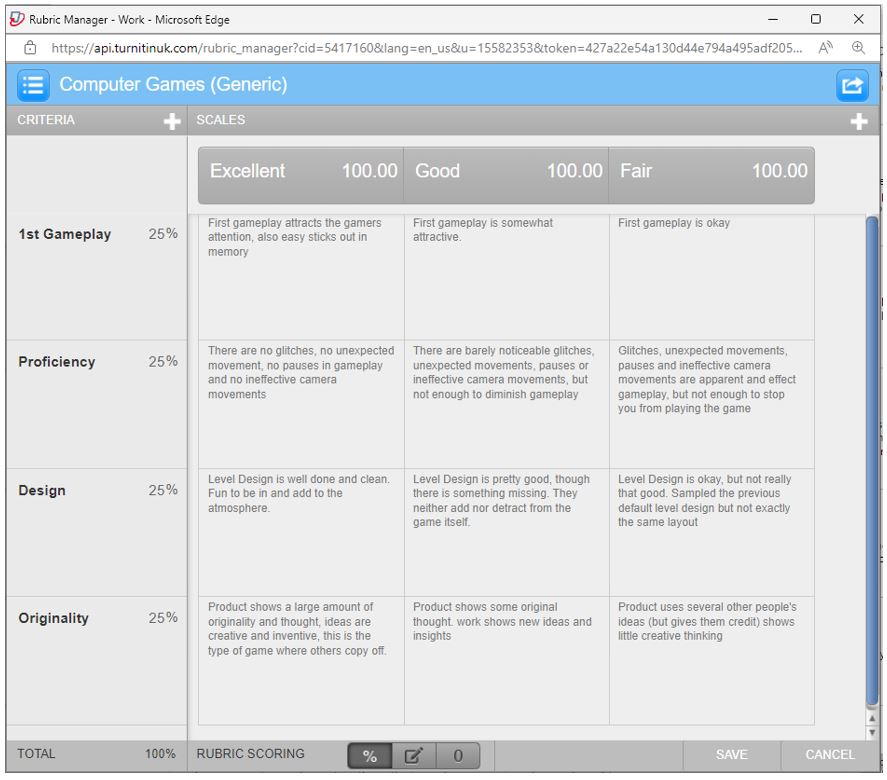
An example of a completed rubric could look like the following:
Rubric scoring methods
Choose the scoring technique for the rubric including:
- Awarding a percentage for each criterion
- Scoring using individual scales
- Use the rubric as a guide.

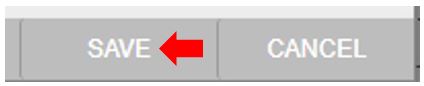
Remember to save your amendments regularly by clicking on the SAVE button in the bottom left-hand corner of the Rubric Manager window (HINT: This button can be difficult to spot due to a similar colour being used for the menu bar it is located on).
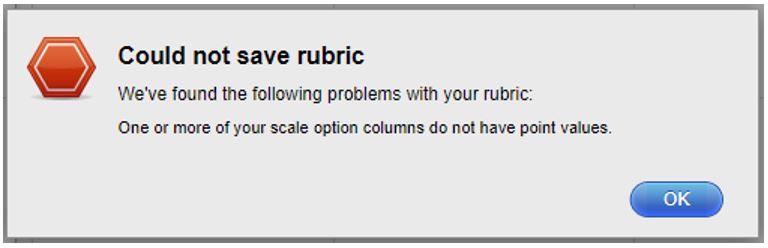
There are also several built-in integrity checks that will stop you from saving the rubric until certain conditions have been met, for example not adding point values to the scale option columns. Only when the rubric is correctly set up and meets all of the rubric manager integrity checks will you be able to save the new/updated rubric.
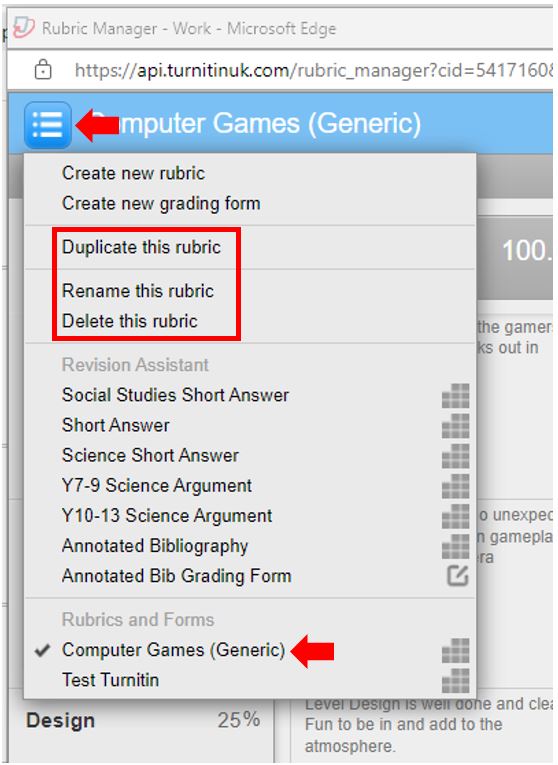
Once saved, the newly created rubric will become available from the Rubric Manager menu and appear in the drop-down list. You can now duplicate, rename and delete this rubric.
There is also the option to export the rubric so that you could share it with other users (remembering that rubrics are attached to the creator rather than the assignment) and also as a method of backing up the rubric.
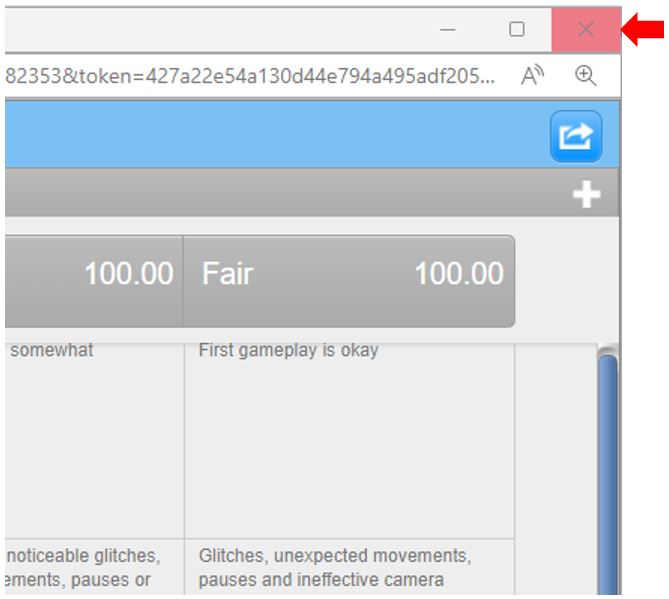
Close the rubric manager window, this will bring you back to the submission paper area.
Next, back in the submission settings of the Turnitin assignment, select the newly created rubric from the dropdown list.

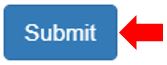
Now click the Submit button to save the new Turnitin assignment with the newly created attached rubric.
Adding a rubric to a previously created Turnitin assignment
If you have previously created a Turnitin assignment but did not attach a rubric this can be easily remedied.
To attach an existing marking rubric to the assignment, open the Turnitin assignment in question via Blackboard Ultra and click on the setting cog in the upper right-hand corner of the screen.

Once on the Turnitin assignment settings page, click on the Optional Settings link.

Click the tick box labelled “Attach a Rubric” listed in the Submission settings section of the Settings page. An additional set of options will appear relating to rubrics.

From the dropdown menu select the existing marking rubric to attach it to the assignment.
Now click the Submit button to save the new Turnitin assignment with the newly created attached rubric.
Additional Considerations
- Rubrics created in Turnitin are only available to Turnitin assignments. Similarly, rubrics created in Blackboard are only available to Blackboard assignments.
- Unlike rubrics created for Blackboard assignments that are associated with the assignment rather than the user that created them. Rubrics created for Turnitin assignments are associated with the user who created them and not the assignment itself. This means that only the user who creates the Turnitin rubric will see the rubric, this can be especially confusing if two or more staff are delivering and sharing a module. It should be noted that although the above it true, once a rubric is applied to a Turnitin assignment, all staff will be able to see it however, only the original creator will have access to re-apply it if it is removed.
- During the creation of a Turnitin rubric, the software can timeout after a prolonged period, if you have not saved your rubrics progress, it will be lost. It is therefore recommended to regularly save changes you are making to prevent loss of work.
- Turnitin rubrics can be added to an assignment during its creation or added to an assignment following its creation. The processes to achieve both methods are covered in this guide.
Marking with a Turnitin assignment rubric
Marking papers with a Turnitin rubric is a quick way to provide feedback. The below guidance shows how to give feedback using a Turnitin rubric:
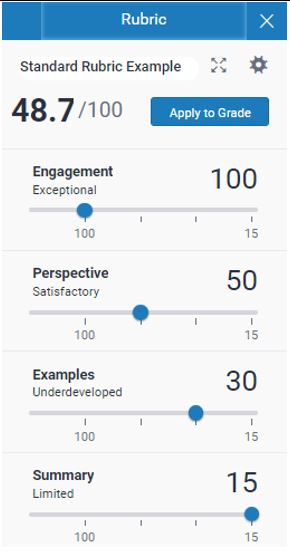
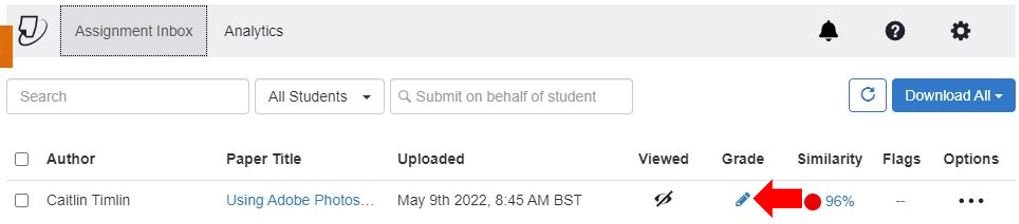
To grade an assignment using the Feedback Studio view, access the Turnitin assignment via the Gradebook and click the Grade icon (pencil).
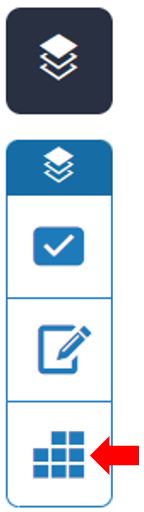
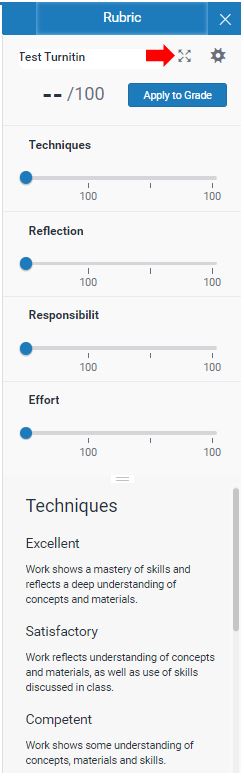
In the Feedback Studio view, click on the rubric symbol from the menu on the right.
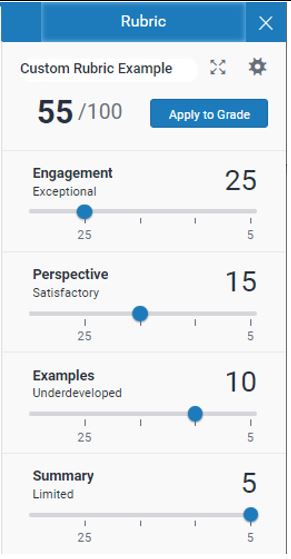
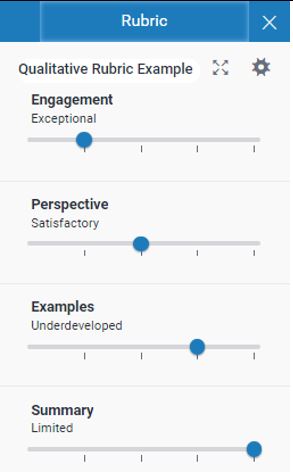
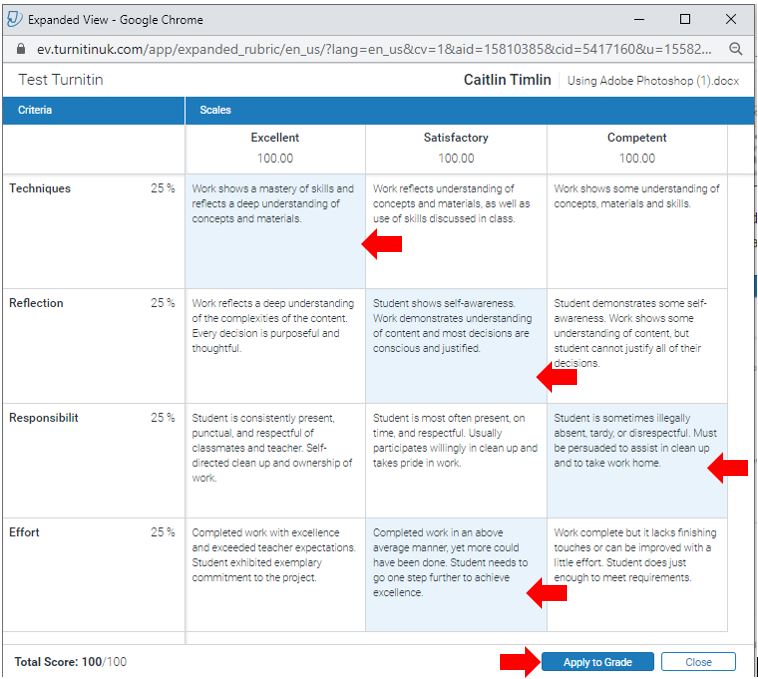
You can either use the sliders to assign the correct levels of achievement for each criterion or click into the expanded view.
In the expanded view, select the relevant cells of achievement for each criterion and use the Close button when finished.
There is no save button, as changes are saved automatically.
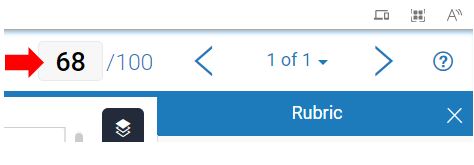
The chosen feedback will now be allocated to that submission.
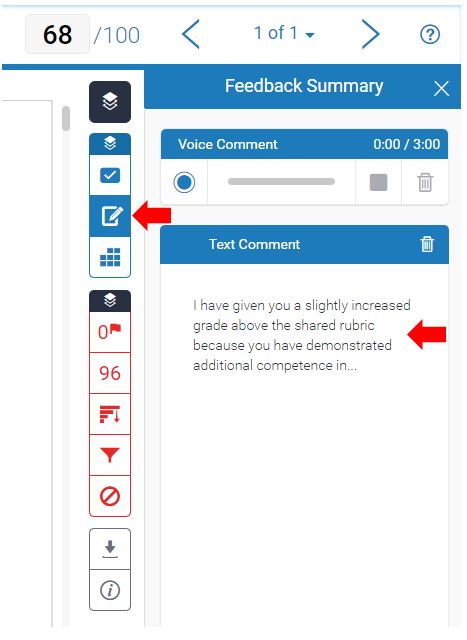
Over-riding the calculated rubric grade
There may be situations where an assessor wants to deviate from the automatically calculated rubric grade, this is possible, see below for instructions on how to accomplish this.
The maximum grade value can also be manually overwritten with a new overall grade based on a tutor’s discretion.
Feedback can then be given via the Turnitin feedback settings option that relates to the general feedback, explanation of the why you have awarded a more bespoke percentage and grade based on the overriding of the maximum grade value.
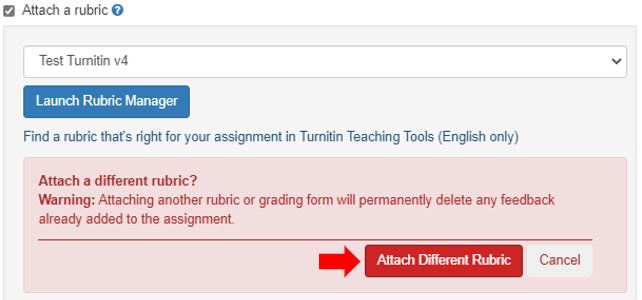
Modifying rubrics
A rubric can be modified after creation. However, if the rubric has been used to score student papers, modification of the rubric is not permitted. There is however a partial solution to this.
If there is a situation where a mistake/s with a rubric has been identified after it has been used to mark submitted work, a workaround is to duplicate the current rubric using the Turnitin Rubric Manager, update and rectify the identified mistake/s and then replace the current rubric with the updated rubric.
To do this, access the Turnitin assessment in question and open the Rubric Manager. With this rubric open, select the Duplicate this rubric option.
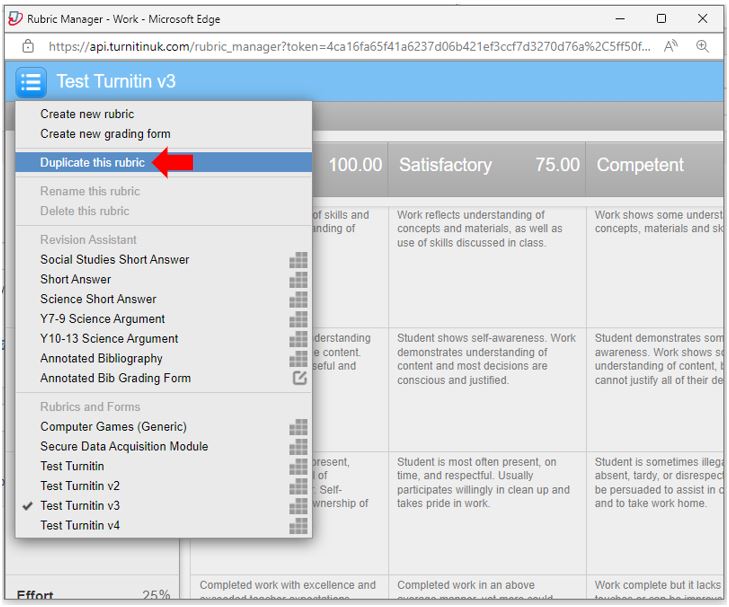
Once the rubric is duplicated, give it an updated name (such as v2 etc.), make the necessary changes to the rubric content and click the save button located in the bottom right corner of the screen.
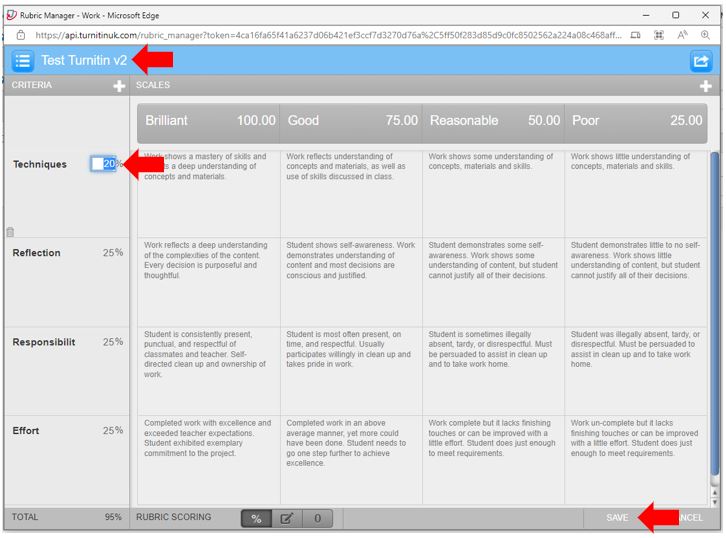
Use the Turnitin Rubric Manager menu to attach this ‘corrected’ rubric to the assessment.

Replacing the previously attached (and used) rubric will permanently delete all grades and feedback already added to the assignment.