
Introduction
It’s quite common to want to create a sign-up list for tutorial slots. For example, you have 20 students that need to book a 30-minute tutorial with you on a particular day. There are several approaches to make this happen in a digital space, but this guide will focus on creating a document that can be shared and edited collaboratively. The same approach could be used via an Excel Spreadsheet, depending on your own preference.
This article includes both a tutorial video and a step-by-step guide, each following the same approach.
Tutorial video
Step-by-step Guide
Step One: Create the document
1. Go to https://portal.office.com and click on the Word icon located on the left-hand side of the screen.
2. Click the New Blank Document button to start a new document.
3. Create your document as appropriate. For example, you might want to create a table where students can put their names next to a designated time slot.
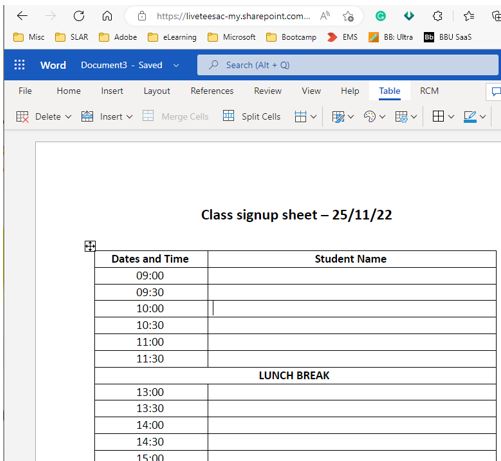
The above is an example of a Microsoft Word document setup as a signup sheet.
4. In the top left of the page, you can see the document’s name. It’ll most likely say something like Document1 – click that to rename it to something more meaningful (such as Sign Up List) and press Enter.
Step Two: Get the link to share
1. Still in Word, click the option to Share, located in the top right of the screen.
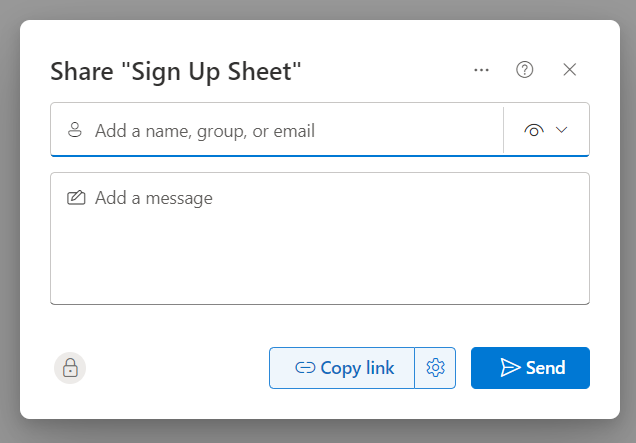
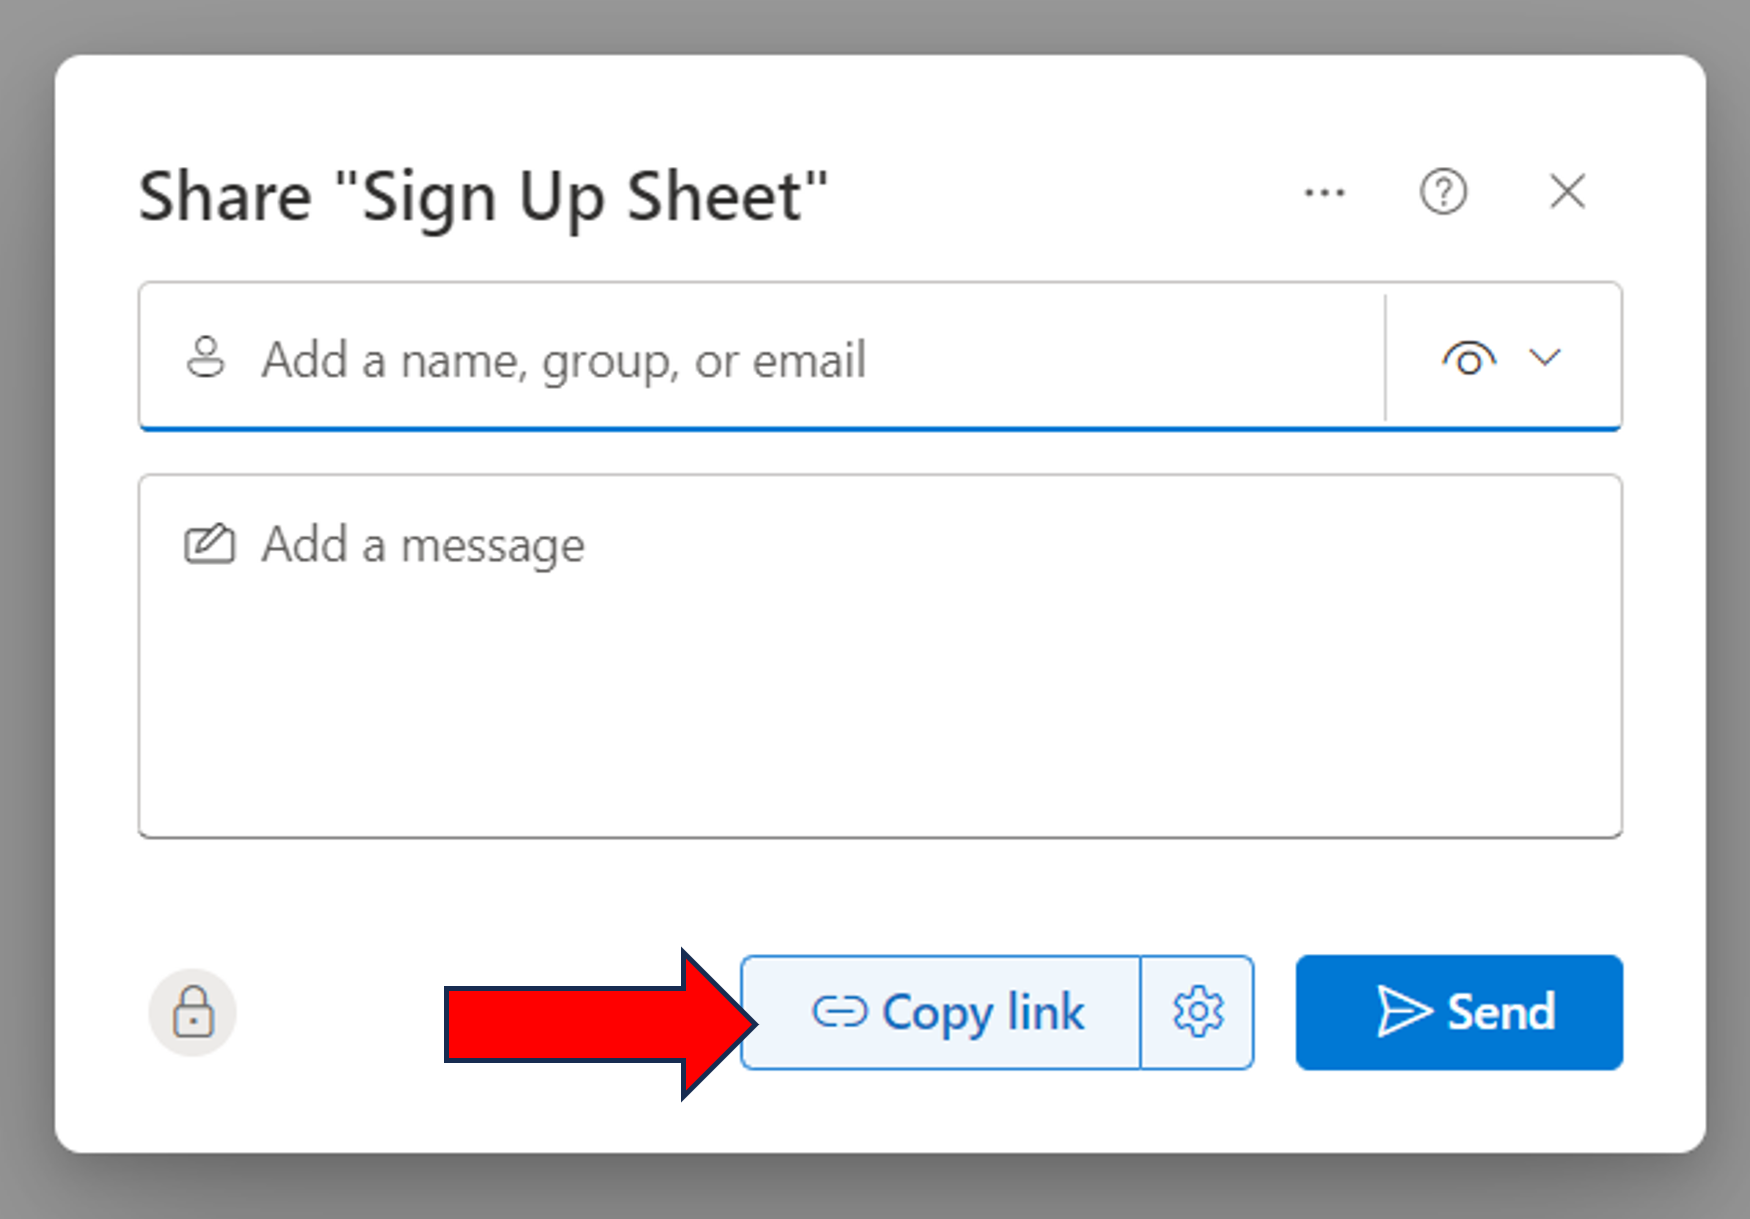
2. Click on the icon to Share. This will open up a small dialogue box labelled Share “filename”, as seen below.
3. First, change the permissions of the file by clicking on the icon as shown below.
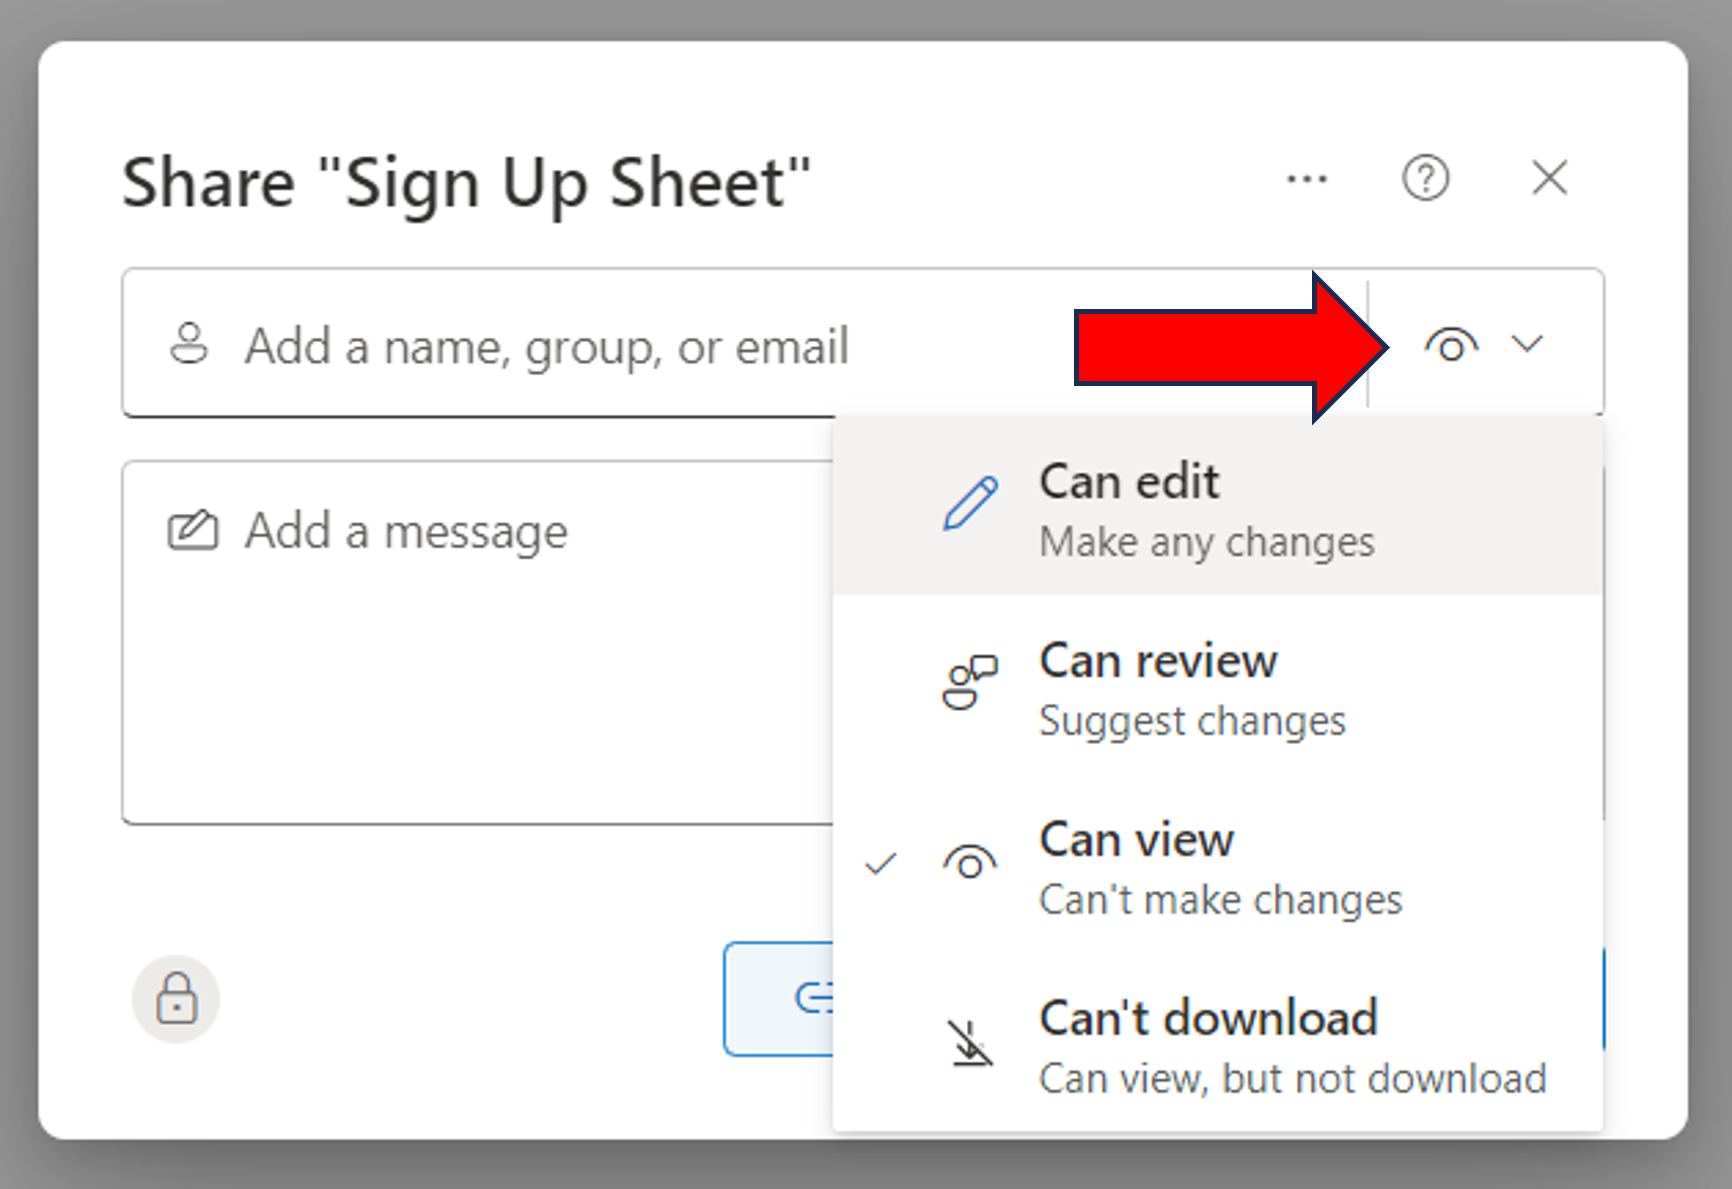
4. Change the permissions from “Can View” to “Can Edit”
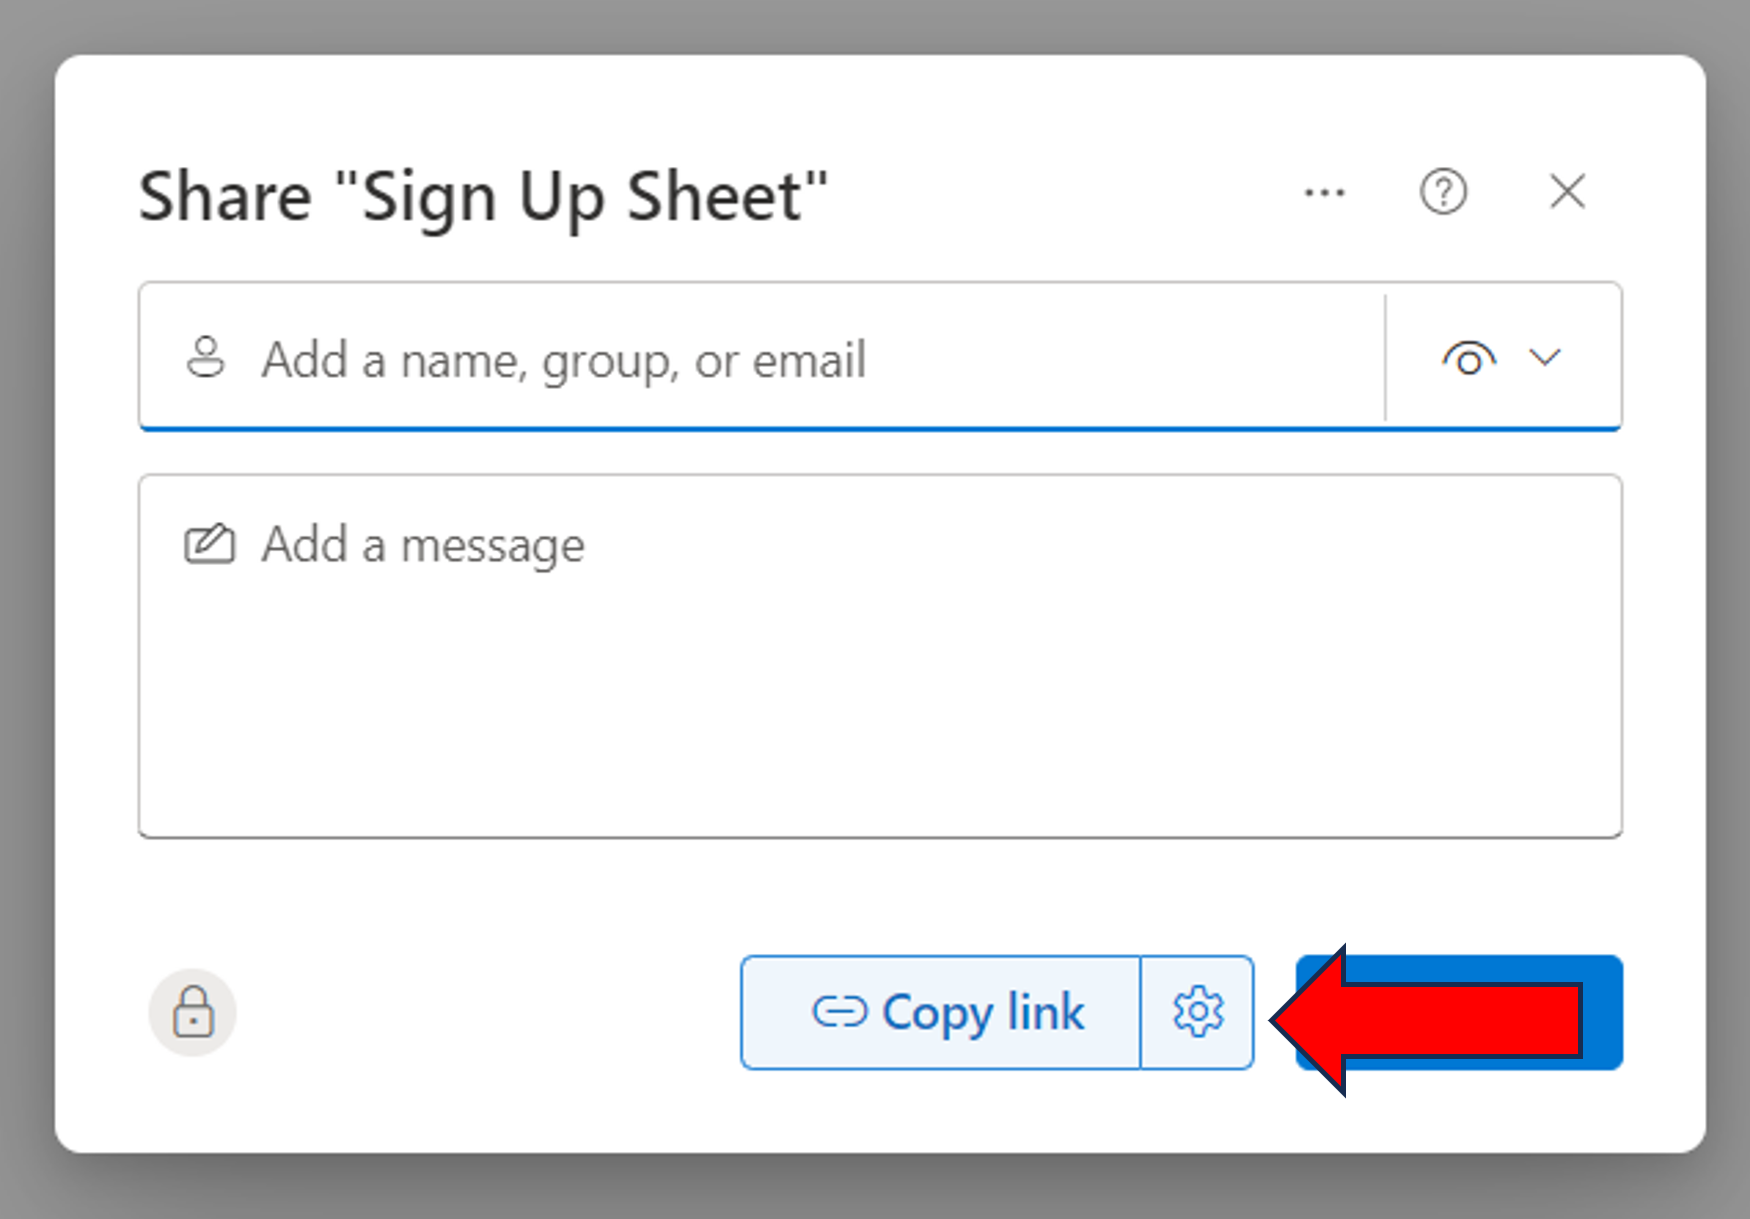
5. Now, click the Link Settings, as indicated below:
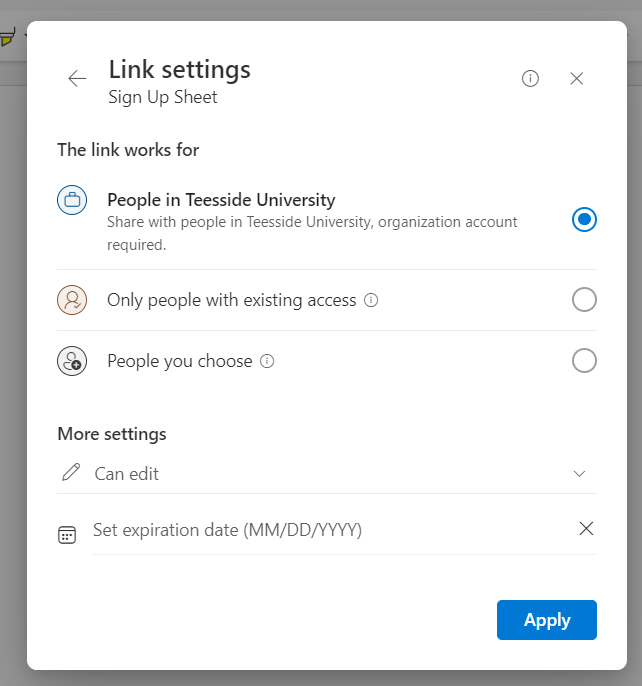
6. You will now be presented with a small dialogue box labelled Link Settings. Click once on “People in Teesside University with link” to select this option, as shown below. Click Apply to keep these settings.
7. Now click the Copy Link button highlighted below. You will get a message to say “Link Copied. People in your organization with the link can edit”.
Step Three: Share the link with your students
1. Open Blackboard at https://bb.tees.ac.uk
2. Go into your module and decide where to put the link. Hover your mouse over that space, click the small circle with the + icon and select Create.
3. From the side pane that appears on the right, select Link.
4. Give the link a Display Name for the students to see.
5. In the Link URL box, paste the web link to the document that you created earlier (either right-click the mouse and paste or press Ctrl and V).
6. It is recommended to leave the Open in a new window option ticked, so the sign up document will open up in a new tab for the students.
6. In the Description box, you can provide some supplementary information for the students if you so wish.
7. Click on Save.
8. When you are satisfied everything is working, make the link visible to students.