
Techniques to create wikis and link to Blackboard Ultra
This article introduces three different methods to create Wikis that can be linked to Blackboard Ultra and accessed by learners. This article sets out the benefits and drawbacks of each and guides you through how to setup and allow students to work collaboratively on shared artefacts. This guide demonstrates how to setup a basic the wiki to act as a sign-up sheet.
- Technique One: Setup and configure a wiki within Microsoft Teams
- Technique Two: Setup and configure a wiki within Microsoft OneDrive
- Creating a link to a wiki in BBU
- Technique Three: Setup and configure a wiki within Microsoft OneNote
How to setup Wiki’s within Microsoft Teams
Microsoft Teams includes a wiki built into every channel that’s added to a team. Wikis allow students to work collaboratively on shared artefacts.
An example could be students developing a code of conduct. This guide demonstrates how to setup the wiki to act as a sign-up sheet.
Microsoft Teams includes a wiki as one of the default tabs in every channel that’s created.

Too add a wiki, click on the plus sign to open the Add a tab dialogue menu.
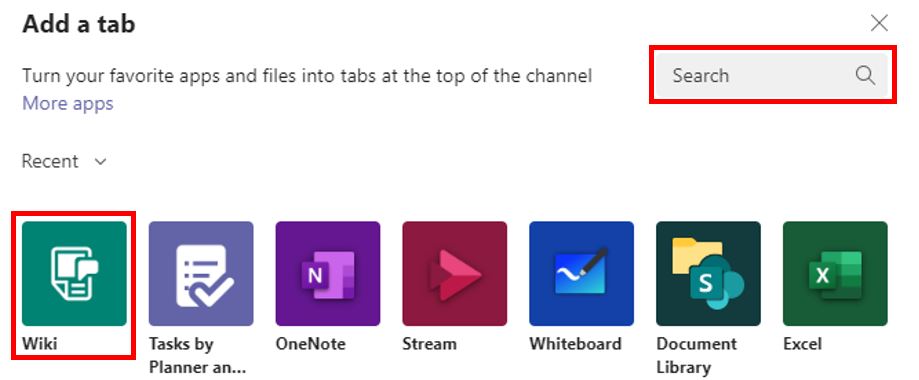
Select wiki from the available list of Apps, if the Wiki app is not in the default list use the search bar and search for “wiki”.
Multiple Wiki’s can be added to a Microsoft Team.
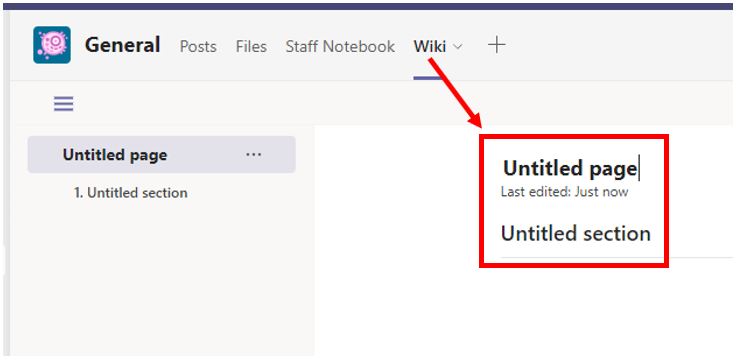
When you click on the Wiki tab for the first time, you’ll see a largely blank page with “Untitled Page” and “Untitled Section” on it. Pages and sections are the building blocks of your Microsoft Teams wiki.
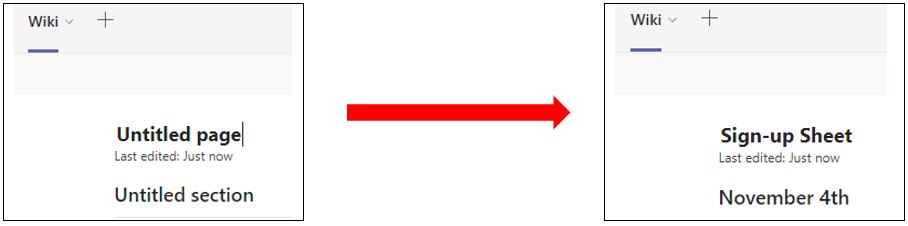
To give the wiki an intuitive name, click on Untitled Page and change it to something else. Sections are used to separate content within the wiki like individual building blocks. For example, this could relate to the date that the sign-up sheet relates to.
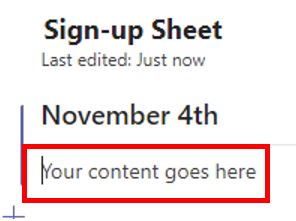
When you click on Untitled Section to change it, a message pops up underneath saying Your Content Goes Here.
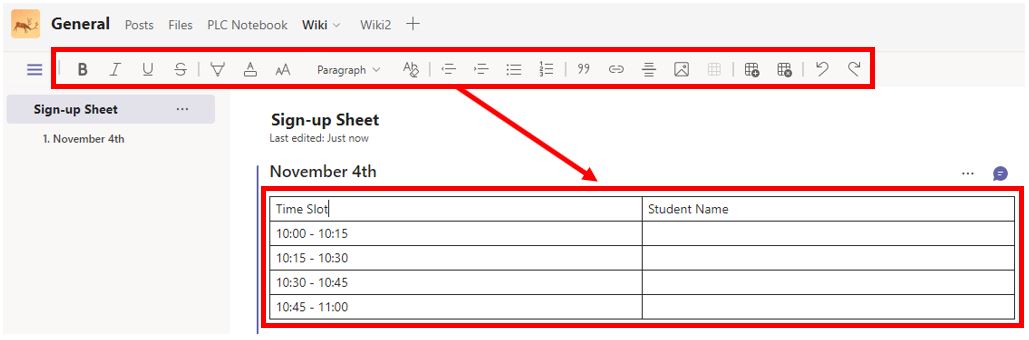
You can now add content as per your requirements. Click on the wiki under a section and a toolbar with editing options will appear at the top. The toolbar contains standard text editing options which should be familiar from Microsoft Word, email, or any other program where you can format text.
Depending on your screen size, some of the options will only become visible when you click on the three-dot icon next to the toolbar.
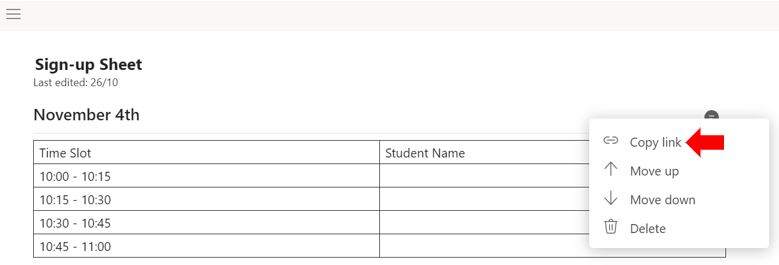
In the above example, a simple table has been inserted to list available time slots where students can add their names to the chosen time slot, whilst one learner is editing the document, others are locked out of making their own updates.
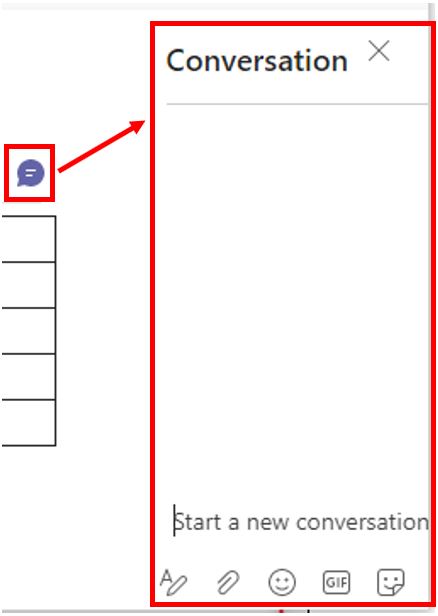
If you want to comment on a section, you can open a dedicated chat window by hovering over the section heading and clicking the chat icon. This will open a standard Microsoft Teams chat window related specifically to that section.
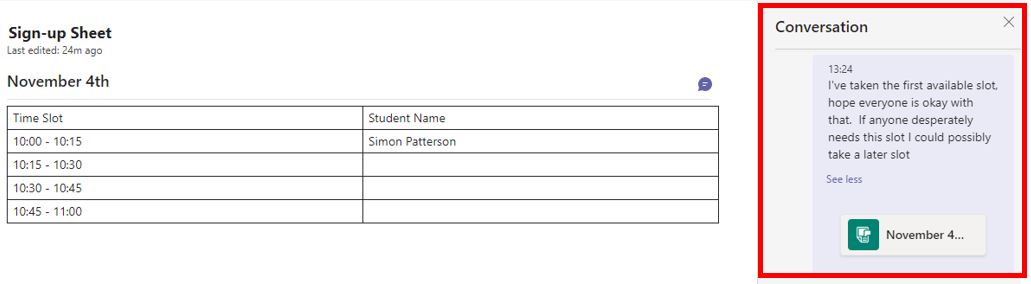
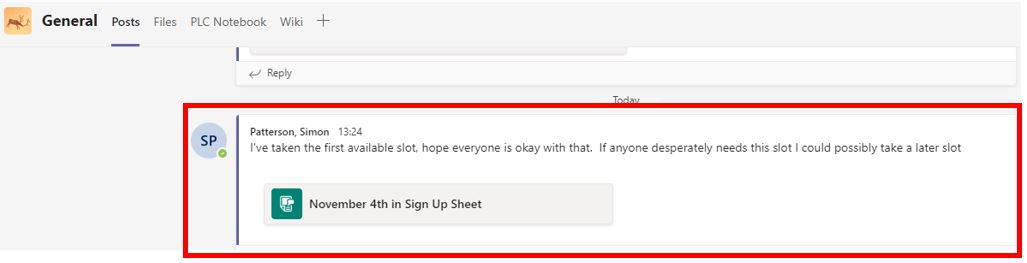
Any comments that you make in the wiki also appear as a post in the General area.
To make this link accessible from Blackboard Ultra, you will first need to ensure that all learners have the correct permissions to the Microsoft Team by ensuring that all learners are added etc.
To copy the wiki link, open the wiki via the previously created wiki tab and click on the ellipses in the top right-hand corner of the wiki and select Copy link.
Once copied you can create a new document or link in Blackboard Ultra and add this link. For more information regarding how to do this please see the section entitled Creating a link in Blackboard Ultra.
How to setup Wiki’s within Microsoft OneDrive
Another option for creating a wiki is Microsoft OneDrive. You can create a word document and host on your university OneDrive that can then be shared to allow other users to access and modify the document.
This guide demonstrates how to setup a wiki using Microsoft OneDrive to act as a sign-up sheet.
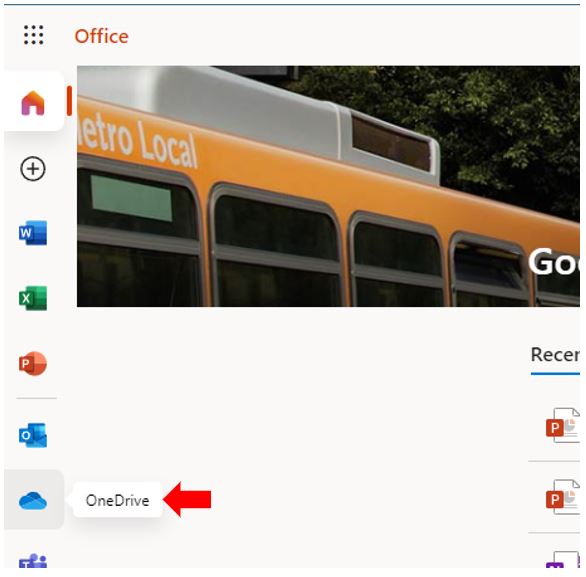
To start the process, you will first need to create location to store your wiki/s on your OneDrive. To access OneDrive at https://www.office.com/?auth=1 and select the OneDrive option.
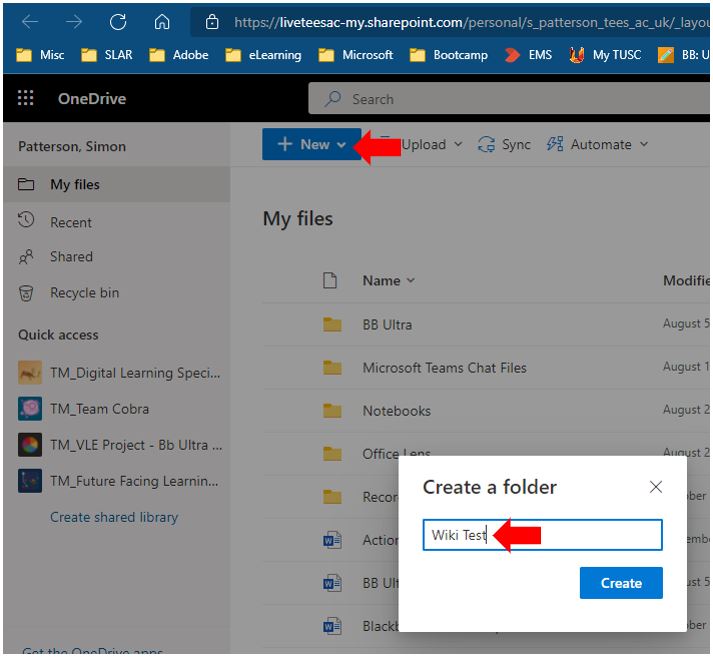
Once you are in OneDrive you will need to create a storage container to store all the wiki word documents you intend to create. We recommend creating a folder and calling it “Wikis” for ease of use and simplicity.
 Next you will need to create the Word document that you intend to use as the wiki.
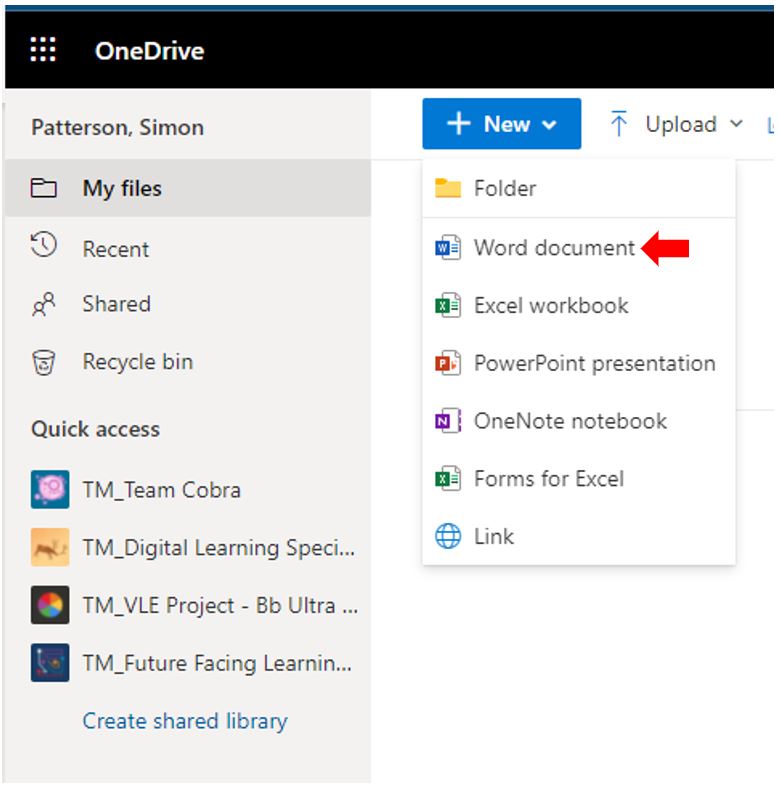 Once the word document has been created you can add the required content, remember that this document will be accessed by others and in most cases, content adding to it so ensure you are happy with its layout and have proofread and checked for errors before moving on.
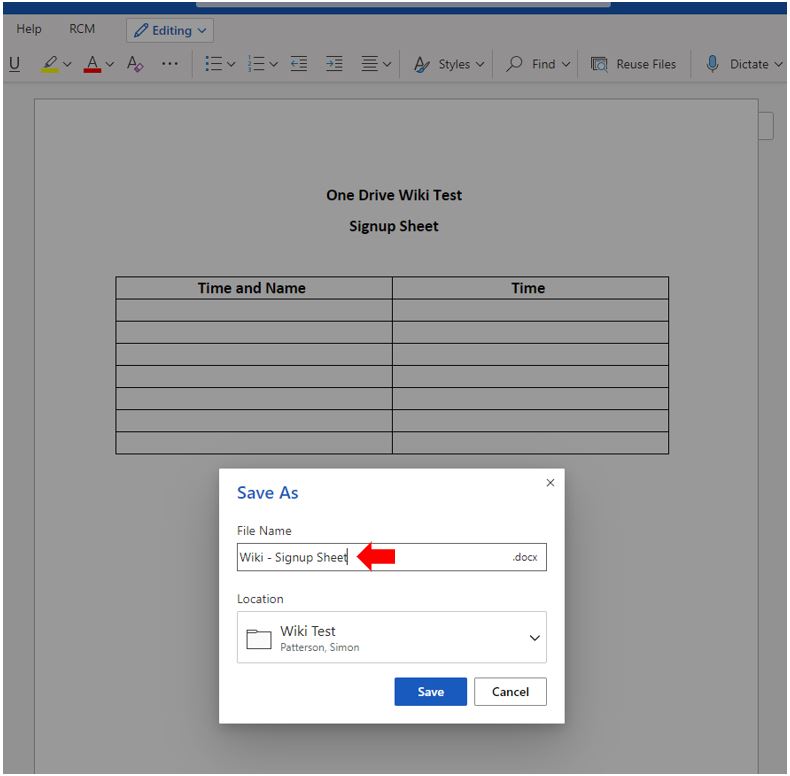 You will need to save the Word document using an intuitive name. The document is now ready but, before others can access and update it, it will need its permissions updating. There are two ways that this can be achieved, both are covered in the following section.
OneDrive wiki method one: Share with People Option
Using this option, you can invite people to access the OneDrive Word document via their email addresses.
To invite users using this method, open the Microsoft Word document in question and select the File menu from the top ribbon and select the Share option. From the Share options select Share with People.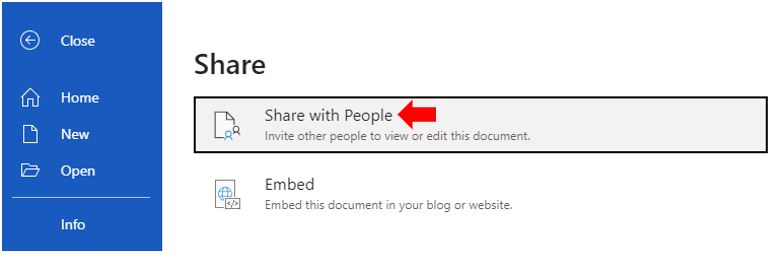 You can now search for and add users based on there usernames or email address. This can be an onerous process if adding a large quantity of users.
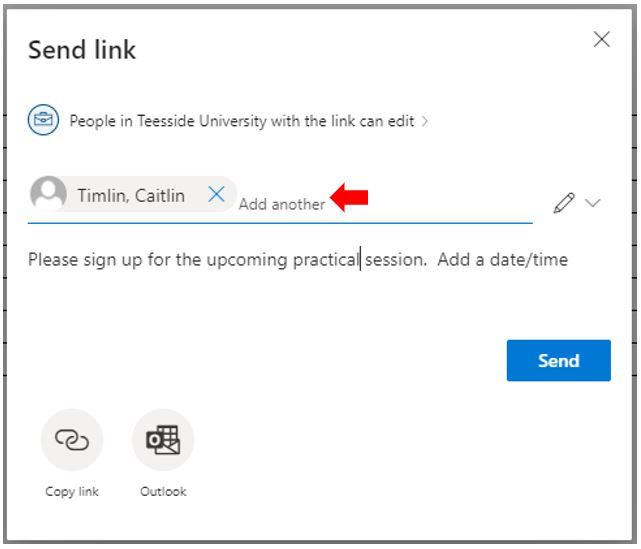
Once you have added all the required users click the send button and each user will receive an email message inviting them to add/modify content on your shared document. Emails will be sent to all invited staff
 Using this method, each invited user will have their permissions automatically set to contributor.
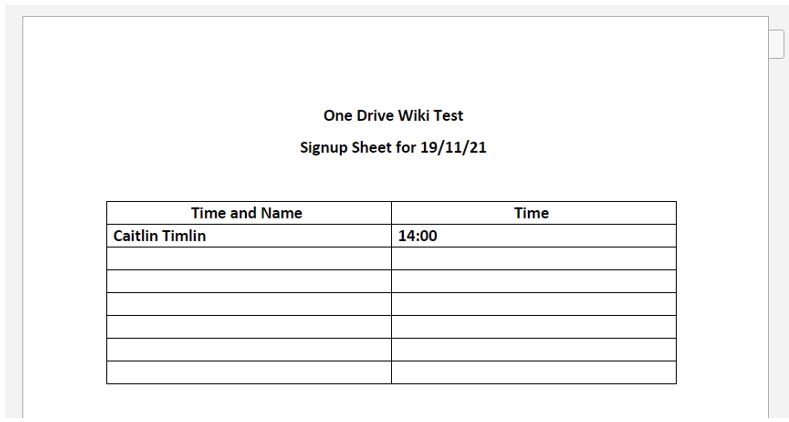
OneDrive wiki method two: Make wiki available via a link option
This option is like the previous but rather than adding individual users to the wiki you can instead make the wiki available to all users inside and/or outside of Teesside University. This is a useful option to use when wanting to allow large numbers of users to gain access to your shared word wiki document.
To invite users using this method, open OneDrive and locate the Word document in question, to the right of the document click on the three dots and select the Manage Access option from the menu. 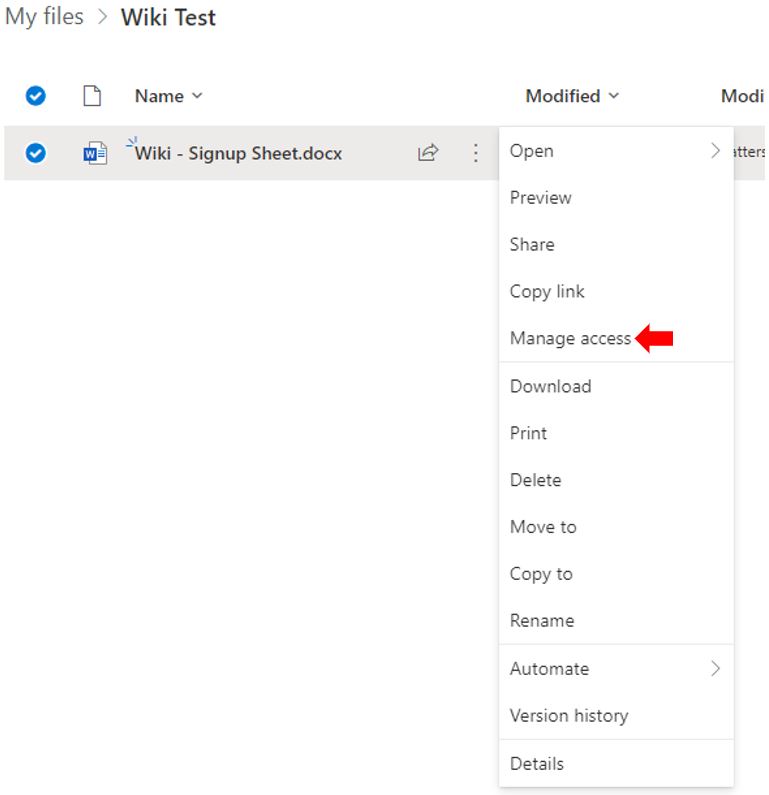 Once the Manage Access option dialogue menu has opened click on the Advanced option.
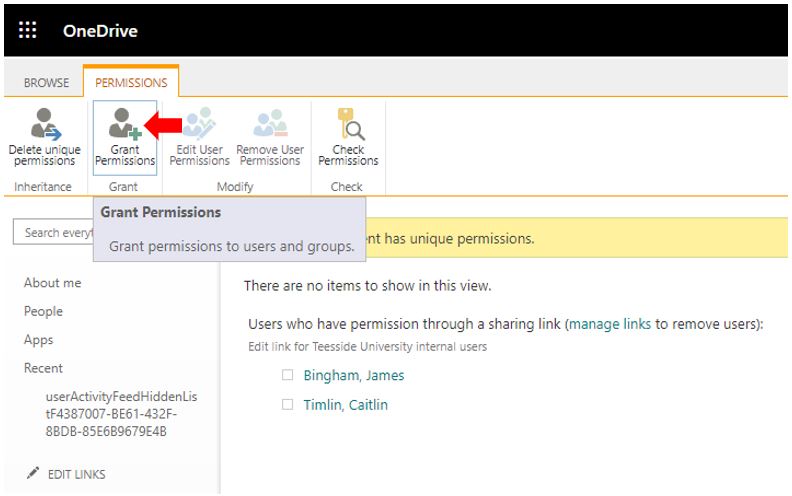
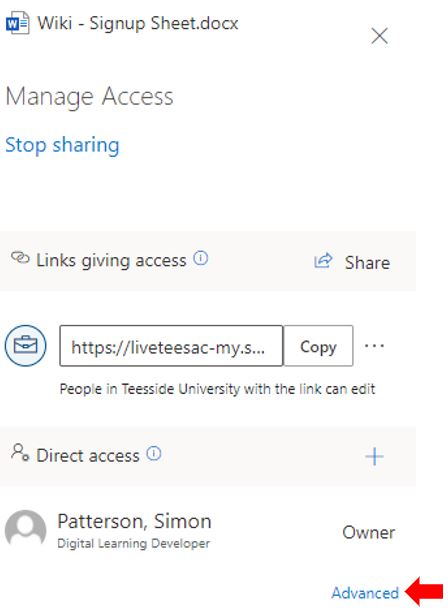 Once the OneDrive Permissions dialogue menu has loaded click Grant Permissions.
You can now individually add users or use “everyone”. This option will give everyone inside Teesside University contributor access to the shared document. It should be noted that although everyone now has access to this OneNote project, if you only share this link with your students then only they will have access to it. Type “everyone” into the Invite People box and select the Everyone except external users.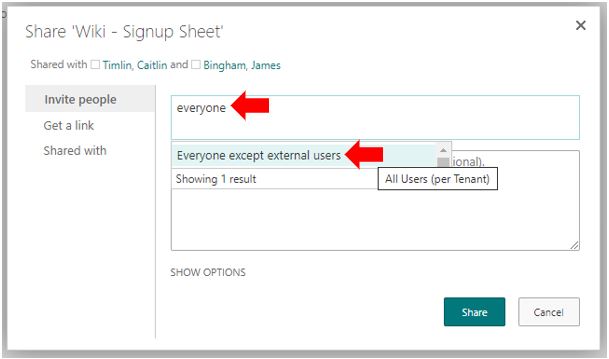
You should now see the Everyone except external users option in the permissions list. Note that if the everyone item hasn’t appeared you have to refresh the webpage, this can be on most browser applications by pressing the F5 key or locating the refresh session icon, once done you should see the everyone item listed. By default, the permission level should be set to Contribute.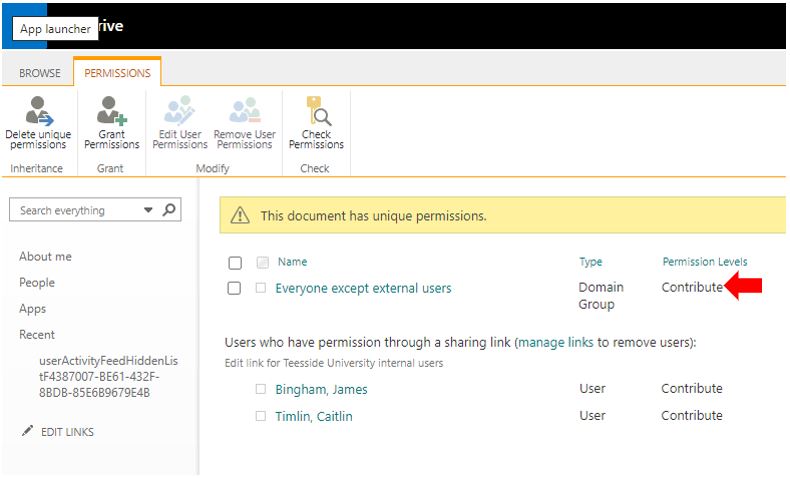 Permissions can be altered by selecting the user or group in questions and clicking on the Edit User Permissions button. To allow users to update this document the permission should be set to the default Contribute.
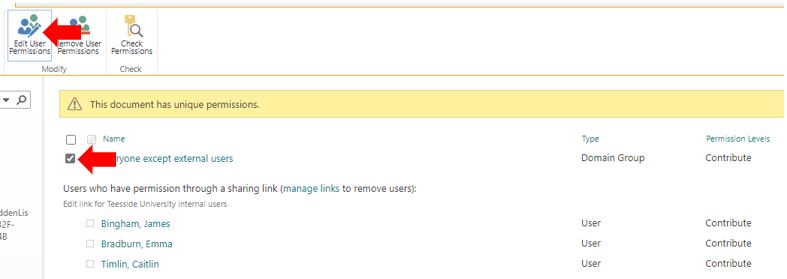 There are several permission options available, with each including a description of what they do. As above, to allow updates to be applied to this document you should set the permission level to Contribute. Once the required permission has been selected click OK to confirm this change.
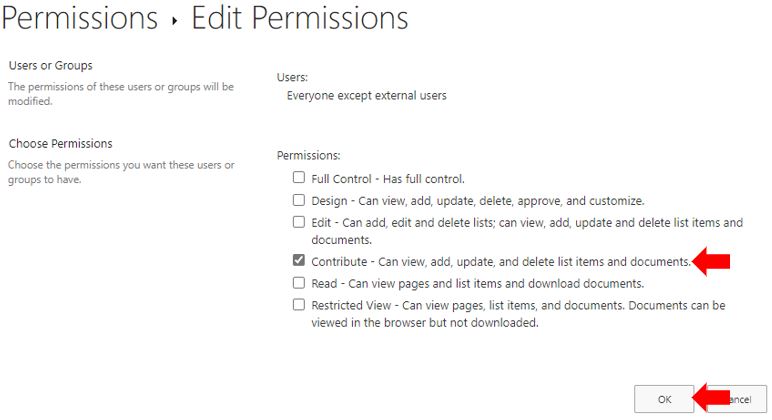 The OneDrive document is now ready to be made available, open OneDrive and locate the Word document in question, to the right of the document click on the three dots and select the Share option from the menu OR click the Share icon to the left of the three dots.
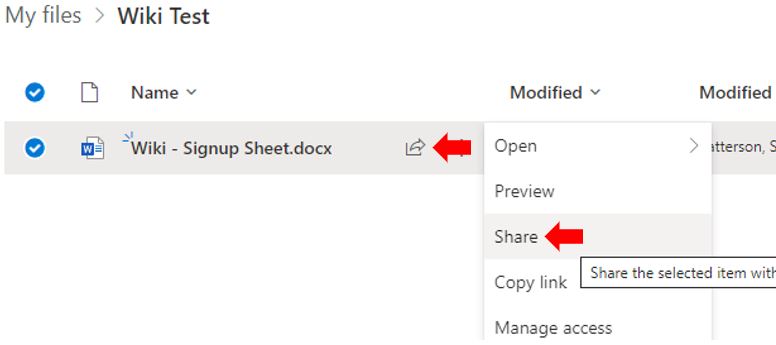 When the Share menu opens click on the Copy Link button
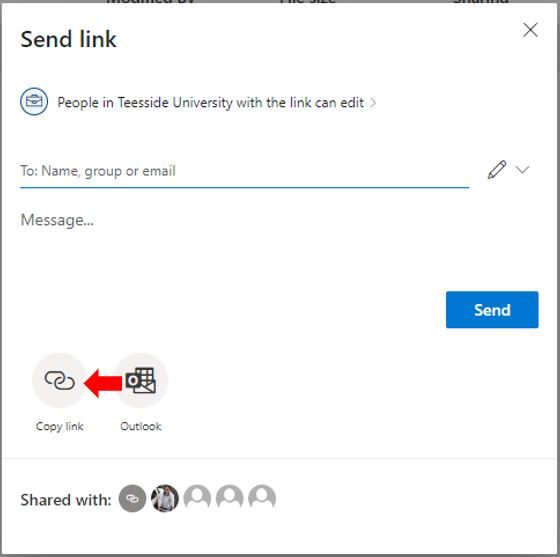 Click the Copy button to make a copy of the link (so that this can be pasted into Blackboard Ultra.
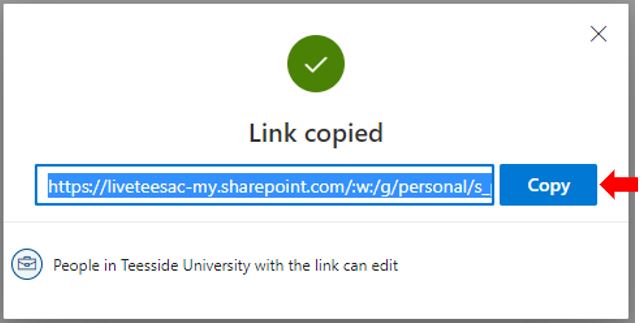
Creating a link to a wiki in Blackboard Ultra
Open Blackboard Ultra and in the required module location click on the purple plus sign and click Create.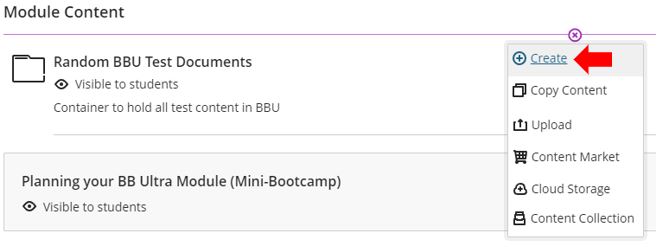 Select the Document option from the Module Content Items list.
 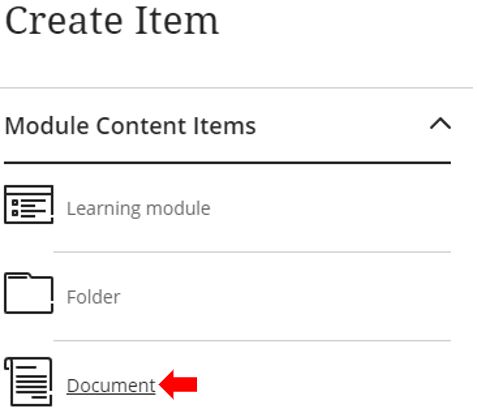 Enter the Document and click on the Add Link button. Insert the link address, copied in the previous step by right clicking in the * Link URL and selecting paste. In the Link Text input box give the link an intuitive name. Click Save to complete process.
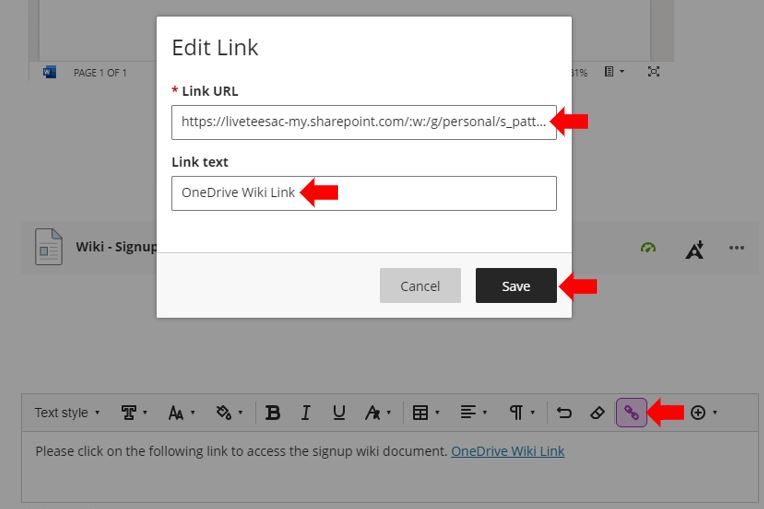 The Blackboard Ultra document will now include a link to the OneDrive document that can be accessed by all students via this document and can be updated in real time like a web-based Wiki. You may want to add additional content to the page to give more detailed or further instruction to the students.
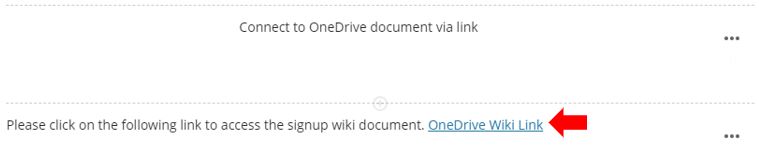
How to setup Wiki’s within Microsoft OneNote
To create a Wiki in Microsoft OneNote, you will need to create a new OneNote document during this setup process. You cannot attach a previously created project. 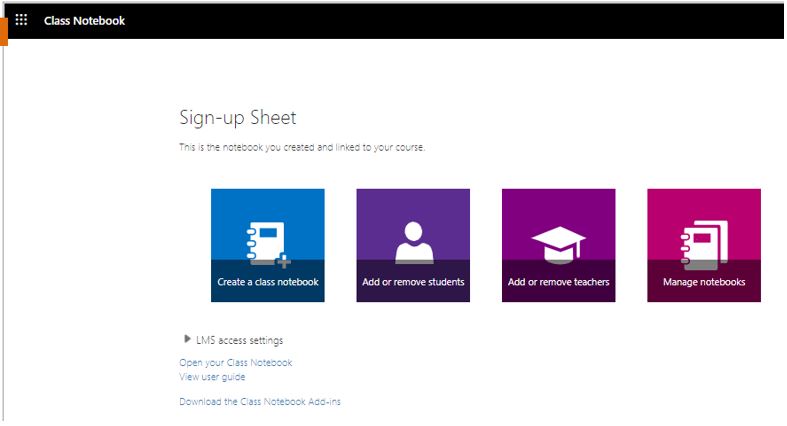 Via the main Class Notebook menu there are several different options available to you via the Class Notebook add-in in Blackboard Ultra.
- Create a new OneNote notebook: Use this option if you are creating the OneNote wiki for the first time.
- Add or remove new students: You can manage and control who has access to this page. There is a later option that also allows you to configure access to this OneNote project (Automatically add students from your LMS as they access the Notebook)
- Add or remove teachers: You can manage which other members of staff are able to access and administer this page. As above, there is a later option to give another teacher permission to access this Notebook.
- Manage notebooks: This option allows you to configure various aspects of the Notebook including enabling or disabling the Collaboration Space, set permissions to this space, add additional sections of the Notebook once it has been created and copy the Notebook link. You can also open the Notebook in the desktop version of OneNote from this location.
To navigate back from any of these sections please use the purple back arrow rather than the browser back arrow or closing the Blackboard window as this can cause complications within the system. You can only have one Class Notebook linked from your course page. If you have already created and linked a Class OneNote, you will receive a notification asking if you want to proceed in replacing the original.
 If you are creating the Notebook for the first time or overwriting a previously created Notebook, there are several options that you need to configure. First you will need to add a name for the Notebook. Click Next to continue.
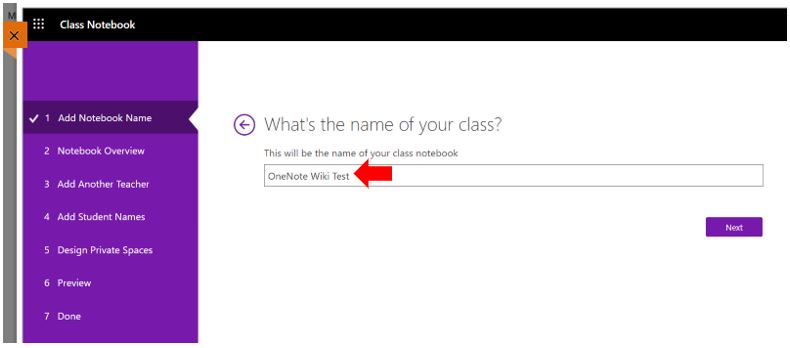 Notebook Overview informs you what sections will be created in the project by default, you will be able to add/remove and configure these sections once the Notebook has been created. Click Next to continue.
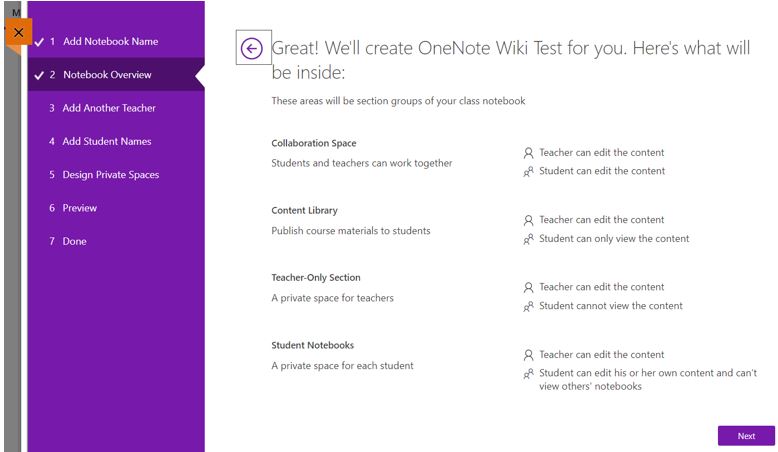 As previously mentioned on the Class Notebook menu, you can give other teachers permission to access and use this Notebook, simply type the staff members name and OneNote will search for the staff members displaying possible matches to your searched criteria. Click Next to continue.
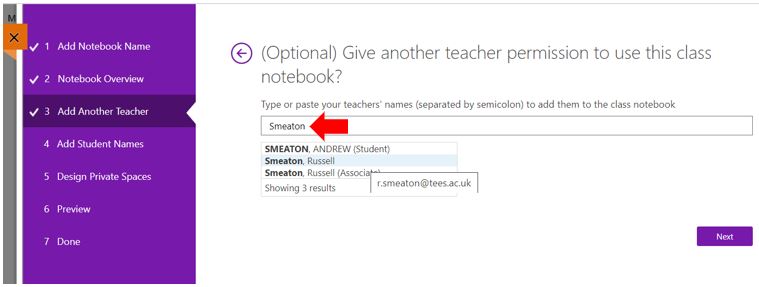 As previously mentioned on the Class Notebook menu, you can add students to allow them to access and contribute this Notebook. You can type or paste lists of student names or you can use the Learning Management Systems to automatically add them as they access the Notebook for the first time (This option will automatically add all learners as they access the project). Click Next to continue.
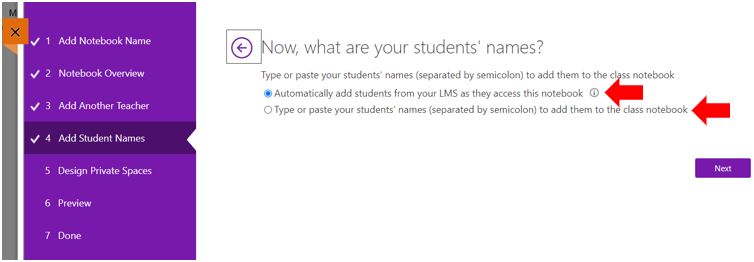 As this OneNote project is simply to create a Wiki space, students do not need the items listed here in their own private space. You may choose to remove all these sections as not to complicate or distract your learners. There are however benefits to leaving these sections available to learners such as fostering creativity and creating a space for notetaking related to this wiki. You can remove any un-needed sections by clicking on the cross to the righthand side of the item. Click Next to continue.
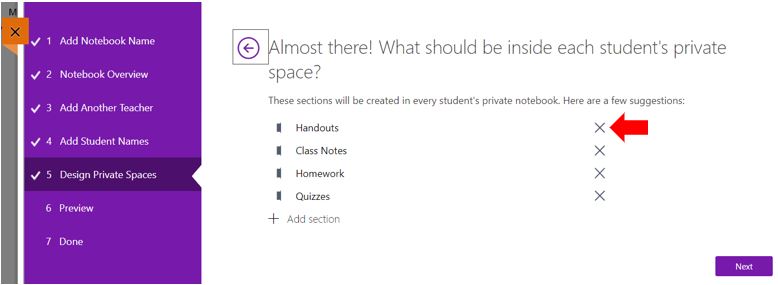 To create the specific Wiki page, click the + Add section and insert a name. Click Next to continue.
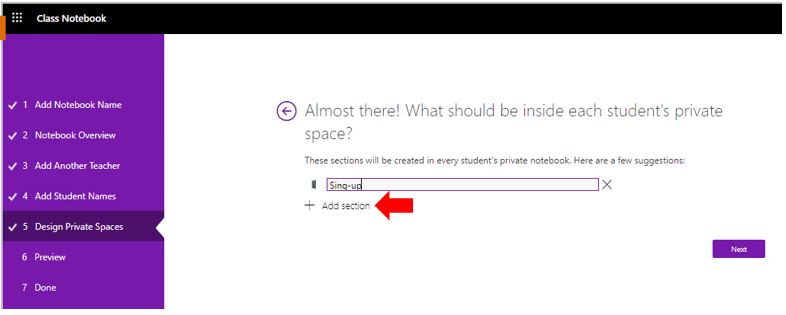
Before committing the configuration and creating the new Notebook you can preview in both Teacher and Student view. If you identify any problems, you can use the purple back arrow to navigate back through the various configurations to correct/modify and apply the required changes.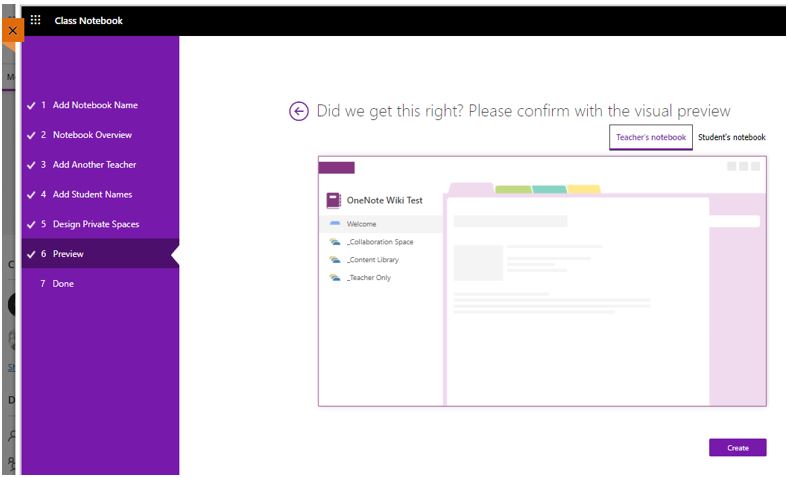 The final stage of the setup confirms the successful creation of the Notebook project and provides several further options. You will now need to open OneNote to create the wiki content that students will be contributing to. Click either the Open in OneNote or Open in OneNote Online.
There is a useful Learn More online resource available on this page, although a much better learning tools would be to utilise the Microsoft Educator Centre and complete one of several introductions to intermediate training courses that Microsoft have provided free of charge, these also include a summative assessment to gain accreditation. These training resources can be found at https://education.microsoft.com/en-us/learningpath/b6e3b5f2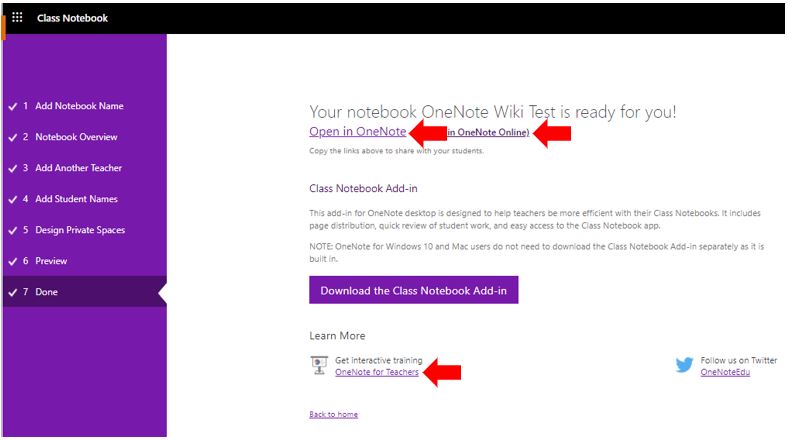 If you choose to open in the desktop app you may receive a security notice like the one shown here, click Yes to continue.
 Also, if you leave this session and plan to return to complete the setup of the wiki later, you will need to access the previously created wiki in a slightly different way. On the Class Notebook menu click on the Open your Class Notebook hyperlink.
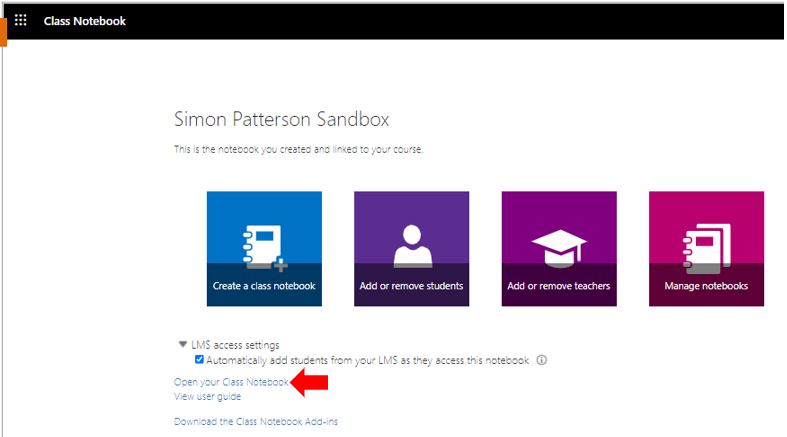
The default OneNote page appears as a Welcome screen this can be customised to the needs of the course in question or can be removed completely.
The Collaboration Space is open to everyone in a class, and all class members can read or write on anything in this part of the notebook. Teachers and students can also create new sections and pages in ways that work best for them.
For example, if a class splits up into group projects, each group could create a section where students can work together and share project-related materials. Educators can also create private sections in the Collaboration Space.
Better than a document on a file share or shared drive
With a Collaboration Space:
- Multiple people can edit a document at the same time.
- Changes are merged automatically.
- The Collaboration Space section group is available offline for everyone.
- Keep your class “on the same page.”
- Editable by anyone
The Collaboration Space is great for storing:
- Class project vision and brainstorming ideas.
- Supporting materials collected by group members.
- To-do lists for students to mark off.
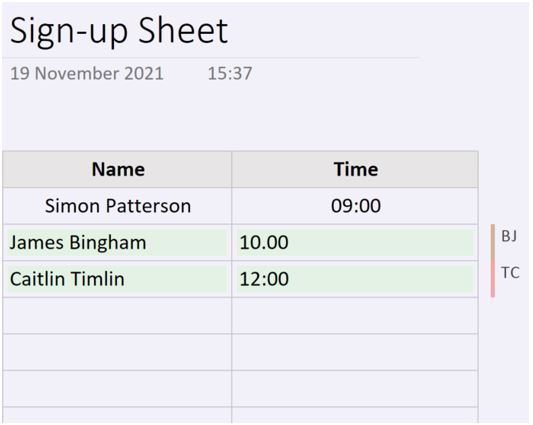
In the example below, I have stripped away much of the content that is included by default in a Microsoft OneNote project to leave just one section, I have renamed it Sign-up Sheet although I have left some of the default text that relates to the Collaboration Space. The design of the wiki and its content is very much down to what you would like to present your learners with and how this design might alter how they interact with the content.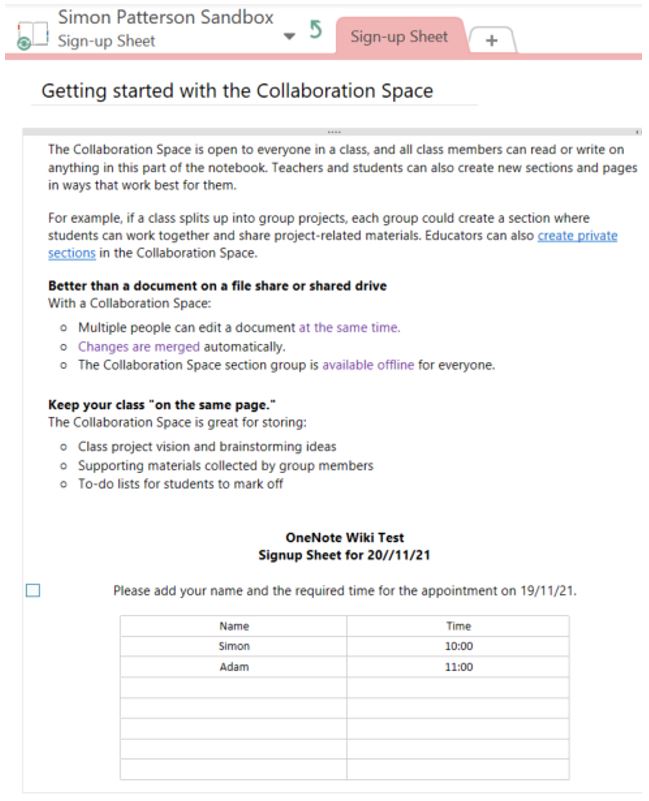 It is also possible to show or hide the authors of the content that is added to a wiki, this can be incredibly useful when trying to track who has added what content.
Conclusion
Hopefully you have found this blog post useful. If you have any further questions regarding setting up Wiki’s please contact eLearning@tees.ac.uk