
This guide has been created to support staff in using Microsoft OneNote. This guide will cover the essential features and functionalities of OneNote, supporting staff and students to harness its full potential for capturing, organising, and sharing ideas and notes. From navigating the interface to structuring Notebooks with sections and section groups, this guide will help get started with this tool. Additionally, it explores advanced features and offers general guidance such as tagging, formatting pages for effective note-taking, and dictating notes. This guide will equip both staff and students with the knowledge and skills needed to unlock the power of Microsoft OneNote.
OneNote allows you to organise content in notebooks, each comprised of multiple sections that can contain pages. An organised OneNote makes it easier to find, review, and add notes.
Contents
- OneNote Interface
- Sections and Section Groups
- Structuring a OneNote Notebook
- OneNote Tags
- Formatting a OneNote page for Note Taking
- Creating and Editing Notes
- Dictating notes in OneNote
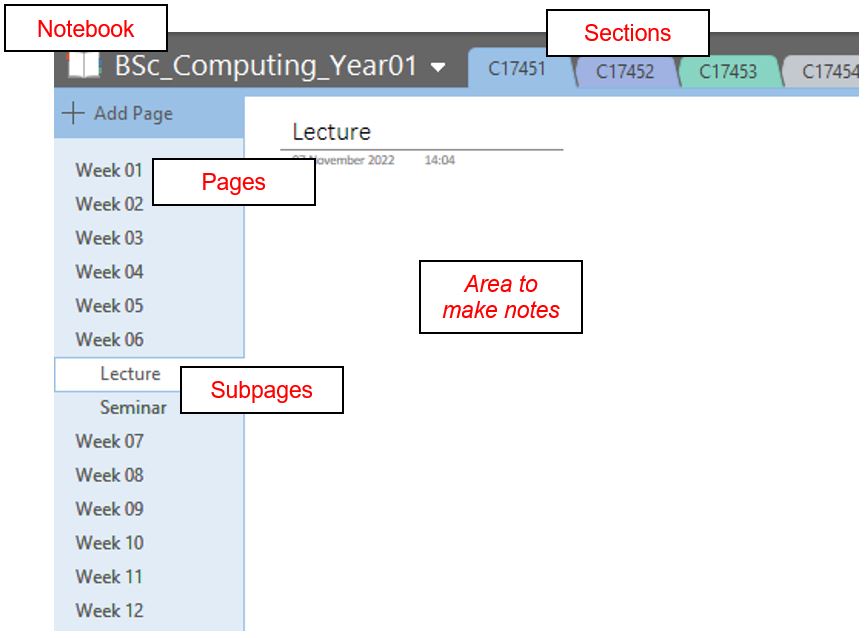
OneNote Interface
OneNote has a simple hierarchical structure, at the top level are notebooks, which can be divided into sections, each section can then have pages added.
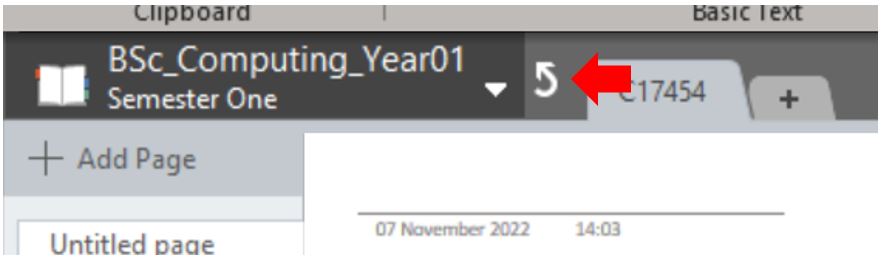
Sections & Section Groups
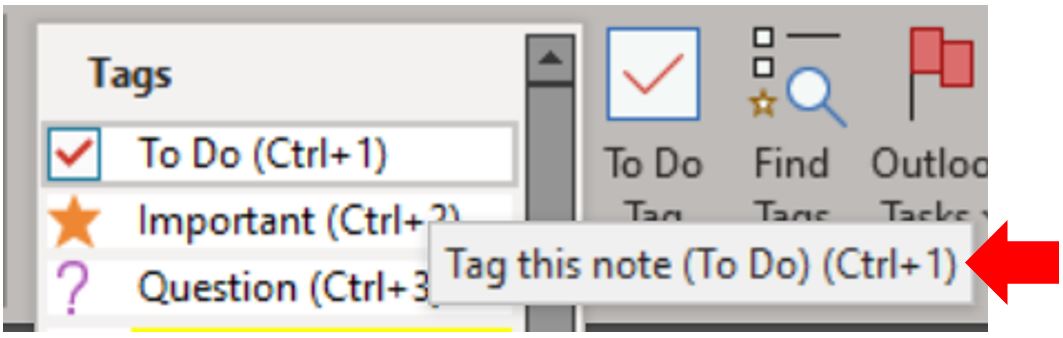
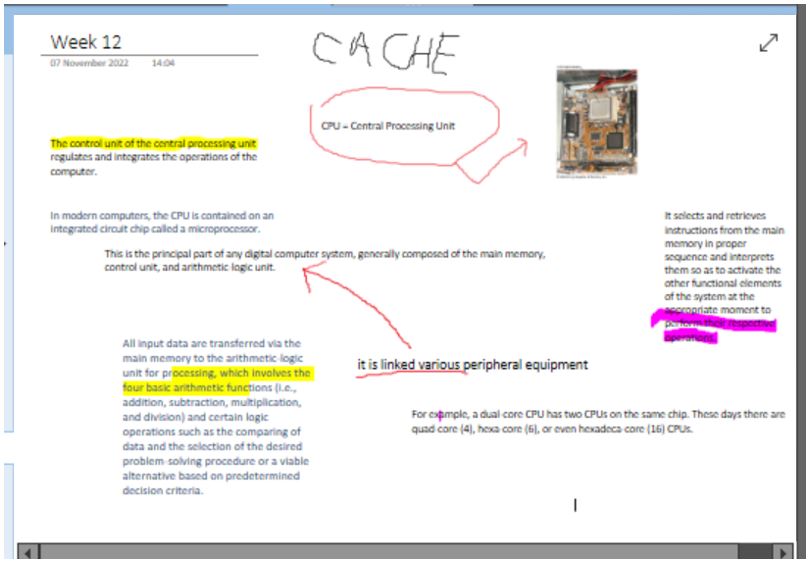
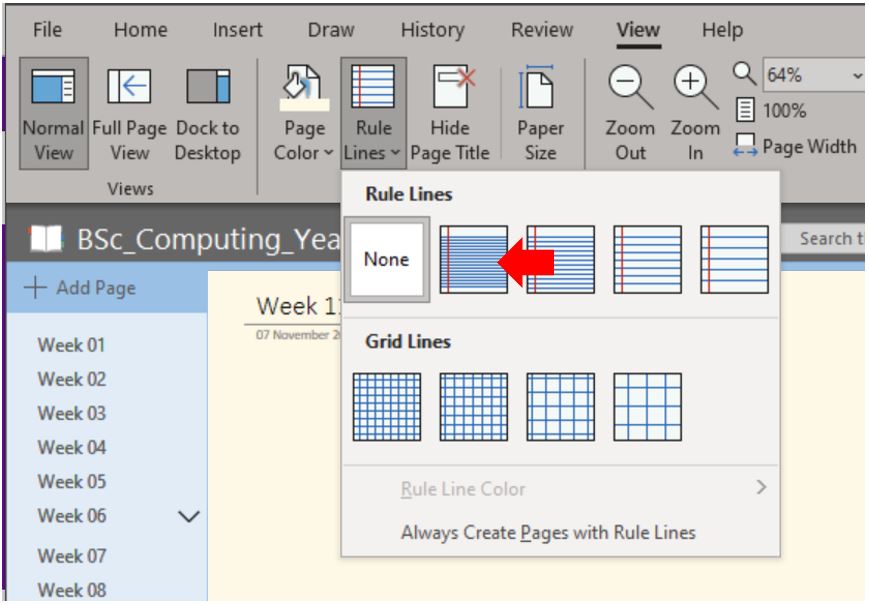
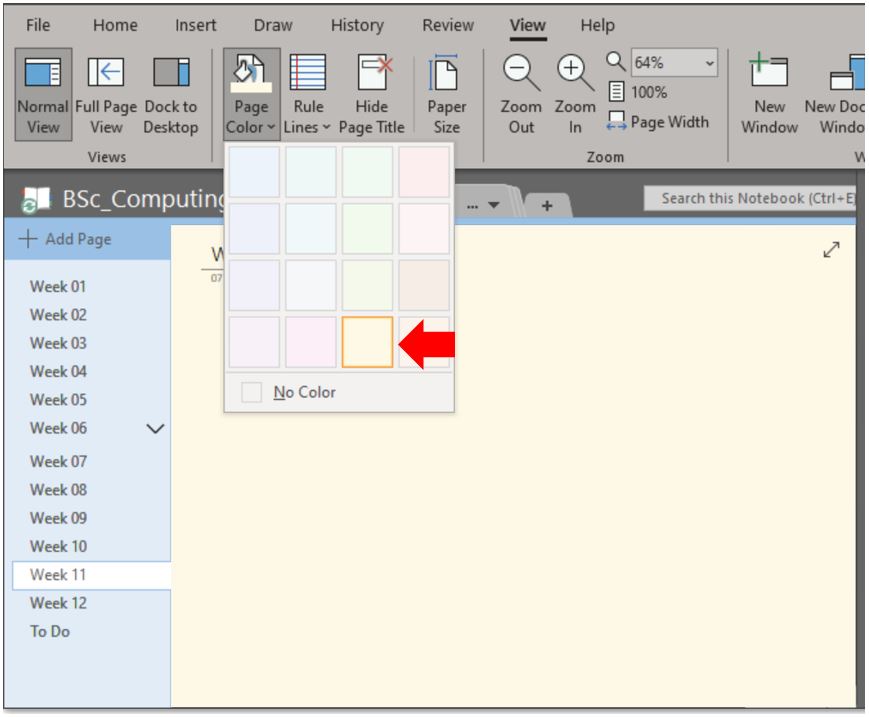
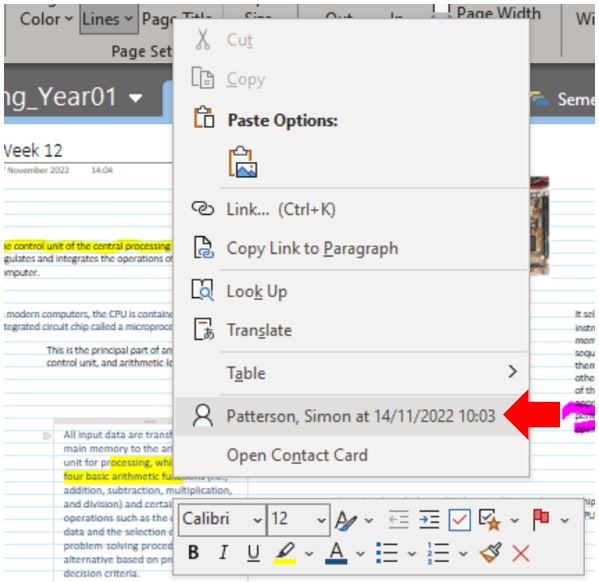
To move a pre-existing section into a section group, simply drag and drop. New groups can also be created inside the section group. To leave the section group, navigate to the parent section group by clicking the arrow to the right of the section name. To get set up for your OneNote for a single unit, you could use any of the following structuring techniques. You can also move, delete, or rename notebooks, sections, or pages whenever you want. OneNote also has built-in tags that can be used to support staff and students in their studying. Some of the most useful and commonly used tags include: Each of these tabs has an associated keyboard shortcut which can be viewed by hovering the mouse over the tag icon. OneNote can search for tags of specific types (such as To Do or Important etc.) so using tags within a notebook is another technique through which information can be categorised and searched. For example, if a student has added tags to their notes in a OneNote notebook, they could carry out a tag search. For example, for all the definition tags. The results of this search will be compiled into a one-page (or more depending on returned search results) list of all the tagged definitions. Use the Create Summary Page button to list all matching tag search results on a single page. OneNote pages differ from Microsoft Word documents, they follow a less structured approach, which means any part of the page can be selected and content added. This can aid in the speed at which notes can be captured; however, if not structured and organised (maybe after a lecture), the collage of random notes won’t be very helpful when information needs to be found. There is an option to add pages that include ruled lines (click the View Tab > Rule Lines > Narrow Ruled). Using the ‘narrow ruled’ option is advantageous as these guidelines match up with the default font size in OneNote). As these lines are not a permanent part of your document, if you copy and paste from a page, they won’t show up in the destination. You can also switch the background of each page with a variety of page colours to choose from which may help students to alleviate visual stress and improve symptoms commonly related to dyslexia, such as a low reading rate, accuracy, and comprehension. OneNote includes drawing tools and a variety of input support. When adding content, each gets a layer of its own and can be moved or deleted without impacting other content. For example, a section of highlighted text will not bleed through a page or obscure text in OneNote. Like all Microsoft Office applications using the Undo function, everything can be undone. OneNote also tracks when content is added, users can click into a text box (right-click and select the last option in the context menu) this will display the author’s name alongside the date and time the text box was created. OneNote also includes tools for translation and language setting. There is also a Smart Lookup tool for defining terms which open in right-hand panels. OneNote includes a variety of built-in math tools. For example, OneNote will automatically solve an equation once the equals symbol has been added (by pressing enter). The Equation and Math menu options offer additional capabilities. For example, you can format complex equations, create embeddable graphs, and get step-by-step instructions for finding the value of a variable. Audio recordings can be made of lectures and any other discussion, and then insert the audio recording later. OneNote can sync audio recordings to notes so that the relevant parts of a recording play at the exact time you wrote down a note. OneNote also includes a transcription service to convert the recording audio into editable text. If students have access to the lecture slides, they can insert those into OneNote, and then add their in-class notes. Handwritten notes can be scanned using a scanning app, such as Microsoft Lens, insert those pictures into OneNote and copy the text from the picture via the right-click context menu. This functionality can also be used to convert a screenshot into editable text. Dictation is a quick and easy way to create drafts, capture notes and make comments. Dictation lets you use speech-to-text to author content in Office with a microphone and a reliable internet connection. In addition to dictating your content, you can speak commands to add punctuation, navigate around the page, and enter special characters. How to use dictation
Ways to Structure a OneNote Notebook
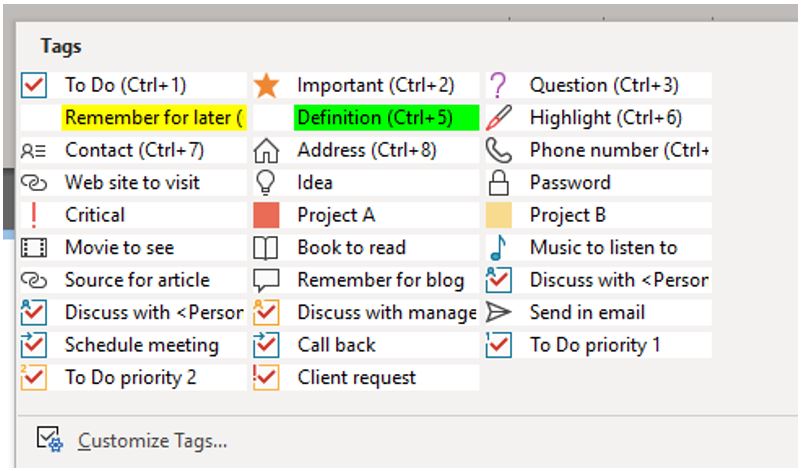
OneNote Tags
![]()
Use the Definition tag to highlight key terminology
![]()
Use the Question tag to flag items for review later
![]()
Use the Remember for Later tag to highlight important facts
![]()
Use the Important tag to flat the cornerstone facts.
![]()
Use the To Do tag to jot down items you may want to review or address later.

Formatting a OneNote Page for Notetaking
Creating and Editing Notes
Dictating notes in OneNote