
This Learning Support Guide provides step-by-step instructions for setting up Turnitin assignments within a Blackboard module. Once students have uploaded their work to the Turnitin assignment submission space, staff can collate assignments, view Turnitin Similarity reports and utilise Turnitin Feedback Studio.
What is Turnitin?
Turnitin is an academic integrity and feedback tool integrated into Blackboard. It helps academics check student submissions for originality by comparing them against a vast database of academic content, internet sources, and previously submitted papers. Turnitin also provides robust tools for marking and feedback, including rubrics, inline comments, and similarity reports that help support good academic practice and deter plagiarism.
Creating Assignment Video Guide
The following video will take you through the process of creating a new assignment.
Step-by-step guide to creating a new Turnitin Assignment
To create a new Turnitin assignment, go into your module and identify where you wish to place the assignment. Click on the purple plus sign that appears when you hover between your content items. Select Content Market from the dropdown menu.
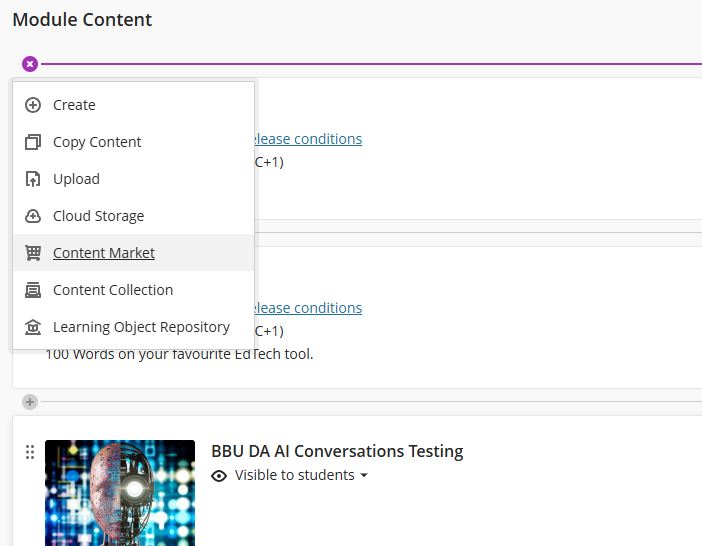
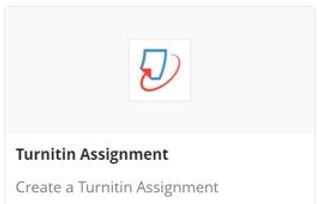
Select Turnitin Assignment from the list of options.
Adding the Assignment details
On the default Assignment Details tab, the following Turnitin Assignment configuration options can be configured.
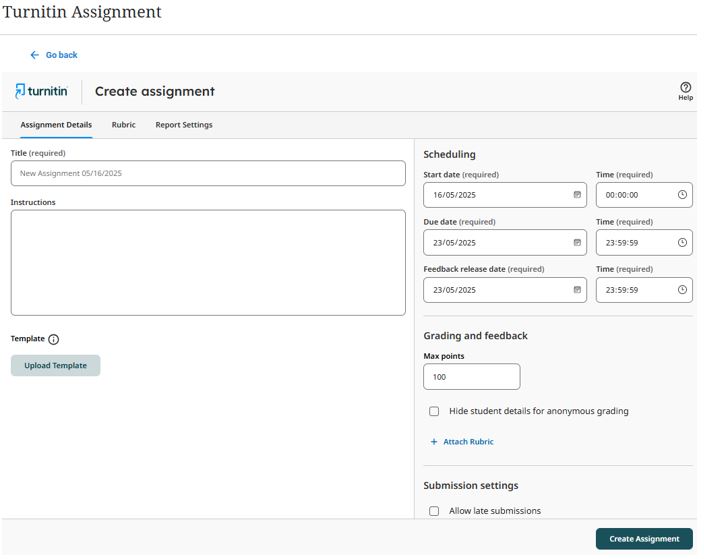
- Add the assessment Title
- Student Instructions: Assessment instructions to be given to students to allow them to complete the assignment
- Template: Assignment template to be shared with students to develop their assignment work on
- Required scheduling components: Start, Due & Feedback dates and times
- Grading & Feedback options: Maximum points and Anonymous grading
- Attaching a Rubric: Covered in a separate guide (here)
- Submission settings: Allow late submissions
Other Turnitin Configurable settings
Several additional Turnitin Similarity report settings can be modified on the Report Settings tab. In order to ensure consistency with the “Check Your Work for Plagiarism” organisation, the recommended settings for the Similarity score are listed here:
- Select whether to store submissions so they can be used for similarity checking: General Turnitin Repository
- Generate report: At time of submission
- Exclusions: All three exclusions are checked, and “Exclude matches smaller than” is set to 5 words, not 8.
- Compare Submissions: General Turnitin repository, Internet content & Periodicals, journals and publications
- Report Access: Allow students to view Similarity Reports
- Translated Matching: Not configured
Once you have configured your Turnitin settings, click Create Assignment to complete the process and create the Turnitin Assignment.
Allocating A Category
When you have created your Turnitin assignment, it is not given a Marking Category. Should you wish to use the Overall Grade feature within the Gradebook, you are encouraged to allocate the assignment a specific category. To do this, please follow these steps.
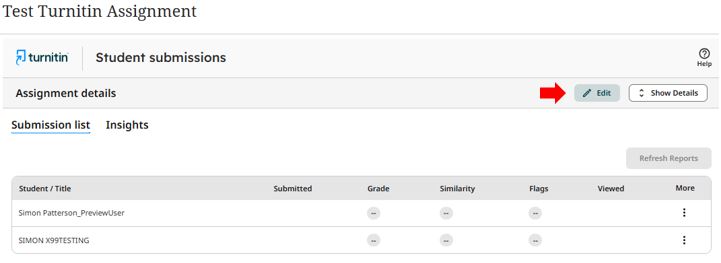
Begin by clicking the three dots to the right of the assignment name and clicking Edit, as shown below:

From the side panel that appears, you can see the option for Mark Category. From the drop down list, you can select an appropriate category, such as Assignment.
Editing a previously created assignment
Should you wish to make any changes to the assignment, you can edit it after creation.
There are two areas that allow editing, depending on your requirements.
To change the Title or Due Date, click the ellipses (the three dots) to the right of the assignment name. This will open the side panel to allow you to adjust both the Title and the Due Date as appropriate. You can also adjust the Points Possible (and as mentioned above, the Mark Category).
Other changes can be made by accessing the Assignment Details panel.
- Click on the assignment name
- This will open the assignment inbox
- In the top right-hand corner, click the Edit button
- You can now edit the assignment as appropriate
- Click Submit when done
For more information on creating rubrics, please follow this link for Creating Rubrics.
For more information on creating assignments in Turnitin, please follow this link to Turnitin’s Creating Assignments resource page.
For further support, please contact the Digital Learning Specialist team via elearning@tees.ac.uk.