
This guide explains how you can use ReView to capture your live lectures or classroom activity within Blackboard Ultra modules.
Before you record a lecture, please remember to:
- notify the students that the lecture will be recorded and display the ReView Recording Notice before the start of a capture. Click here to download the notice templates.
- inform students when (e.g. after 48 hours ) the recording will be available for viewing
- keep the web camera focused on you/projector screen and ensure students are not captured
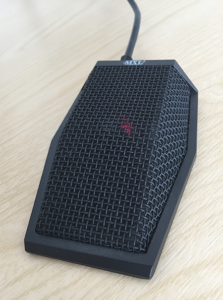
- stand close to the boundary microphone, and project your voice when you are away from the microphone
- pause, if the content is not suitable for capture
- pause the recording during discussions and question and answer session
Recording a Lecture
- Login to Blackboard and select the module that you would like to record and save the lecture in.
- Once you have selected a module, navigate to Module Tools.

- Within Module Tools click ReView Video Library link.
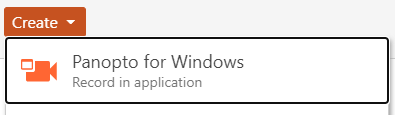
- To record a session, click the Create button and select Panopto for Windows from the drop-down.
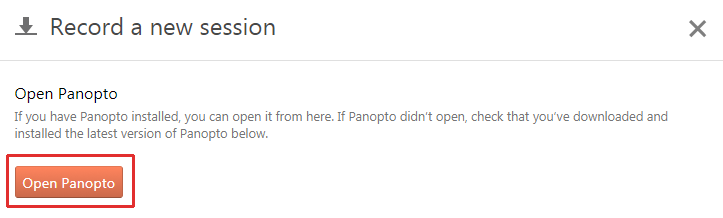
- This will prompt a pop-up to launch the recorder. Click the Launch Panopto button. Depending on the browser click Open Panopto Recorder / Allow on pop-up window that follows this.
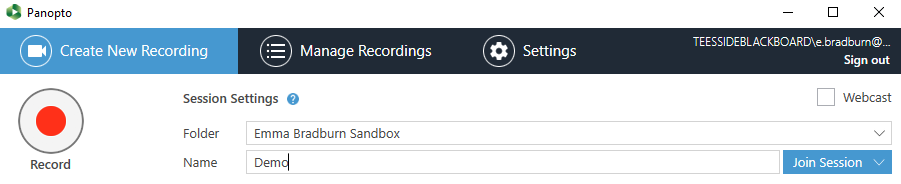
- Under the Session Settings, the Folder will be will selected for you. This will be the module that you launch the recorder from.
- Name the session.
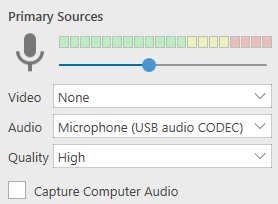
- Select the appropriate Primary Sources. For Video select a web camera from the drop down menu and for Audio select the boundary microphone Microphone (USB audio CODEC) and adjust the volume slider if required.
Note: If you are capturing Video – web camera feed, plug it in before launching the recorder.
- Set Quality to High. Select Capture Computer Audio if you choose to record any audio that plays on your computer.
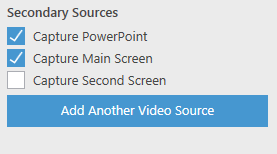
- Once you have selected your video and audio inputs, select the relevant Secondary Sources. To record your slide presentation, tick Capture PowerPoint and if you wish to record the screen activity on the lectern, tick Capture Main Screen. The software will automatically detect any additional screen for example, a second monitor. You may also choose to capture additional video/web camera feed by clicking Add Another Video Source.
- Adjust the Resolution to the highest setting from the dropdown menu and set the fps to 15 and click Apply.

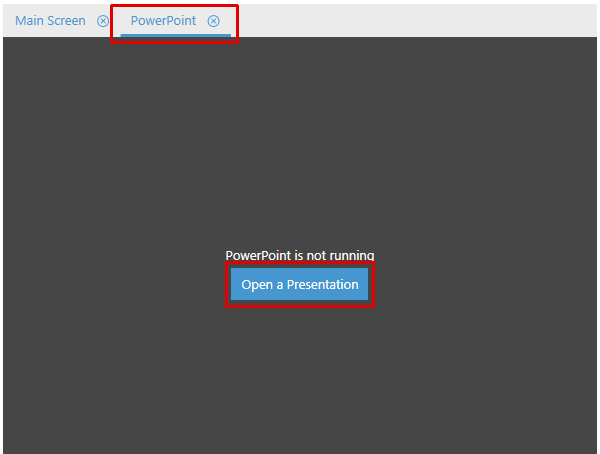
- There are several ways to start the recording. You can choose to launch your PowerPoint slides from the recorder. In order to this, click Open Presentation. Browse for your file and click Open. This will prompt a message to start the recording automatically. Click Yes, and this will launch your PowerPoint to presentation mode and start the recording for you. You can proceed with your lecture and advance your slides as you normally would.
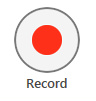
- The second option is to browse and open your PowerPoint slides as you normally would and manually click the Record button. This will launch the PowerPoint slides to presentation mode.
- If there are segments within the slides or the presentation not suitable for capture, or during discussions you can pause the recording. In order to do this, click the recorder icon on the task bar to prompt the software and click the Pause button.
- If you have recorded parts of the presentation that you do not wish to share with your students, you can edit the video later. The following guide explains how to edit your ReView recordings.
- When you have reached the end of your presentation, click Stop.
- This will prompt a Recording Complete window. Click Upload.

- You will be taken to the Manage Recordings page, where you will be able to see the list of sessions that have been recorded offline, are uploading, or have completed uploading. At this point, you can choose to log out of Blackboard and the computer.
- The uploading process will continue in the background and can be viewed in Manage Recordings.
- The session will automatically be added to the selected module ReView Library. The publishing and processing duration may vary, depending on the length of the recording.
NOTE: Please remember to make the session available to students within 48 hours of the taught session.
Equipment and Software Availability
All General Purpose Teaching (GPT) rooms and Lecture Theatres (LT) are equipped with lecture recording software and a boundary microphone, which has a pickup range of approximately 20 feet. If you would like to capture video, use the input webcam within the monitor.
NOTE: Please test the equipment in the venue that you will be recording to ensure everything is in working order before the actual recording.
Scheduled Recording
A select number of lecture theatres are installed with a high-quality camera and have the facility for scheduled/automated recording. Please contact ITACS if you would like to use this facility.