This guide introduces the process of exporting work from Microsoft OneNote Class Notebook, allowing students to retain copies of their notes and lesson activities in PDF format for future reference, even after their access to university systems has ended.
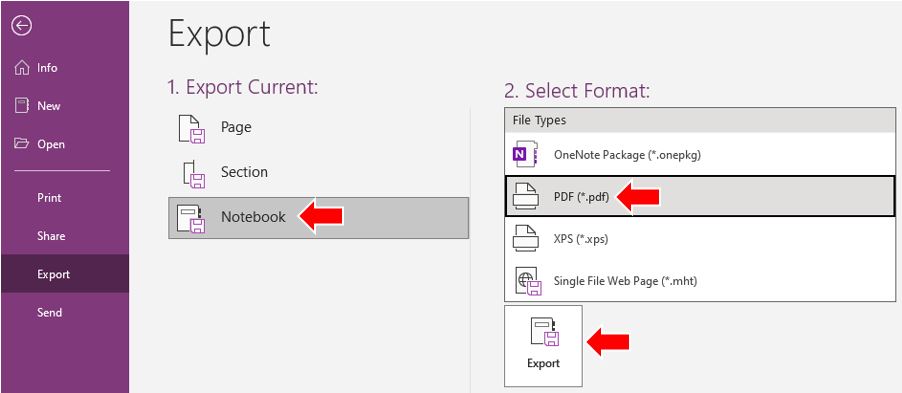
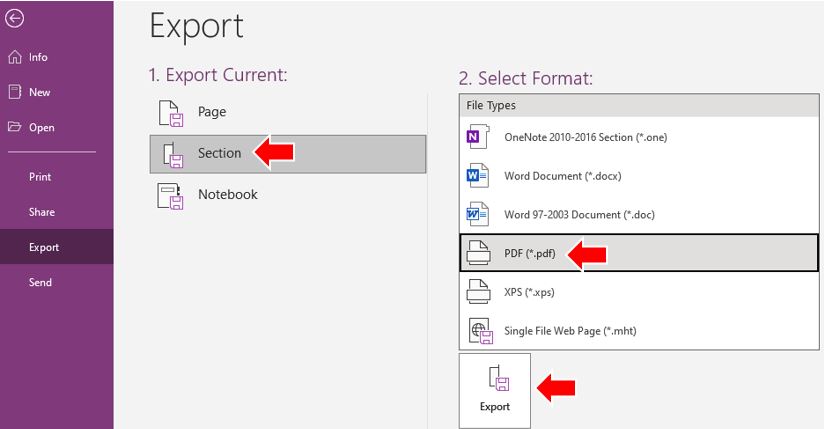
Contents All workflows and associated screenshots in this guide are based on the desktop version of Microsoft OneNote. If you are currently using the web-based version, you will be able to open the desktop version, by clicking on the Editing button in the top right and selecting ‘Open in Desktop app’ Using this export option will export all of the content within the Class Notebook that the student has permission to access to a single PDF document. This includes: Using this export method can create very lengthy PDF documents, although this option includes all the student work (regardless of the number of sub-sections in their private workspace), it also includes the two publicly accessible sections (Content Library and Collaboration Space). This can be quite useful if the student also wants to take a copy of this material for future reference. It should also be noted that using the Export section option discussed later in this guide will mean that the student will need to export each section of their private workspace individually, which can be time-consuming and lead to mistakes if, for example, they accidentally forget to export one section. This option allows a student to focus on exporting only the relevant materials, such as notes, work, or study guides, from a specific section rather than the entire notebook. By exporting a section, students can easily create customised study materials, share specific content with peers or instructors, or archive important information for future reference without including unnecessary content from other sections of their notebook(s). This export option will export the section of the notebook the student currently has open. If a student intends to export all of their private workspace (especially those comprised of numerous sub-sections) it is recommended that the above ‘export an entire Notebook’ option is used. This option allows a student to focus on exporting only the relevant content, such as notes, work, or study guides, from a specific page rather than a complete section or the entire notebook. By exporting a page, students can easily create customised study materials, share specific content with peers or instructors, or archive important information for future reference without including unnecessary content from other pages or sections of their notebook(s). This export option will export the notebook page the student currently has open.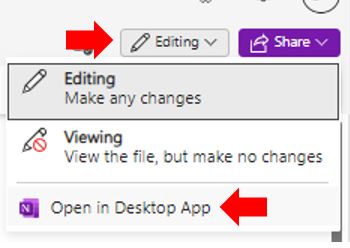
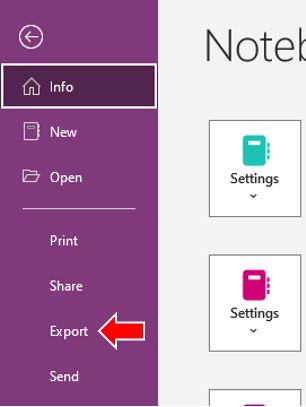
1. Exporting an entire Notebook
2. Exporting a single Section
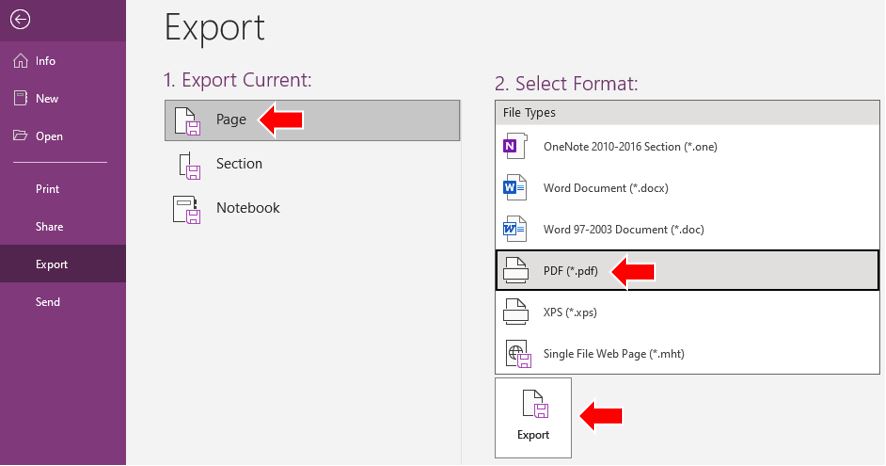
Exporting a single Page