The following guide has been created to introduce staff to Microsoft OneNote Class Notebook, a powerful tool designed to transform classroom collaboration and organisation. This guide covers various features and functionalities of Class Notebook, exploring how it can enhance teaching and learning experiences for educators and students alike.
Contents
- What is a OneNote Class Notebook?
- Content Library
- Collaboration Space
- Student Private Space
- Embedding Content
- Distributing Content
What is a Class Notebook?
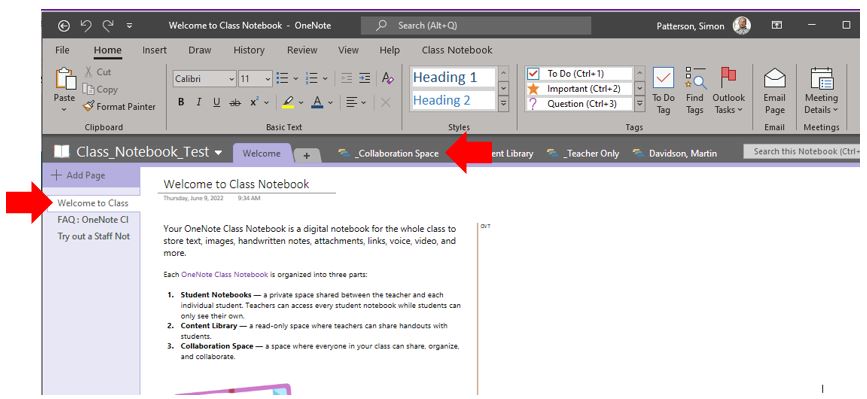
Microsoft Class Notebook serves as a digital hub for educators to organise course materials, assignments, and collaborative activities in one central location. It offers a structured framework that includes sections for content distribution, collaboration, and individual student workspaces, making it a versatile tool for managing classroom activities efficiently. A OneNote Class Notebook is like a physical notebook, whiteboard and filing cabinet all in one space.
It includes;
- a Content Library for sharing class materials
- a private notebook for each student
- an optional teacher-only area
- a Collaboration Space for working together with students and other teachers
Everyone’s work is saved to the cloud automatically, so many students and teacher/s can access it anytime, anywhere and from any device.
Below is a screenshot of an example Notebook. This default Welcome section contains helpful pages about how to manage OneNote.
Content Library
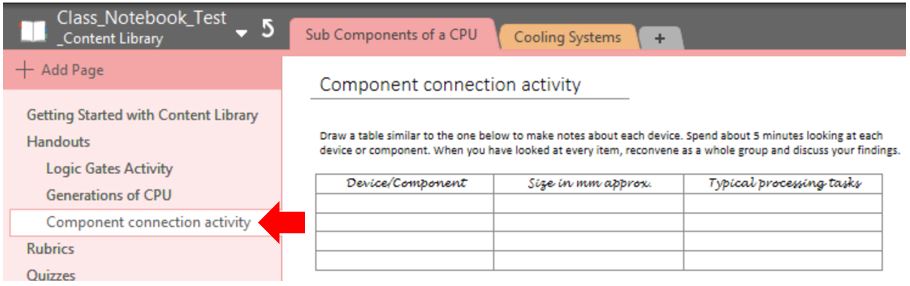
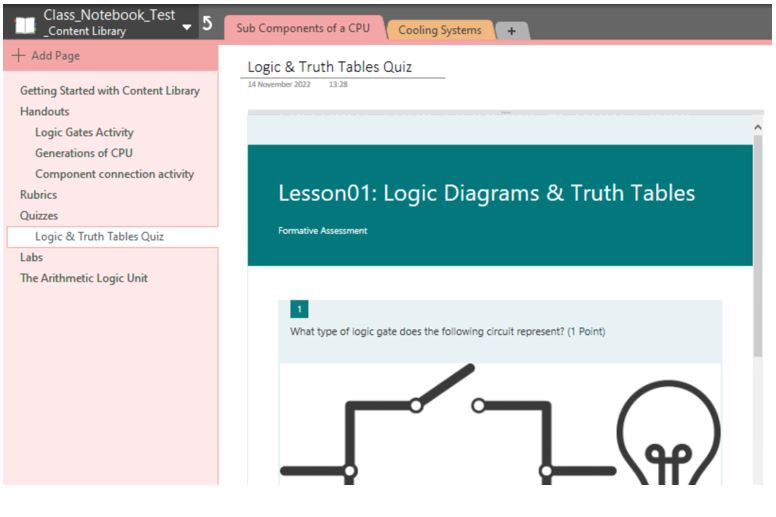
The Content Library within Microsoft Class Notebook provides a dedicated space to store and organise course materials. It serves as a repository where resources such as lecture notes, handouts, and reference materials can be easily accessed and shared with students. The Content Library facilitates seamless content management, ensuring that academics can effectively deliver course materials to students. The Content Library resembles a filing cabinet full of class material. Only the lecturer can add and edit content to this section. The content library can be a good place to post assessments, ICAs and other class resources for students to gain access to.
Collaboration Space
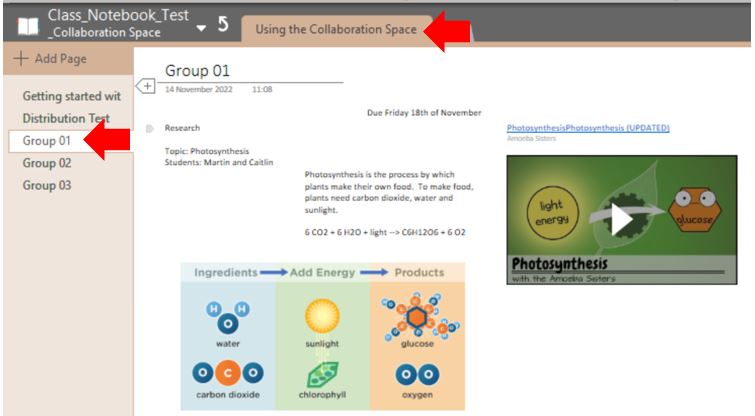
Microsoft Class Notebook features a Collaboration Space where academic staff and students can collaborate in real-time. This interactive environment fosters group discussions, brainstorming sessions, and collaborative projects, allowing for dynamic engagement and knowledge sharing among participants. The Collaboration Space promotes active learning and collaboration, enabling educators to facilitate meaningful interactions within their classroom community. It’s the section of the Notebook that acts like a “whiteboard”. Each student can edit these pages and add content.
Student Private Workspace
Each student enrolled in a Microsoft Class Notebook has access to a private workspace, they can take notes, complete assignments, and organise their learning materials. This personalised environment empowers students to work at their own pace, review course materials, and track their progress throughout the module. The Student Private Workspace promotes student autonomy and individualised learning, enhancing the overall learning experience. OneNote Class Notebook automatically creates a private workspace for each student.

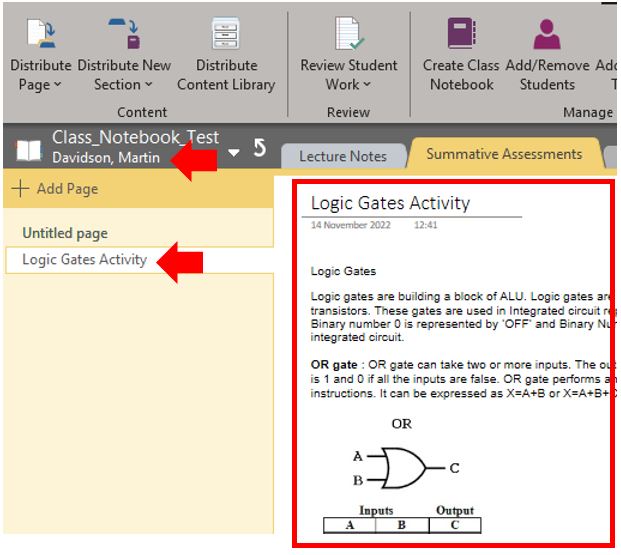
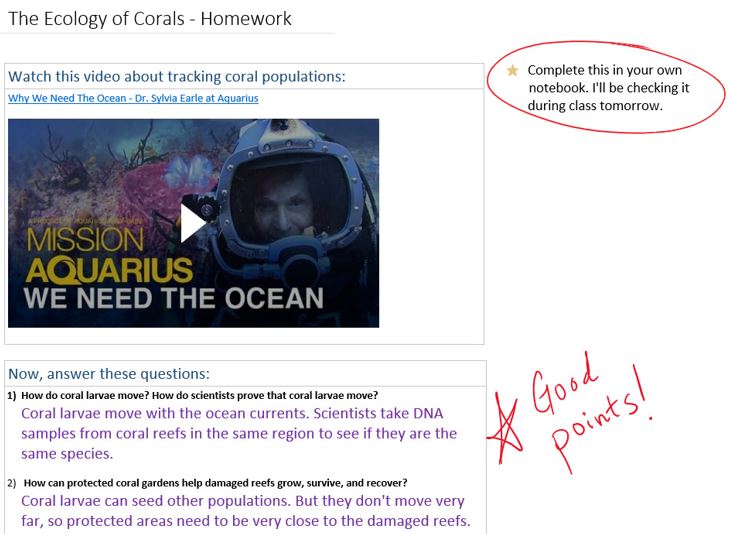
Like a student exercise book, Notebooks can be collected, marked and returned with feedback to students. Any feedback given to a student is only available to that student in question. In the example below, Martin has completed his work on this assignment and feedback has been given.
Embedding Content
Microsoft Class Notebook allows educators to embed external content directly into their course materials, enriching the learning experience with multimedia resources. This feature enables educators to integrate videos, websites, and multimedia files seamlessly into Class Notebook pages, providing additional context and resources to support student learning. Embedding content enhances engagement and comprehension, making learning materials more interactive and engaging for students. You can embed a wide variety of content from other sources into OneNote, examples include office documents, videos, audio clips, and more by inserting and pasting or linking to such content right in your notes.
OneNote currently supports embedding content from the following sites and services:
For example…
A Microsoft Form can be embedded, which makes it easy to quickly assess and evaluate student learning. This will help to ensure how best to meet the needs of each student.
Distribute pages and sections in the Class Notebook
With Microsoft Class Notebook, Pages and Sections can easily be distributed to students, ensuring that course materials and assignments are delivered efficiently. This feature streamlines the distribution process, allowing educators to schedule content releases and monitor student progress effectively. Distributing pages and sections can provide students with timely access to course materials, facilitating a smooth and organized learning experience.
As content (such as materials) is added to the Content library in OneNote Class Notebook which is read-only to students, students can gain access to this material by either:
- Students can copy and paste the content from the content library to their own Student Private Workspace.
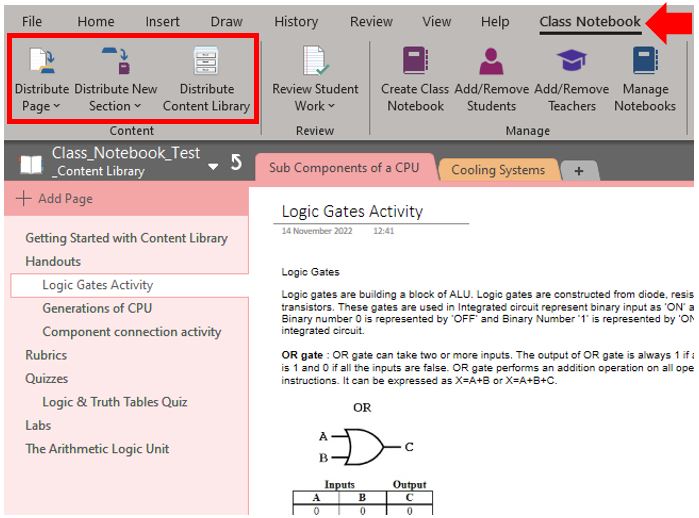
- The staff member can use the distribute content feature, which allows them to push a page to all the students in a notebook at once.
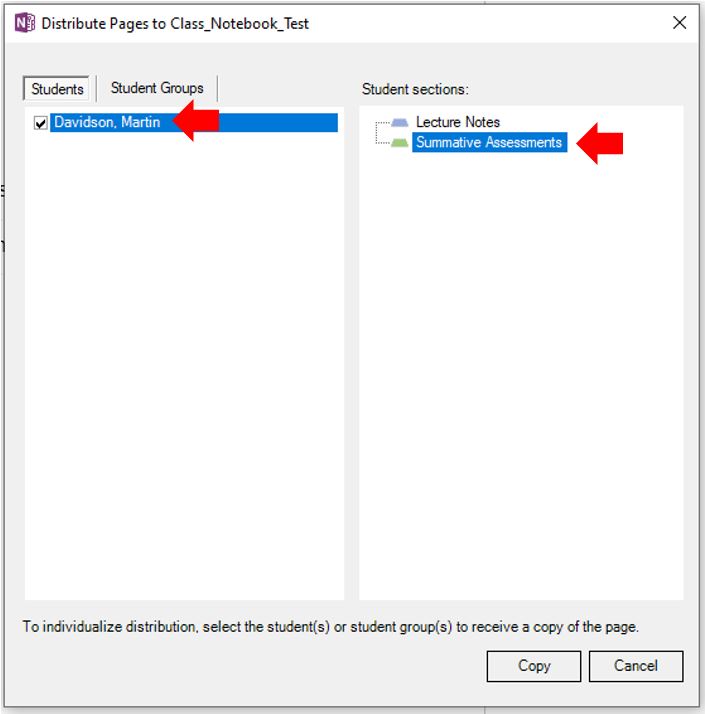
To distribute a worksheet, ensure that the page or section to be copied is currently selected then click on the Class Notebook menu item and select Distribute Page or Distribute New Section.
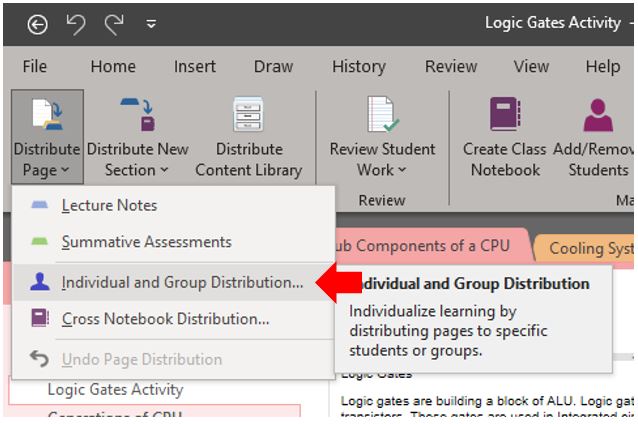
By clicking the Distribute page it will then ask which section of the student’s Notebooks the page should be pushed to. Once the distribution process has been completed to check the distribution, collapse the Content library open one of the test students and open the section where the page should have been copied.
You can also distribute content to individual students instead of the full class. On the Distribute Page, you will see an option that says individual distribution so this will allow you to pre-select only certain students.
This Notebook only includes one student, for a standard cohort a list of all students would be shown, and the specific students can be selected.
The specific student’s Class Notebook can then be checked to ensure that the page has been copied to the desired location.