
Check accessibility of PDFs (Adobe Acrobat DC)
This guide has been created to support staff in producing fully accessible Adobe Acrobat PDF documents.
Introduction to Adobe DC and Accessibility
Adobe Acrobat includes a variety of tools to support the creation of accessible PDF documents and check existing PDF documents. These accessibility checks are compliant with various recognised standards such as Web Content Accessibility Guidelines (WCAG) 2.0 and PDF/UA (Universal Access, or ISO 14289).
PowerPoint Accessibility in Context
To make an accessible Adobe PDF document, you should consider not just the types of information in the file, but also the ways in which students will access and consume the content.
To access the accessibility options in Adobe Acrobat, open the Tools menu, navigate to Protect and Standardise and click the Add button to append the accessibility options to the right-hand side menu.

Once you have added the Accessibility tool to the shortcut you can now click on link to open the Accessibility submenu. There are several options included on this menu that will be explored in the following sections of this guide.
Check accessibility of PDFs (Acrobat Pro)
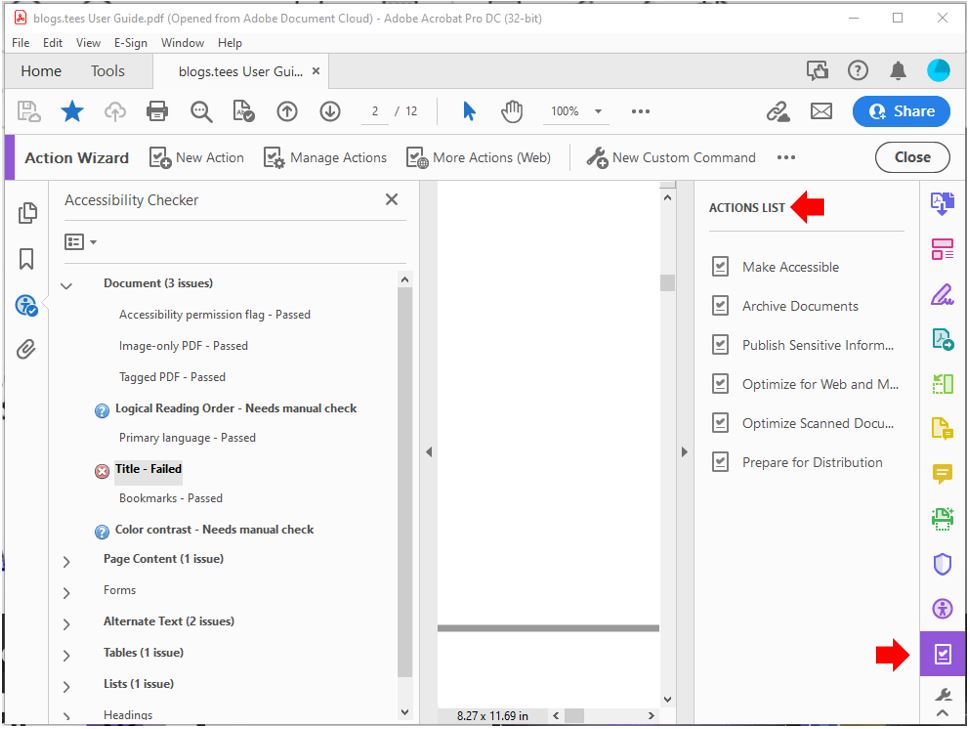
Adobe Acrobat includes features that allow you to automate ways to check the accessibility of a PDF file. The Accessibility Check feature in Acrobat checks a PDF for many of the characteristics of accessible PDFs. You can review the various accessibility problems to look for and how you want the results reported.
The Accessibility toolset is displayed in the secondary toolbar. In the secondary toolbar, click Accessibility Check.

The Accessibility Checker Options dialogue box is displayed.
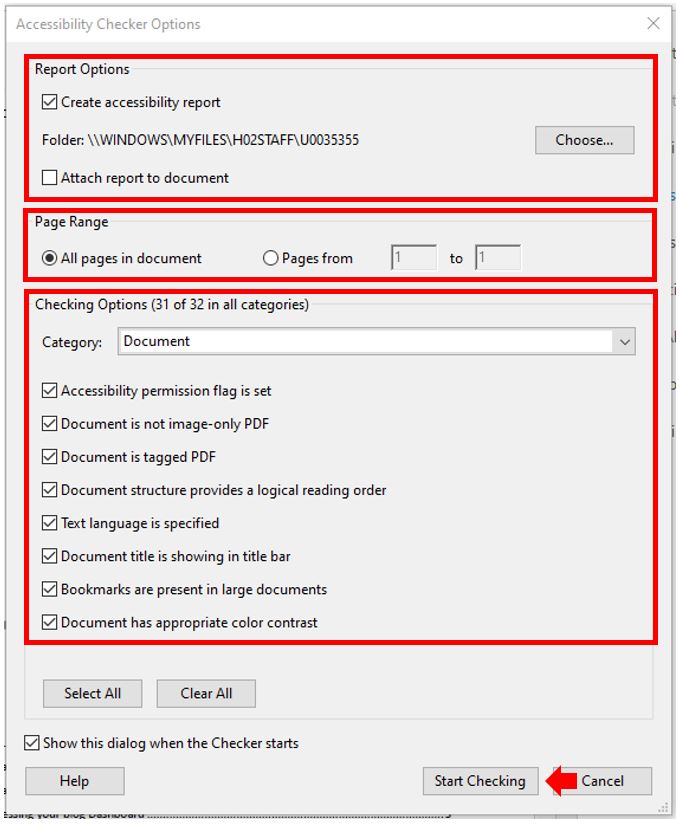
In the Report Options section, select options for how you want to view the results. You can save the results as an HTML file on your system or attach the results file to the document itself. Select a page range if you prefer to check individual pages of a document.
Select one or more of the Checking Options and click Start Checking.
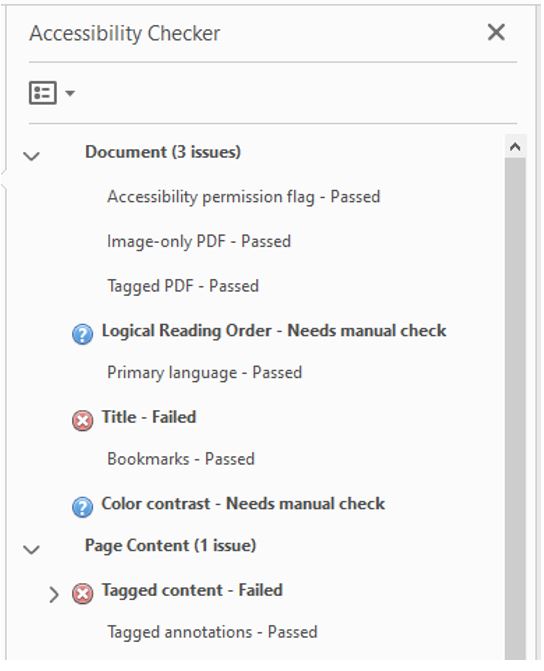
The results are displayed in the Accessibility Checker panel on the left, which also has helpful links and hints for repairing issues. If you created a report in the previous step, the results will also be available in the selected folder.

The Accessibility Check feature cannot distinguish between essential and nonessential content types, so some issues it reports don’t affect readability. Therefore, it’s a good idea to review all issues to determine which ones require correction.
The report includes feedback for each area it checks with each being given one of the following status categories:
- Passed: The item is accessible.
- Skipped By User: The rule was not checked because it wasn’t selected in the Accessibility Checker Options dialogue box.
- Needs Manual Check: The Full Check/Accessibility Check feature couldn’t check the item automatically. Verify the item manually.
- Failed: The item didn’t pass the accessibility check.
Additional techniques to carryout PDF accessibility checks
Reflow Tool
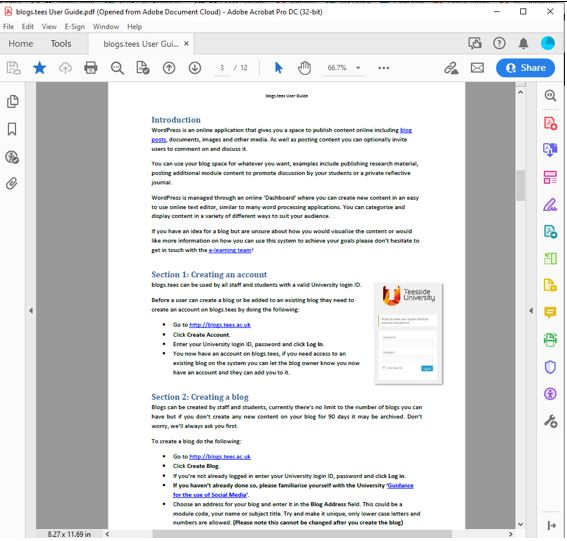
Use Reflow view to quickly check the reading order. Select View menu > Zoom > Reflow (or press Ctrl + 4)
 |
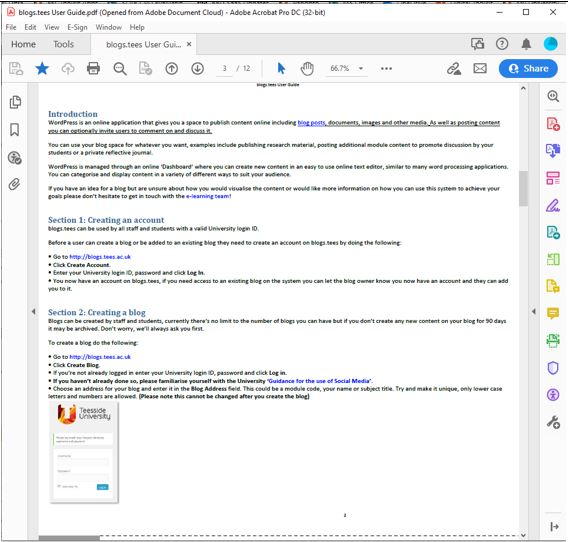 |
| In standard PDF document view | In Reflow PDF document view |
Find more information on using the Reflow tool here
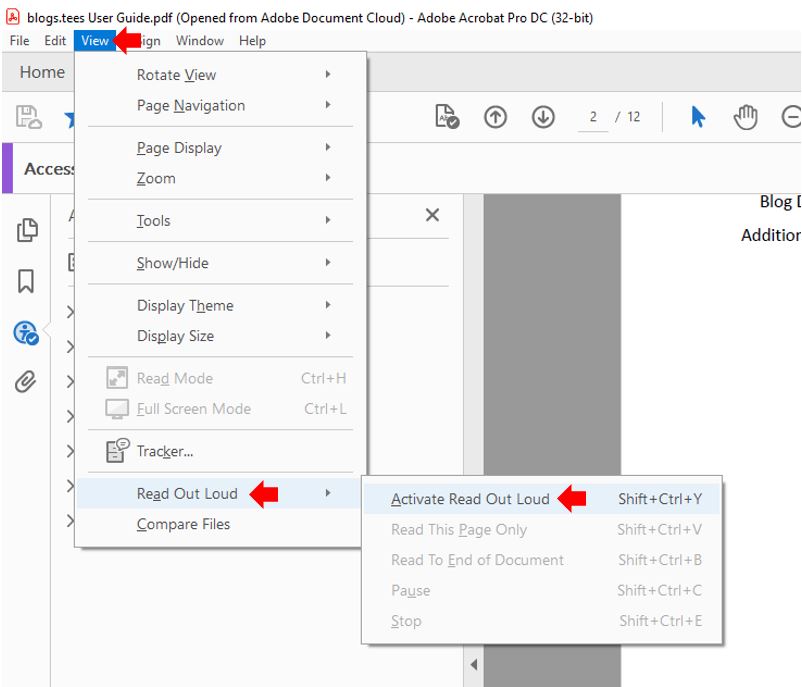
Read Out Loud Tool
Use Read Out Loud to experience the document as readers who use the text-to-speech conversion tool experience it. Select View menu > Read Out Loud > Activate Read Out Loud (or press Shift + Ctrl + Y)
Find more information on using the Readout loud tool here
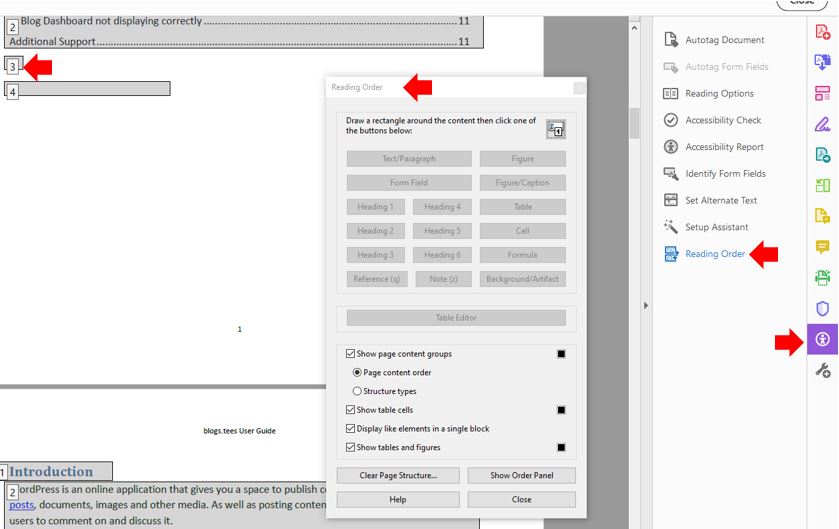
Reading Order tool
Use the Reading Order tool, Order, Tags, and Content panels to examine the structure, reading order, and contents of a PDF.
Find more information on using the Reading Order tool here.
Fix accessibility issues
To fix a failed check after running an accessibility check, right-click (Windows) the item in the Accessibility Checker panel. Choose one of the following options from the context menu:
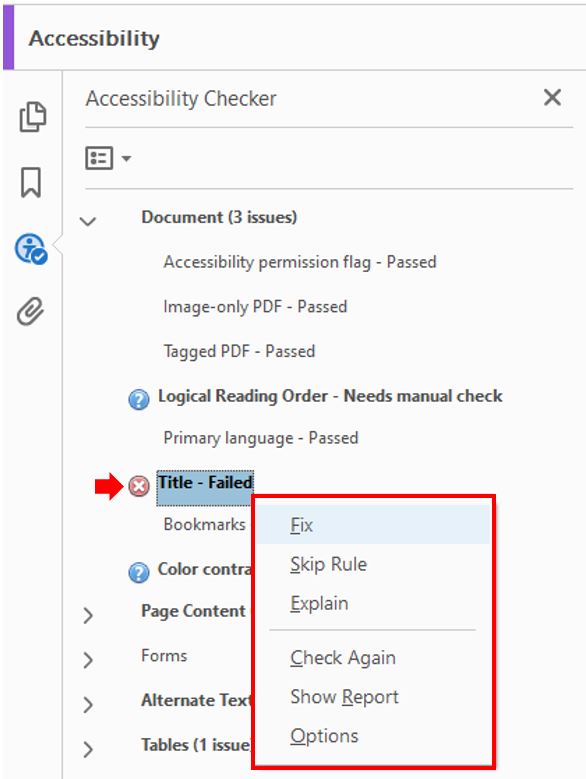
- Fix: Acrobat either fixes the item automatically or displays a dialogue box prompting you to fix the item manually.
- Skip Rule: Deselects this option in the dialogue box for future checks of this document and changes the item status to Skipped.
- Explain: Opens the online Help to offer more details about the accessibility issue (useful if you are unsure of what is causing the accessibility problem.
- Check Again: Runs the checker again on all items. Choose this option after modifying one or more items.
- Show Report: Displays a report with links to tips on how to repair failed checks.
Make PDFs accessible
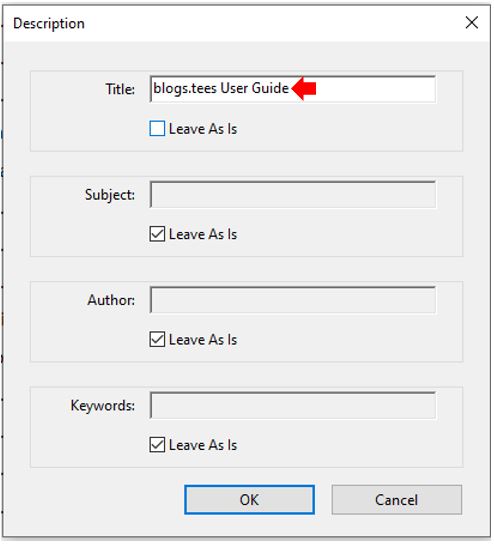
The Make Accessible option includes steps that can be taken to make a PDF accessible. It gives prompts to address accessibility issues including missing document descriptions or titles. It also looks for other common elements that need further action including:
- Scanned text
- Form fields
- Tables
You can run this action on all PDFs except dynamic forms and portfolios.
To run the Make Accessible feature follow these steps:
Choose Tools > Action Wizard.
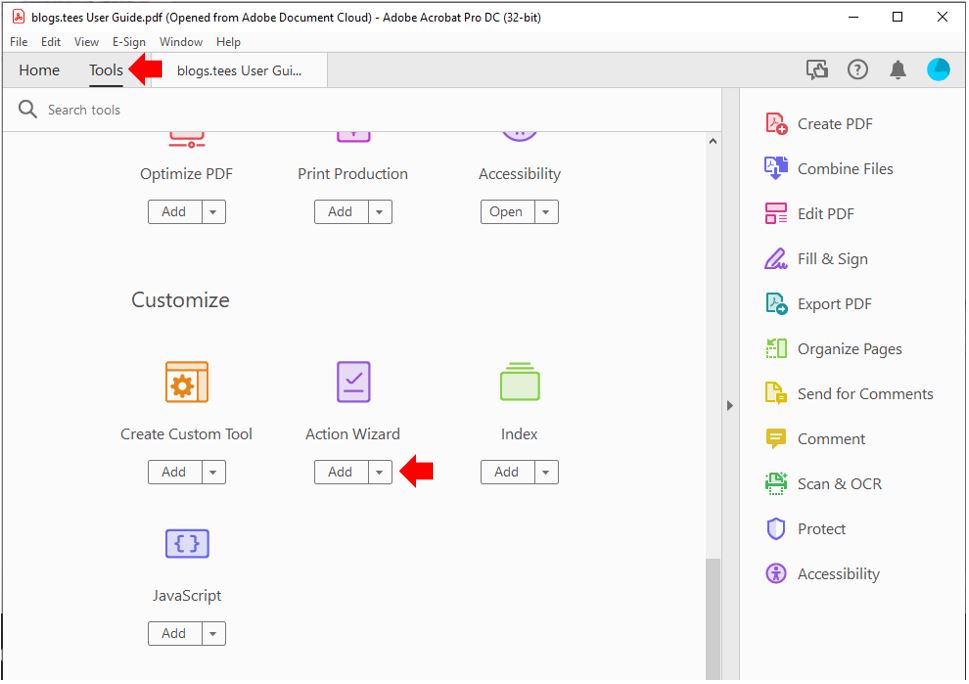
The Action Wizard toolset is displayed in the secondary toolbar (the original toolbar might collapse to reduce the amount of space that is used on-screen).
From the Actions List, click Make Accessible.
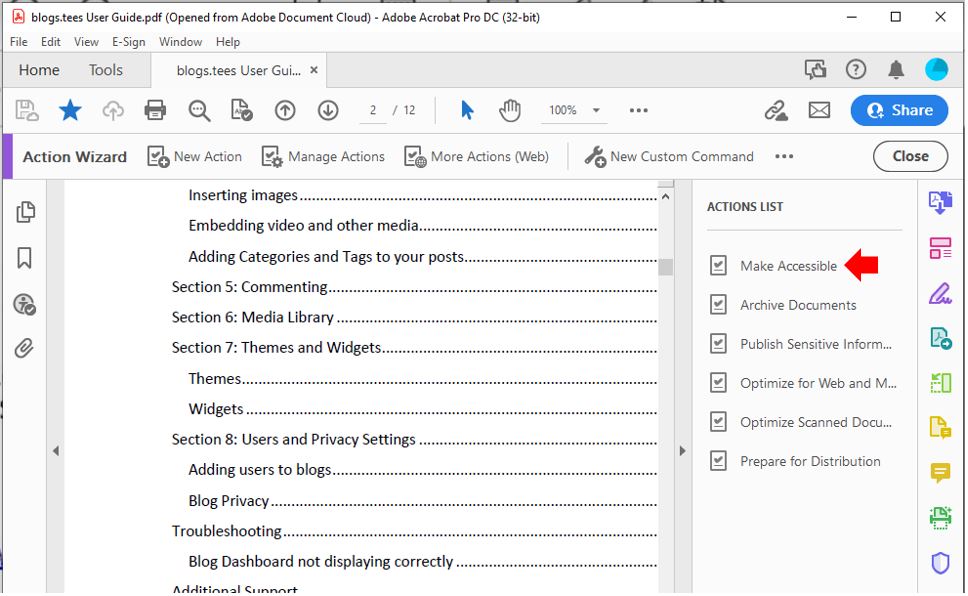
The right-hand pane changes to display each task included in the Make Accessible action and the instructions required to perform the action.
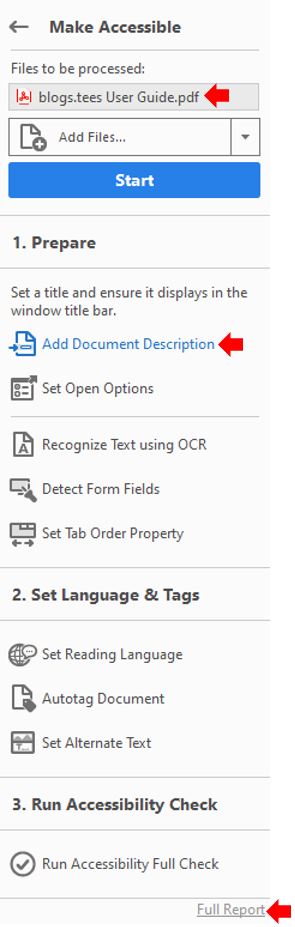
Select the file/s that you want to apply the Make Accessible action to. By default, the action runs on the document that’s currently open, so this is already selected. You can select Add Files to add additional files or a folder to run the action (or if you don’t have a PDF document currently open).
In this example the document selected is blogs.tees User Guide.pdf and the Prepare action selected is Add Document Description so when the Start button is pressed the Make Accessible wizard will load the options window to modify, set or configure these options.
The Make Accessible feature includes a variety of techniques that can be applied to a PDF document to increase its accessibility compliance.