
This guide explains how to provide grades and feedback for assignments submitted electronically via Blackboard.
As explained in the Creating an Assignment guide, whenever you create an assignment in Blackboard, an associated space is automatically added to the Gradebook. This is used to store provisional grade information and provide feedback to your students. You can access assignments that have been submitted and need grading from:
- Within a Module > the Gradebook
- Within a Module > the Assignment/Test item itself.
- Marks on Base navigation, to view all gradable items for all your Modules
Accessing & Grading Assignments via Gradebook
The module Gradebook shows all gradable items. This includes Assignments, Tests, Surveys and gradable Blogs, Journals or Discussion Boards you may have setup in your module. You can also set up an Overall Mark within the Gradebook.
The default view is Markable Items, as shown below. It is recommended you explore the other views (such as Overview) to get a better understanding of what is available to you via the Gradebook.
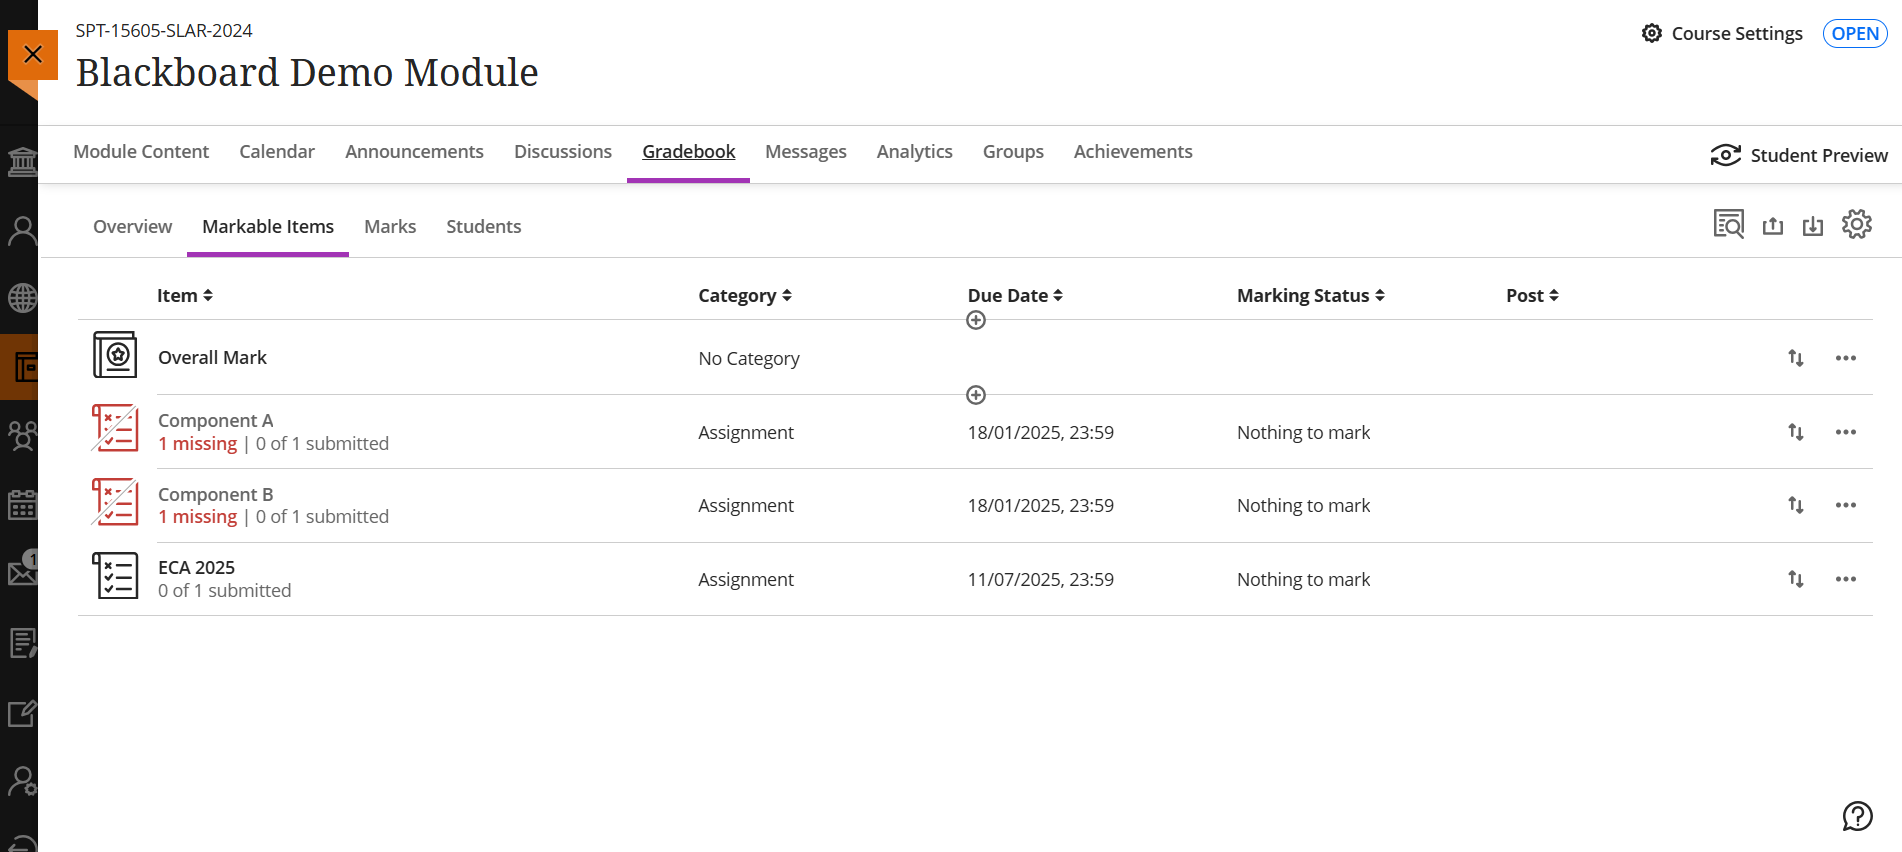
Markable items shows all items that can be marked, as well as calculated options. The view can be sorted depending on preference by clicking the column titles. The Marking Status of each assignment gives you a clear indication of whether students have submitted, and whether there is outstanding grading. Clicking on assignment titles will take you to that assignment where you can access, and grade the students work.
The Marks view of the Gradebook shows all the students within the module on the left hand side, with corresponding columns for all the assignments.
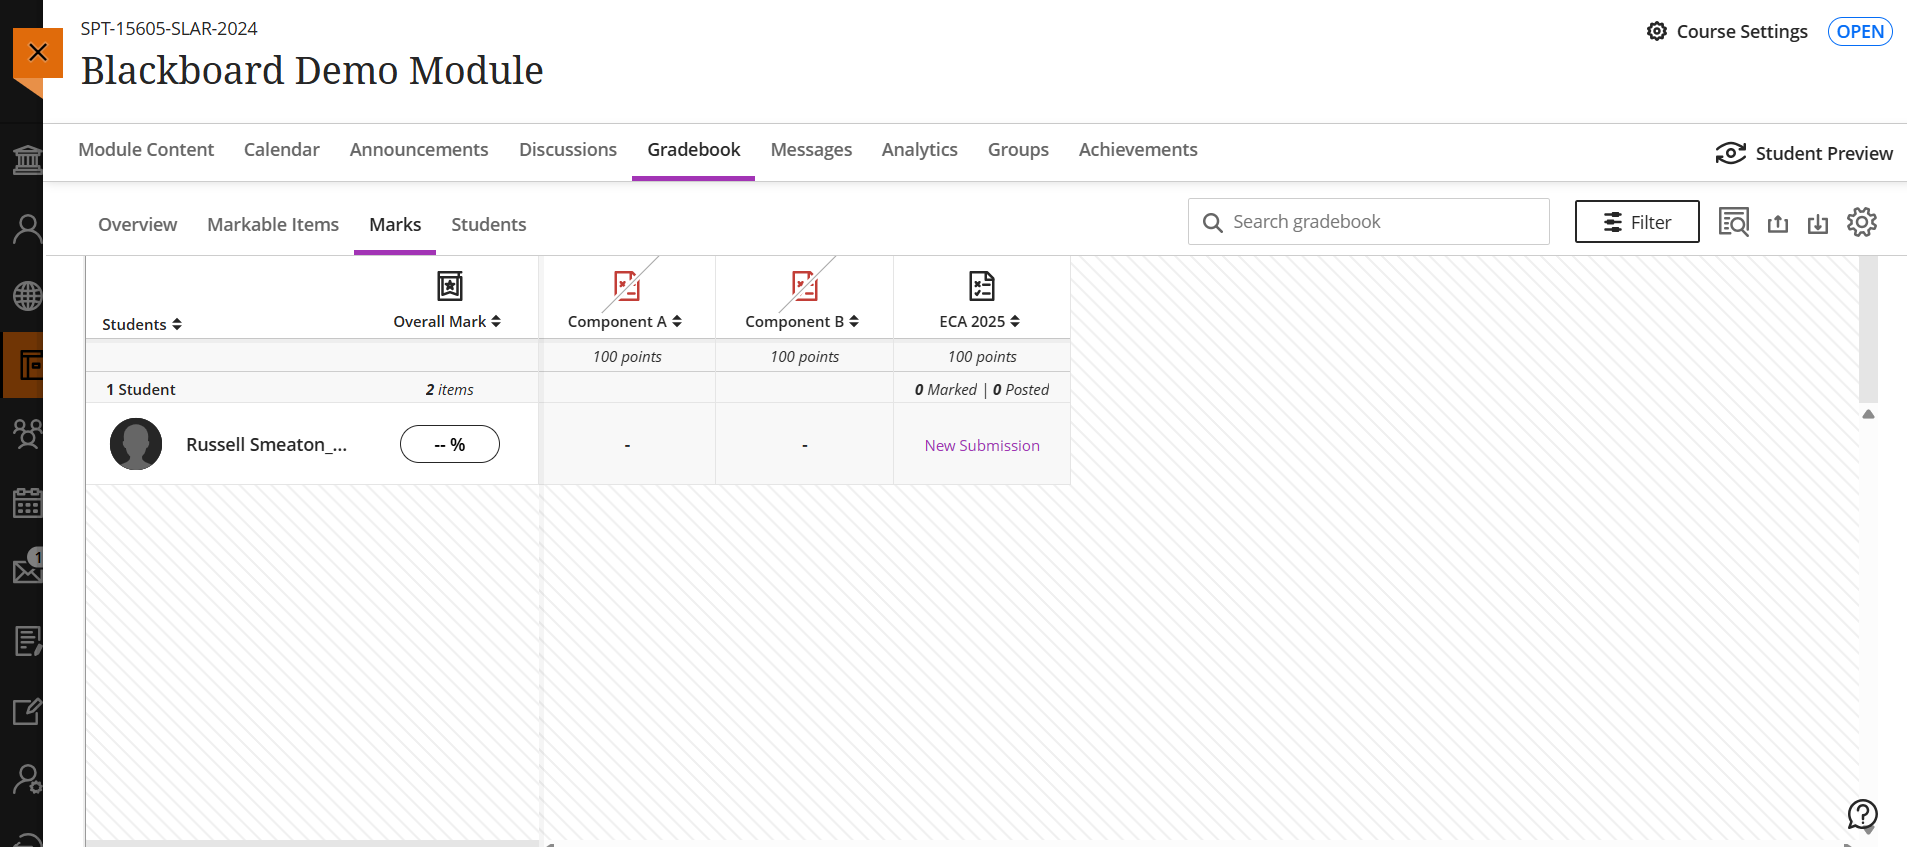 Any student submissions will be indicated by either New Submission (if the work has not been marked) or the grade (if the work has been marked). To view the submission, hover your mouse over the appropriate cell and click New Submission. You can now input a grade or View the assignment to directly open the students submission.
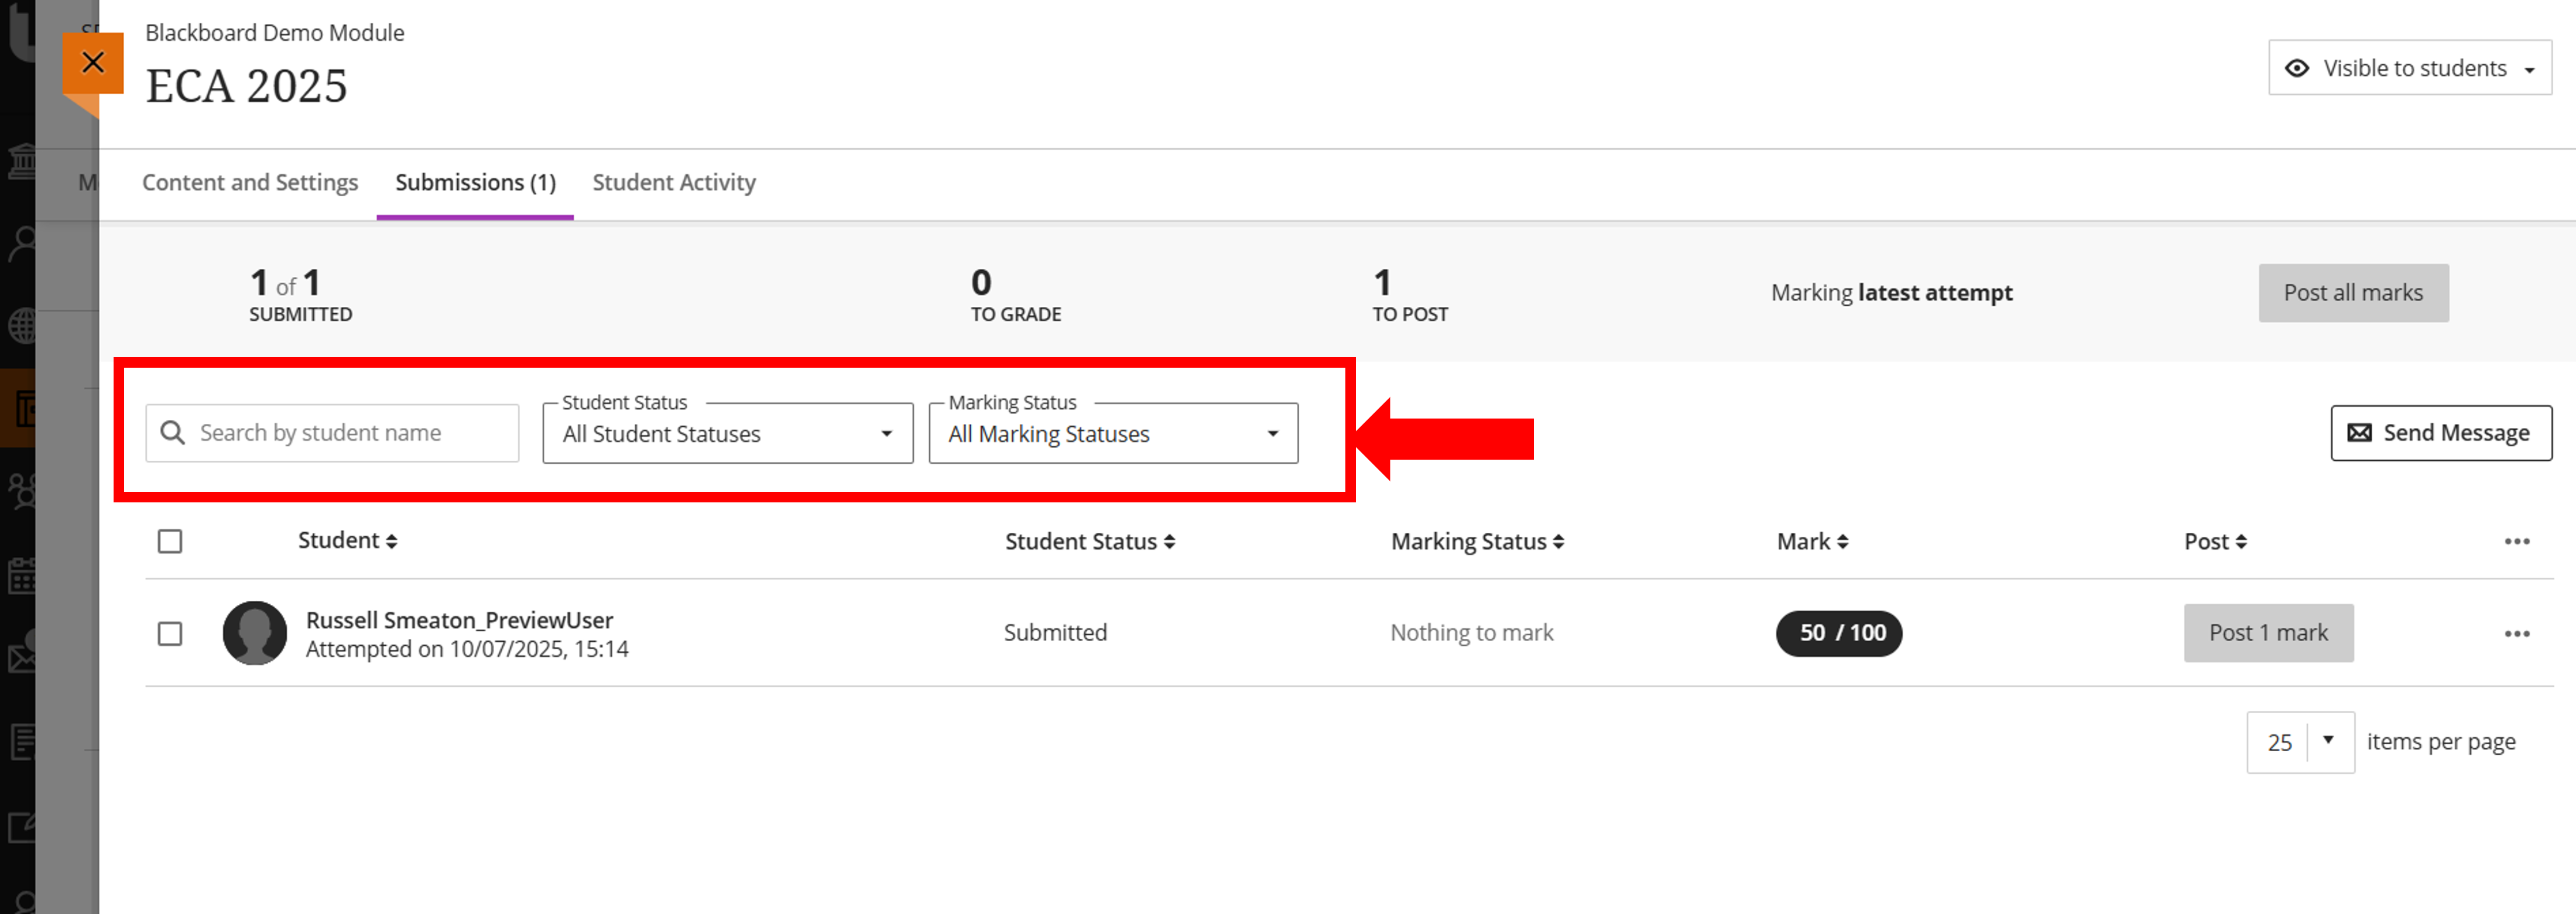
Clicking on an assignment name will open the Submissions page. On the Submissions page, there are a number of filters to assist with the marking process. You can search for specific students, filter by Student Status or by Marking Status. This can speed up your workflow, allowing you to focus on work that needs to be completed.
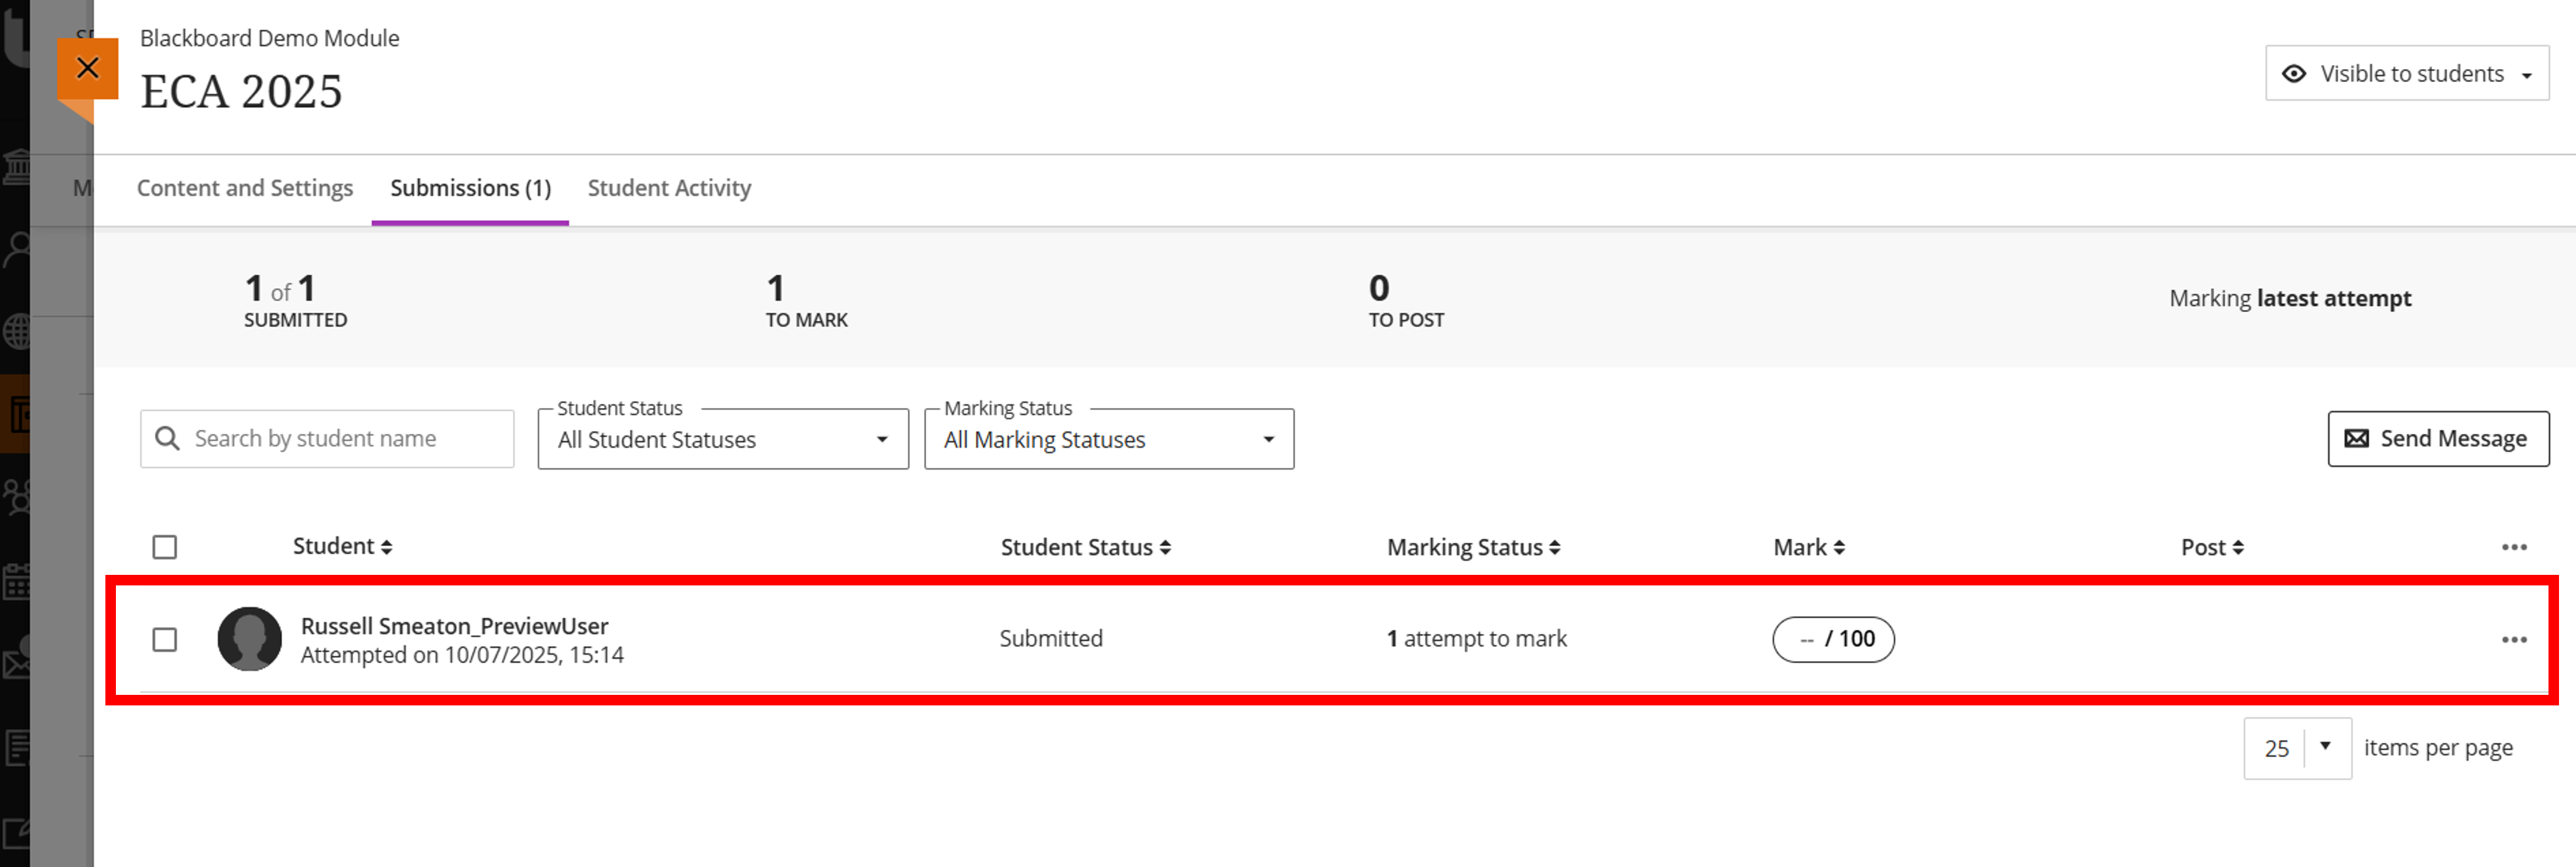
To grade individuals work on the Submissions page click anywhere on that students submission status (as shown below). Alternatively, if at this stage you only want to assign a grade, click on the grade pill in the Mark column.
The Grade Assignment Page
The Grade Assignment page enables you to view, comment and grade student assignment submissions within a single interface. Documents submitted by students in Word, PowerPoint, Excel and PDF format are rendered to be viewed directly within the browser. Please note that PowerPoints that include embedded audio will need to be downloaded in order to listen to the audio.
The following shows a typical view:
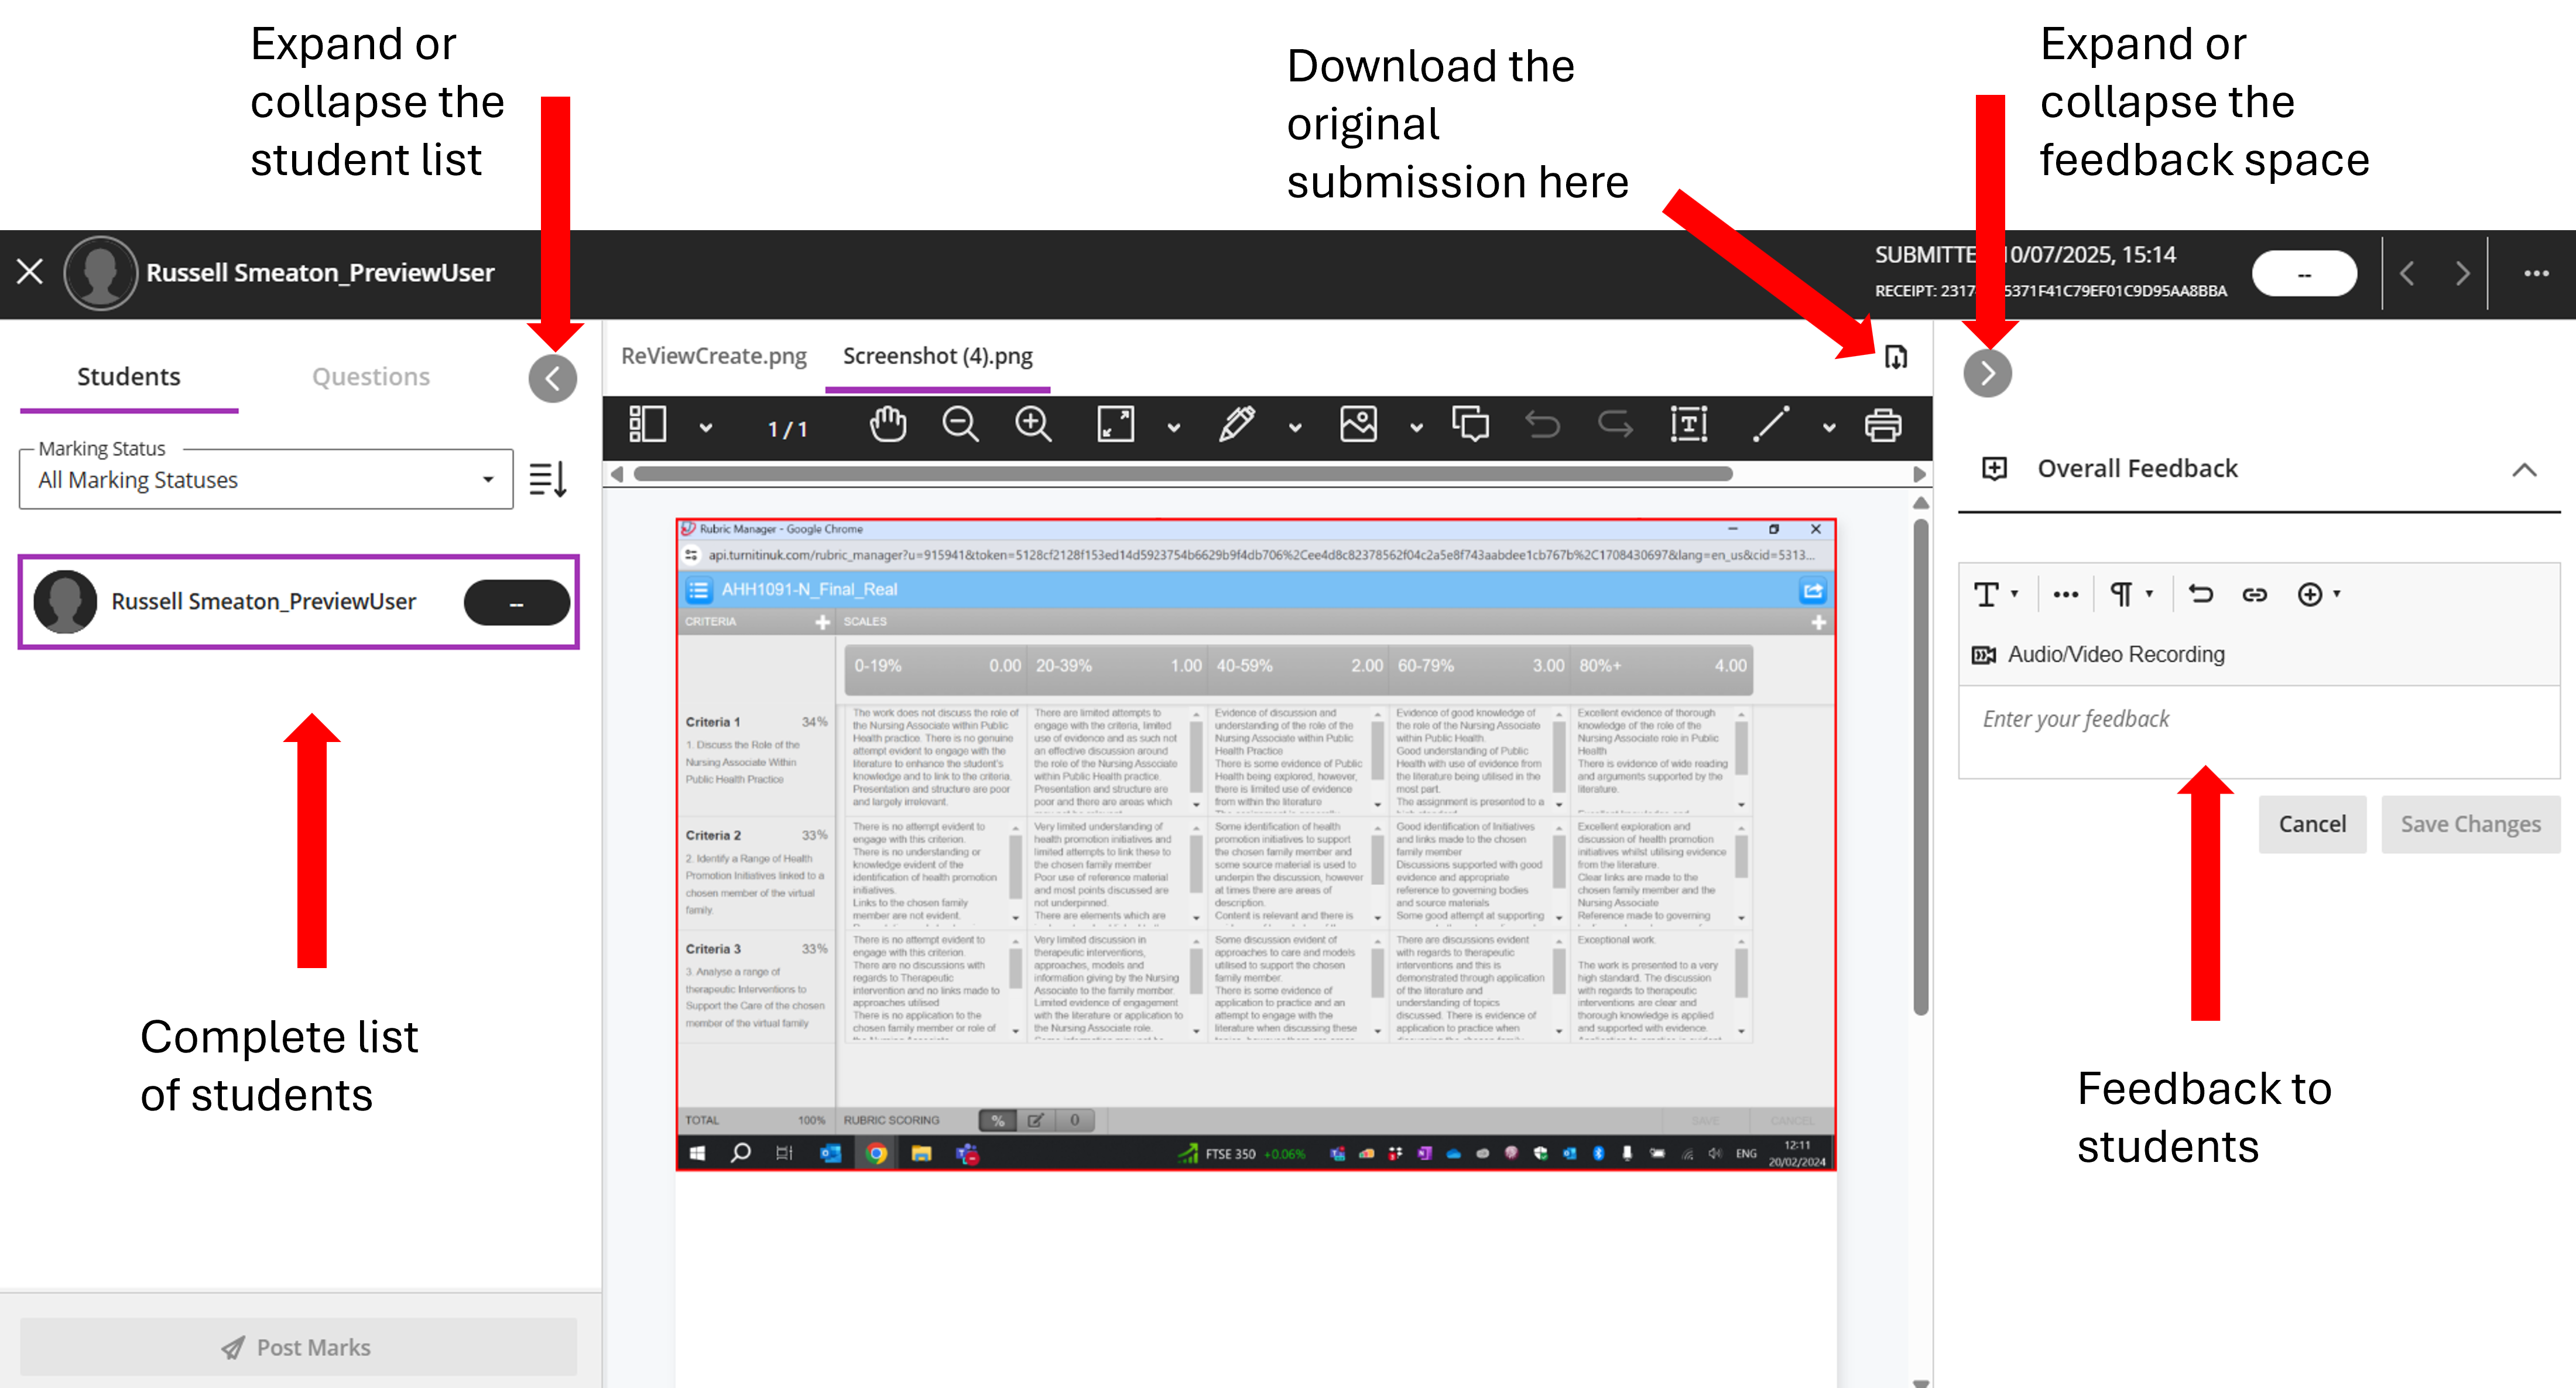
From left to right we see:
- Student List. This panel can be expanded or collapsed, allowing you to navigate to other students who have submitted.
- Main Submission. In the main part of the screen, you can see the inline view of the assignment. If there are multiple files, you can switch to the different files using the file names listed at the top of this panel.
- Feedback panel. To the right, you can see the space to provide Overall Feedback. As with the student list, this panel can be expanded or collapsed. Above this space, the grade pill is visible, allowing you to enter the grade for this assignment. To the immediate right of the grade pill are navigation options, letting you move to the next piece of work to be marked.
The inline grading bar provides you with all the tools you need to grade the assignment, such as the ability to draw on assignments, add comments and so on. To add a comment on the submission, select the Comments tool by clicking once on it in the grading bar. Then, click on the assignment where you wish to make a comment and the comment box will appear, allowing you to type your comment directly in the relevant space. The comment box will contain your name, the date and time you made the comment, and the comment itself. You can edit or delete comments by clicking on it, and clicking the ellipses (the three dots).
To fully experience the options available, you can experiment with your Sandbox Module. For example, in your Sandbox module, create an assignment. Switch to Student Preview, and make a submission. When you exit Student Preview mode, select the option to Save – this will preserve the submission, allowing you to experiment with the marking fully.
Attaching feedback to an assessed assignment
To attach a file as feedback, click the Insert Content dropdown and then the attachment paperclip icon ![]() in the Feedback for Student text box.
in the Feedback for Student text box.
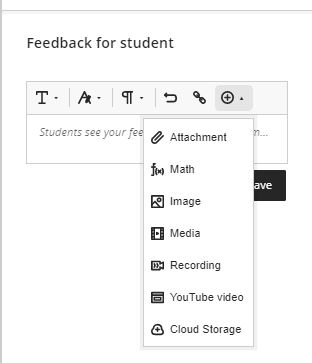
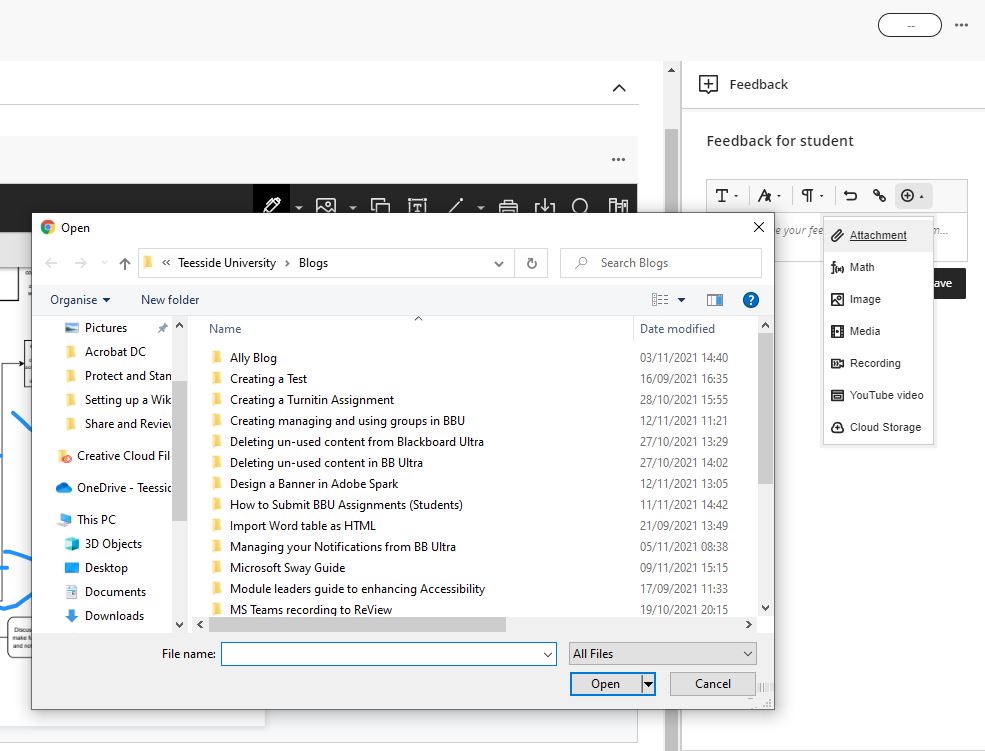
This will launch a new window which allows you to attach a file by clicking Browse My Computer and then selecting the file from your computer. This could be a document with typed feedback or an annotated version of the student’s work. You could even attach an MP3 audio file. Remember to click Submit in this window to attach the file. To remove the file, simply delete the link in the text box.
Remember to click Save to save your feedback.
Post Marks
In Blackboard Ultra, your grades and feedback are not visible to students until you POST them. You can post individual students’ grades/feedback or post all from the Gradebook.
 To post all grades at the same time:
- In Grid view click on the assignment column header and select Post all.
- In the List view select Post Marks next to the assignment.
- In the assignment Submissions list page click on Post all Marks.
After you grade assessments and post the grades, students can view their grades on their Marks page from the base navigation or in the Activity Stream. They can also access the assessment, their submissions, your feedback, and their grades from the assignment in the Module Content area.