
This guide has been created to introduce the concept of assessment Rubrics, the different types of Rubrics available in Blackboard Ultra and how to create these Rubrics for assessment within Blackboard Ultra modules.
Contents
-
- What is a Rubric?
- How can students use Rubrics?
- Rubrics in Blackboard Ultra.
- Creating a Rubric in Blackboard Ultra.
- Assigning a Rubric to a Blackboard Ultra assessment.
- Editing a new Rubric.
- Editing a previously used Rubric.
- Types of Blackboard Ultra Rubric.
- Importing Rubrics from other Blackboard Modules.
-
What is a Rubric?
A rubric is a scoring tool you can use to evaluate graded work. When you create a rubric, you divide the assigned work into parts. You can provide clear descriptions of the characteristics of the work associated with each part, at varying levels of skill.
How can students use Rubrics?
Students can use a rubric to organise their efforts to meet the requirements of the graded work. When you allow students access to rubrics before they complete their work, you provide transparency into your grading methods.
About Blackboard Ultra Rubrics
Multiple rubrics can be created and used in each module. Rubrics consist of rows and columns. The rows correspond to the criteria. The columns correspond to the level of achievement that describes each criterion.
When a new rubric is created, it will consist of four rows and four columns. You can add up to fifteen columns and rows, and you can delete all but one row and one column.
Creating a Rubric in Blackboard
Rubrics can be created using two different workflows:
- In the Gradebook (not attached to a remarkable item such as a test, assignment or discussion board).
- In an Assignment, Test, or Discussion page (attached to a remarkable item).
The workflow for both methods will provide the same features to produce the rubric however, both have a slightly different starting point.
1. Workflow for creating a new rubric that is not attached to a remarkable content item.
Open the Gradebook in the Blackboard module that requires the new rubric to be created.
Click the Settings icon located in the upper right-hand corner of the page.
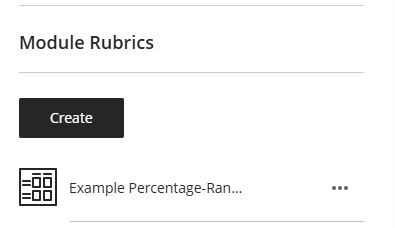
Under Gradebook Settings, look for Module Rubrics and click Create New Rubric.
2. Workflow for creating new rubrics or attaching previously created Rubrics directly to an assessable piece of content.
Either create a new markable content item (such as a test, assignment or discussion board) directly from the Module Content area or via the Gradebook. After the assessment has been located and opened use the following initial workflow.
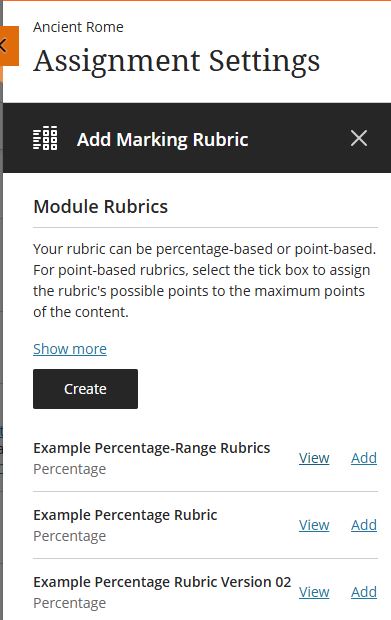
Click the Setting cog and under the Additional Settings > Use marking rubric section, click the Add marking rubric option. This opens the Add Marking Rubric menu and presents the following options.
See the four workflows for setting up the different types of Blackboard Rubrics covered later in this guide here.
Assigning a Rubric to a Blackboard Ultra assessment
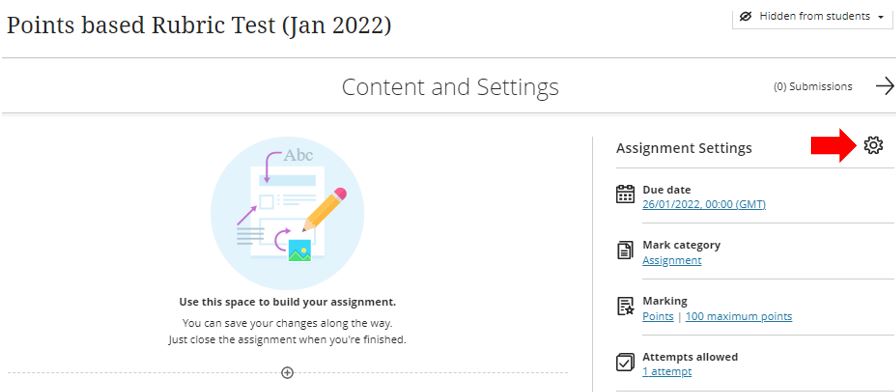
Having created the Blackboard Ultra assessment, click on the assignment settings cog.
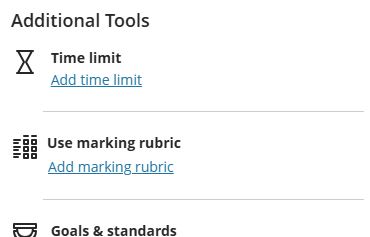
Scroll down the list of configurable settings and under Additional Tools > Use marking rubric click Add marking rubric.
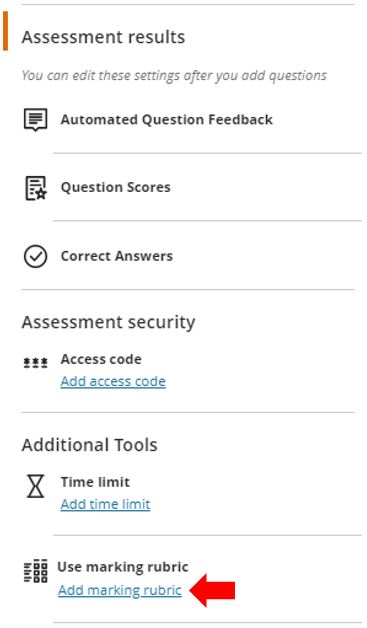 Image showing how to attach a previously created Rubric to an assessable piece of content created in Blackboard Ultra
To add a previously created Rubric (one that is already fit for purpose and requires no additional editing) or to also open and edit a previously created Rubric to be assigned to the assessable Blackboard Ultra content select from the available list and click Add. If you would like to check/edit the Rubric before adding click View and then once reviewed, click Cancel to close the ‘View Rubric’ menu and Add to attach the Rubric OR to edit the Rubric, click View to open the Rubric, make the required edits and updates to the rubric content, click Save which will close the rubric view menu and then click Add to attach the Rubric.
Once the Add button has been clicked, the Save button must be pressed to complete the assessment and rubric setup process.
Editing a new Rubric
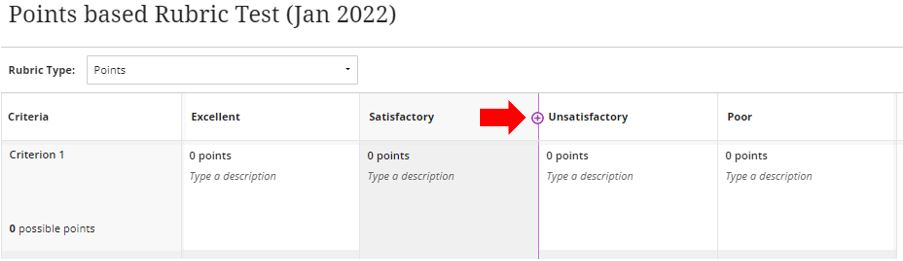
*NOTE If a Rubric has been created but not used for grading it can be modified, this includes the rubric title, rows, columns, and percentages.Additional grading boundaries can be added to the rubric before or after any of the current grade boundary columns by hovering the mouse on a column boundary line and clicking on the purple plus icon that appears. You can add multiple additional grading columns per criteria.
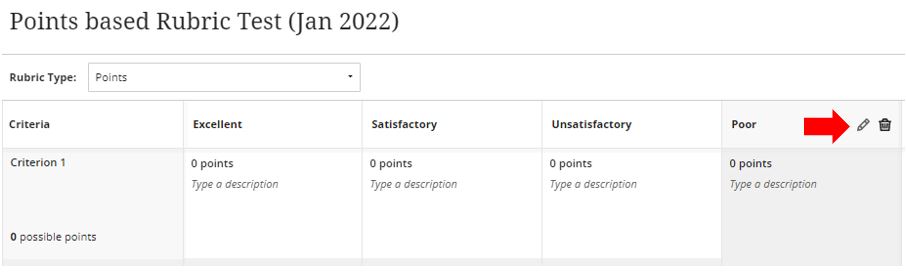
You can edit or remove grade boundary columns by hovering the mouse over the column heading and clicking the pencil icon (to edit) or trashcan icon (to remove)
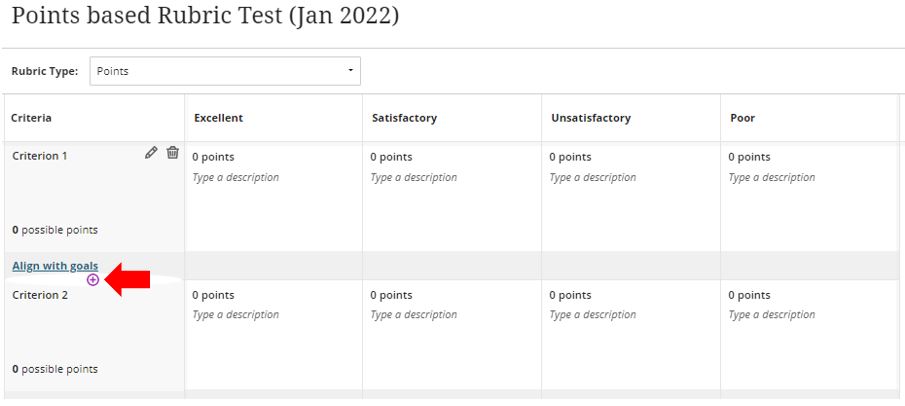
You can add additional criteria to a rubric, before or after any of the current criteria by holding the mouse on the row boundary line and clicking on the purple plus icon that appears. You can add multiple additional criteria.
You can also edit or remove grading criteria rows by hovering the mouse over the row heading and clicking the pencil icon (to edit) or trashcan icon (to remove)

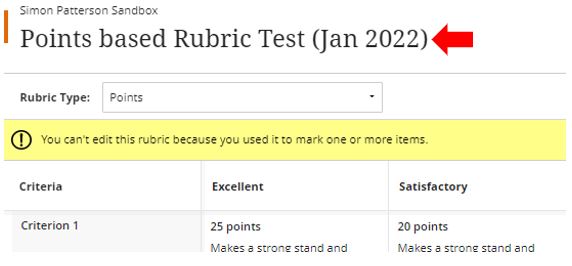
Editing a previously used Rubric
*NOTE If the rubric has been used for grading, modification of the rubric is not permitted.The following workflow is a workaround solution to editing a previously created but used Rubric (as above, once a Rubric has been associated with an assessment item and used for assessment it cannot be modified (for example, this could be considered academic dishonesty on the part of the Module Leader). The following workflow can be used to make a duplicate copy of a locked assessment Rubric so it can be used elsewhere.
If you’ve already used a rubric to grade an item, you can create a copy of the rubric and edit the duplicate version and attach this to the assessment instead.
From the Gradebook click the Settings cog.

Scroll down the list of settings to locate the rubric with the identified mistake/s and then either:
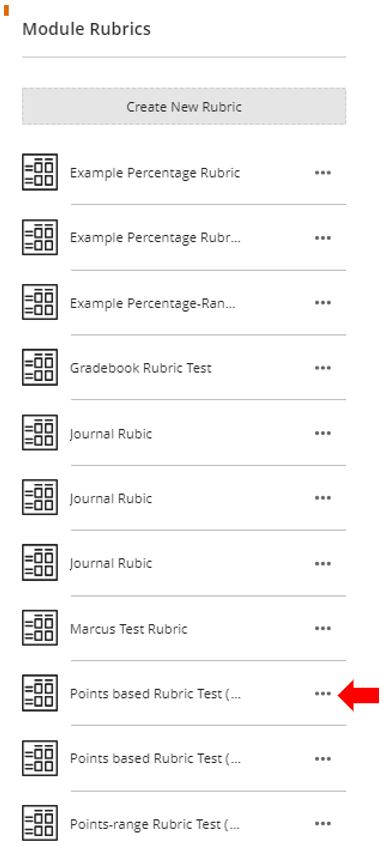
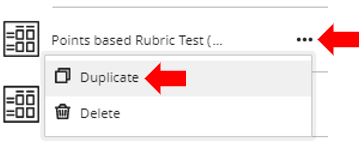
Click on the three dots to the right of the Rubric and choose Duplicate.
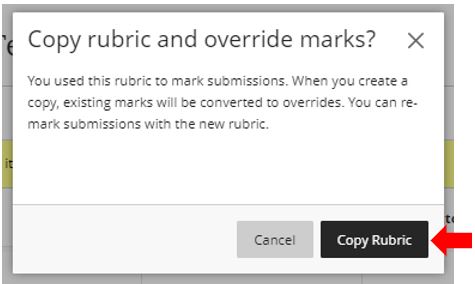
Open the Rubric (might be useful to check it is the correct rubric) and click the Create a Copy button in the bottom right of the screen.

When you create a copy of a rubric you used to grade a test or assignment, the new rubric is associated with the item. Any grades calculated with the original rubric are preserved, but these grades are converted to overrides.
The duplicate copy of the rubric will now open with the original rubric name appended with the current date and the word “copy” at the end. The new copy of the rubric will now be live and editable.
You can edit aspects of the duplicate rubric by clicking on the pencil icon that appears as you hover the mouse cursor over aspects of the rubric. In the example screenshot below the points ranges for the first three criteria have been updated.
Once the required changes have been made (remember to check that any changes to point ranges in the copied rubric correctly add up to the required total), click Save.
You must now remove the erroneous rubric that is currently attached to the assignment.
*NOTE Click the Remove button (rubbish bin icon) is slightly misleading as this action only removes the rubric from the assessment and does not permanently delete the rubric.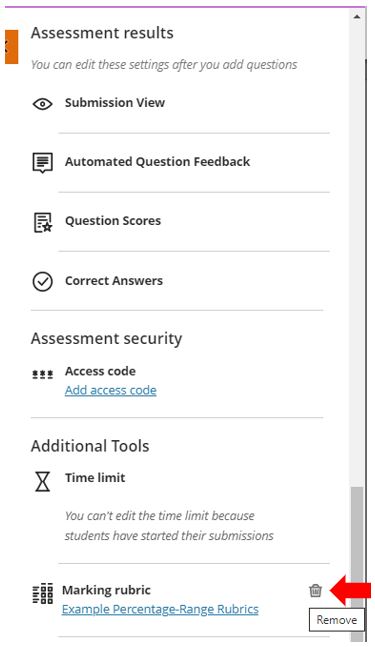
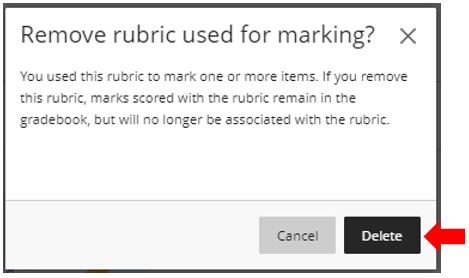
For any assessments already graded using the old rubric, the grades and feedback will remain but no longer be associated with the rubric (appear as added manually). Press the Delete button to confirm the action.
Once the original rubric has been removed you can now add the newly created duplicate rubric. Click Add marking rubric.
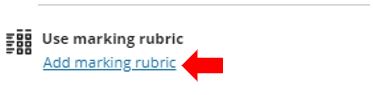
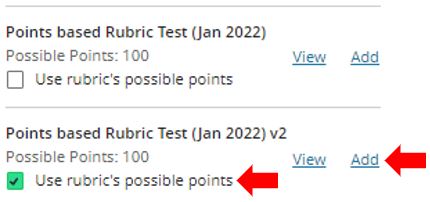
From the list, locate the new rubric and ensure you click Use rubric’s possible points. Click Add and then click Save to complete the process.
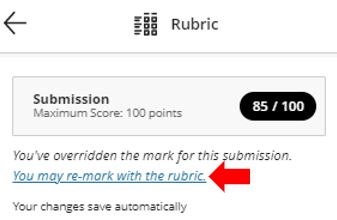
You can now regrade all assignment submissions with the new rubric. For assignment submissions graded using the previous rubric, you may need to tick the, You may re-mark with the rubric option.
Types of Blackboard Ultra Rubric
You can create four types of rubrics in a course:
- Percentage-based Rubrics: This type of Rubric can include multiple criteria where the criterion total percentage must equal 100% using only whole numbers. (It is possible to add rows set to 0% as long as the total percentage equals 100.)
- Percentage-range Rubrics: For this type of Rubric, each level of achievement has a range of values associated with it. When grading, select the appropriate percentage level for a particular level of achievement. The system calculates the points earned by multiplying the weight x achievement percentage x item points.
- Points-based Rubrics: For points-based rubrics, the maximum possible points should be less than or equal to 99,999. You may only use whole numbers. You may add rows set to 0 as long as your total points are less than or equal to 99,999.
- Points-range Rubrics: For points-range rubrics, the maximum possible points should be less than or equal to 99,999. You may only use whole numbers. You may add rows set to 0 as long as your total points are less than or equal to 99,999. The point range for each criterion must go from a lower range to a higher range.
Percentage-based Rubrics
For percentage-based rubrics, the criteria total percentage must equal 100%. You may only use whole numbers. You may add rows set to 0% as long as your total percentage equals 100.
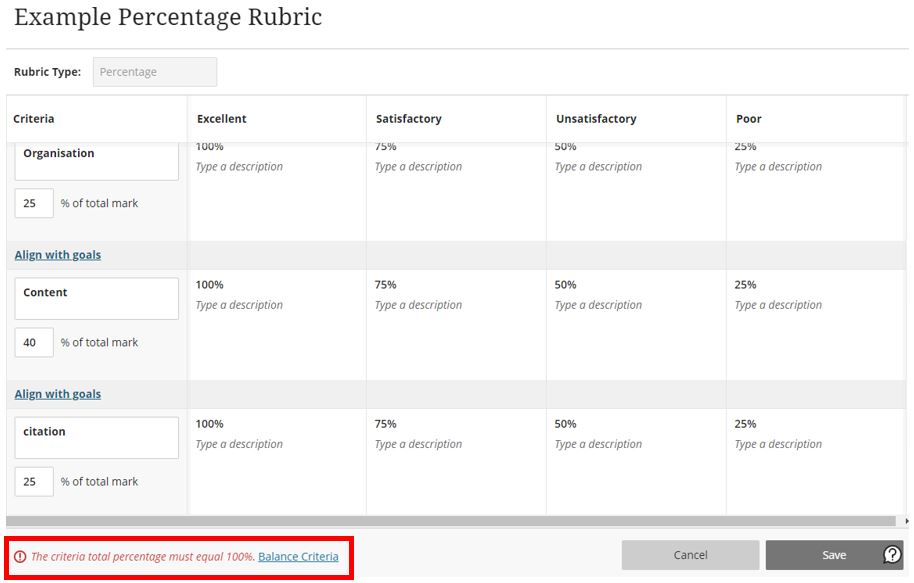 *NOTE If the total of the percentages doesn’t equal 100%, a warning message appears at the bottom of the screen.
Select Balance Criteria next to the message to auto-adjust the percentages so they equal 100 or, you can manually update the percentages as needed.
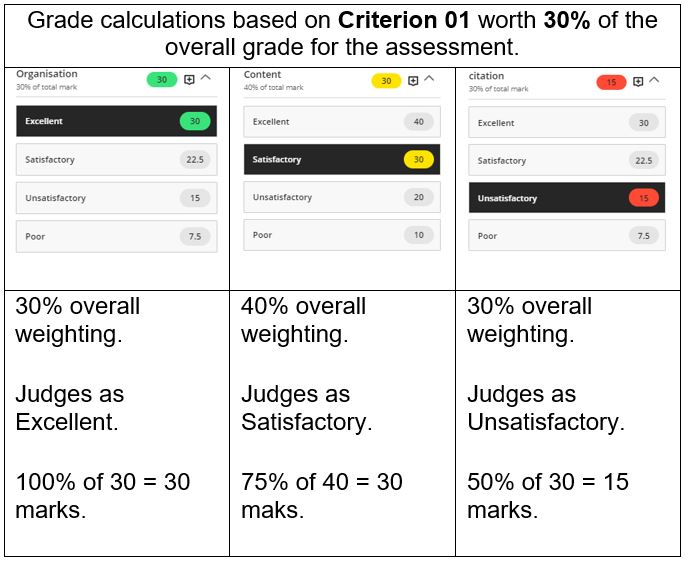
The system calculates the points achieved based on the assessor’s choice of performance per criterion (the default criterion includes, Excellent @ 100%, Satisfactory @ 75%, unsatisfactory @ 50%, and poor @ 25%). These are the only 4 values that can be applied per criterion, unlike the percentage range rubric that will be looked at next.
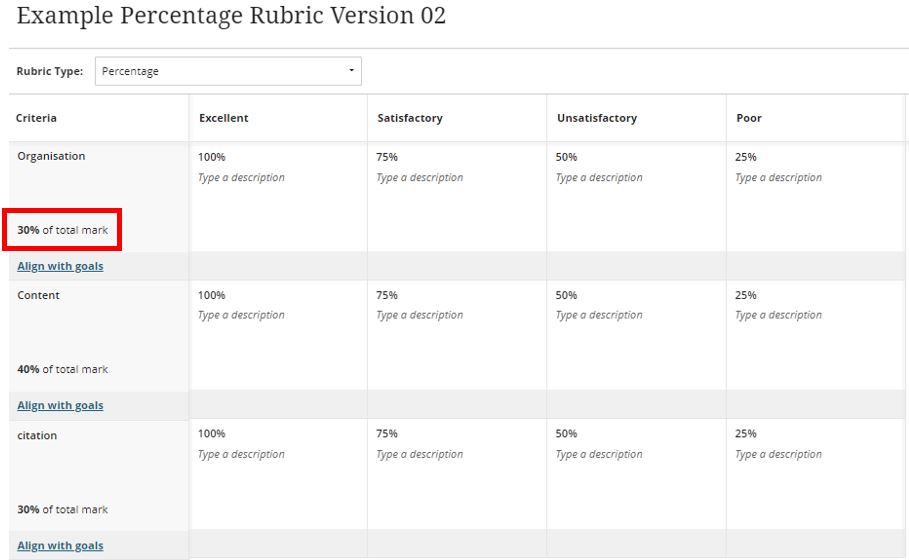
Within the screenshot above, for Criteria 01 the weighting of the total mark for this assignment is 30%. Based upon the default four criteria (as mentioned previously), the following achievement scores will be generated based on the grade the assessor gives for this criterion.
- Excellent scored as 100%. Therefore, 100% of 30 = 30 marks
- Satisfactory scored as 75%. Therefore, 75% of 30 – 22.5 marks
- Unsatisfactory scored as 50%. Therefore, 50% of 30 = 15 marks
After each section of the rubric (as shown above) you can add per Criterion Feedback to support and justify your assessment decision.
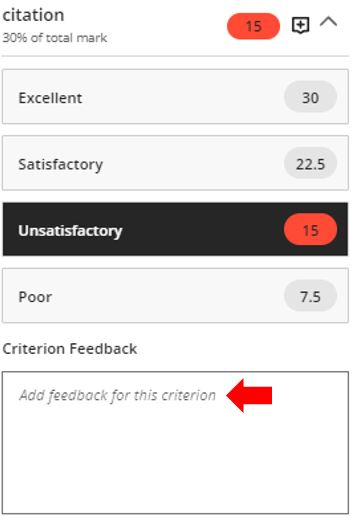
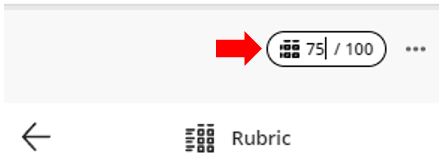
Although the achievement percentage is calculated automatically you can also manually override the overall score by editing the overall marks out of 100%.
Benefits and drawbacks of using a Percentage-based Rubric
Benefits
- Speed: You only need to select which of the grade boundaries to apply to each criterion.
- Setup: This system is quick to set up as each criterion to be graded needs only one variable setting.
Drawbacks
- Lack of control: A grade of Excellent has only one specific point total associated with it so all students who achieve an excellent in a criterion will achieve the same percentage mark. To differentiate scores, more grade boundaries would need to be added to the default four. For example:
- Excellent = 25%
- Good = 20%
- Satisfactory = 15%
- Unsatisfactory = 10%
- Poor = 5%
- Non-submission = 0%
Using this system would take longer to set up and still wouldn’t allow unique grades to be awarded to students.
Percentage-range Rubrics
For percentage-range rubrics, each level of achievement (Excellent, Satisfactory etc.) has a range of values. When a student’s work is graded, a level of achievement must be selected and then an appropriate percentage for a particular level of achievement.
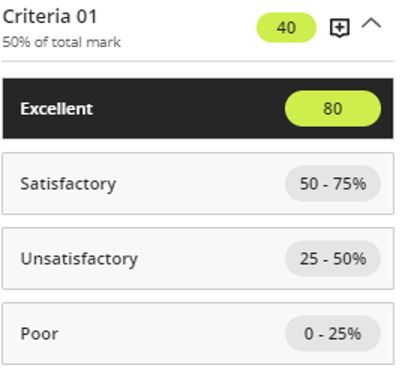
In the example below, for Criteria 01 a lecturer can judge the assessed work based on the criteria as “Excellent” however, they will also need to grade the work with a specific percentage value between 75% and 100%.
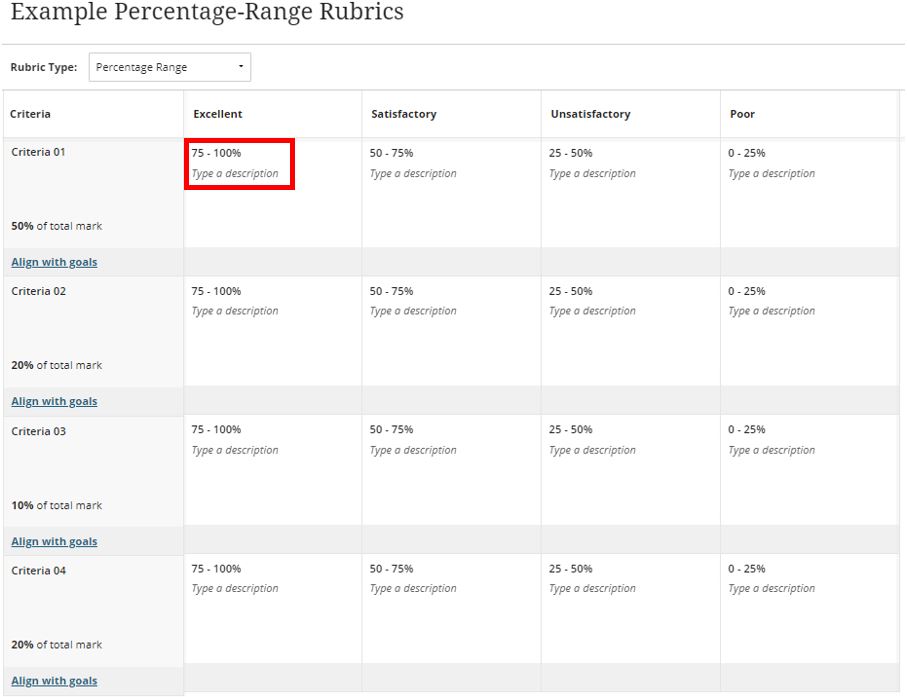
The system calculates the points achieved by multiplying the achievement percentage by the item points.
For example, within the screenshot above, for Criteria 01 the weighting of the total mark for this assignment from Criteria 01 is 50%. The lecturer has judged the assessed work as being Excellent. Excellent has a point scoring range between 75% and 100%, within this range, the lecturer has awarded a specific mark of 80%. The overall percentage achieved for this criterion is calculated by working out what 80% (Criteria 01) of 50 (Overall available marks) is, which in this case is 40.
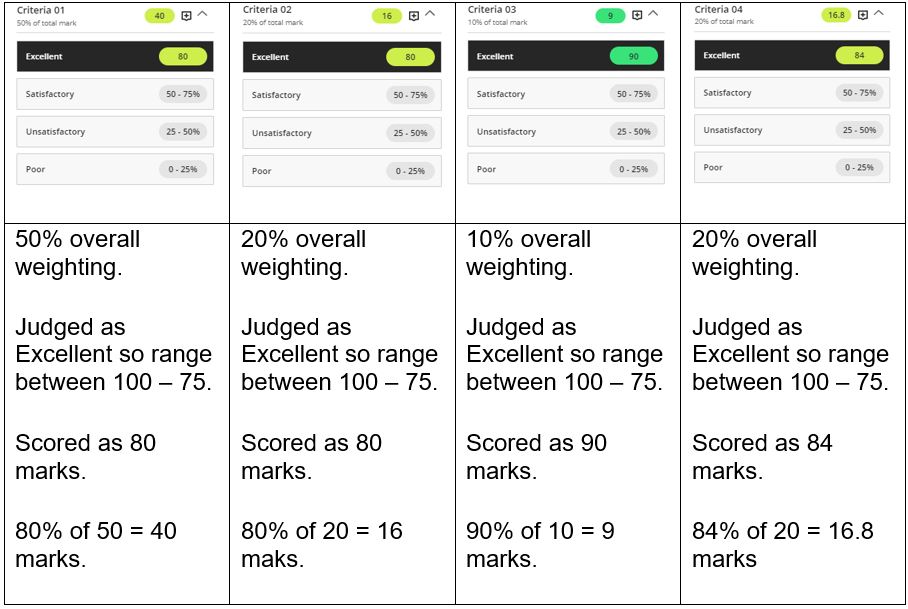
Some more examples are taken from the percentage range Rubric.
After each section of the rubric (as shown above) Criterion Feedback can be added to support and justify the assessment decision.
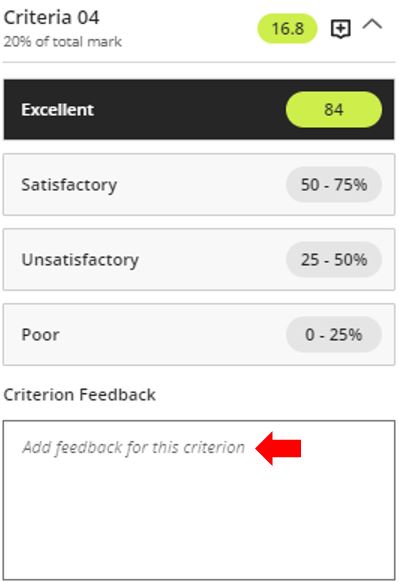
Although the achievement percentage is calculated automatically you can manually override the overall score by changing the overall marks out of 100%.
Benefits and Draws of using a Percentage-range-based Rubric
Benefits
- Control: Two students can be graded as “Excellent” in the grade boundary decision but can then be differentiated by assigning different percentages within the allowed range for Excellent.
For example, Student 01 achieved Excellent and is given a percentage score of 24 and Student 02 also achieved Excellent but is given a percentage score of 21. Both percentage decisions that have been awarded can be justified within the assessment feedback and Blackboard Ultra rubric.
Drawbacks
- Speed: Every criterion being assessed will need a grade boundary to be chosen (such as Excellent or Satisfactory etc.) as well as a specific percentage from within the allowed range (such as for Excellent the grade boundary might be between 21% and 25%).
- Setup: This system will take longer to set up as each criterion to be graded will need multiple variables setting.
Points based Rubrics
By default, when you select this rubric type, like in other rubrics previously covered, the rubric grid will include four criteria (Criterion 1, 2 ,3 and 4) and four grading boundaries (Excellent, Satisfactory, Unsatisfactory and Poor). No overall points will be allocated to any of the criteria and no points will be allocated to the grading boundaries. These must all be manually set.
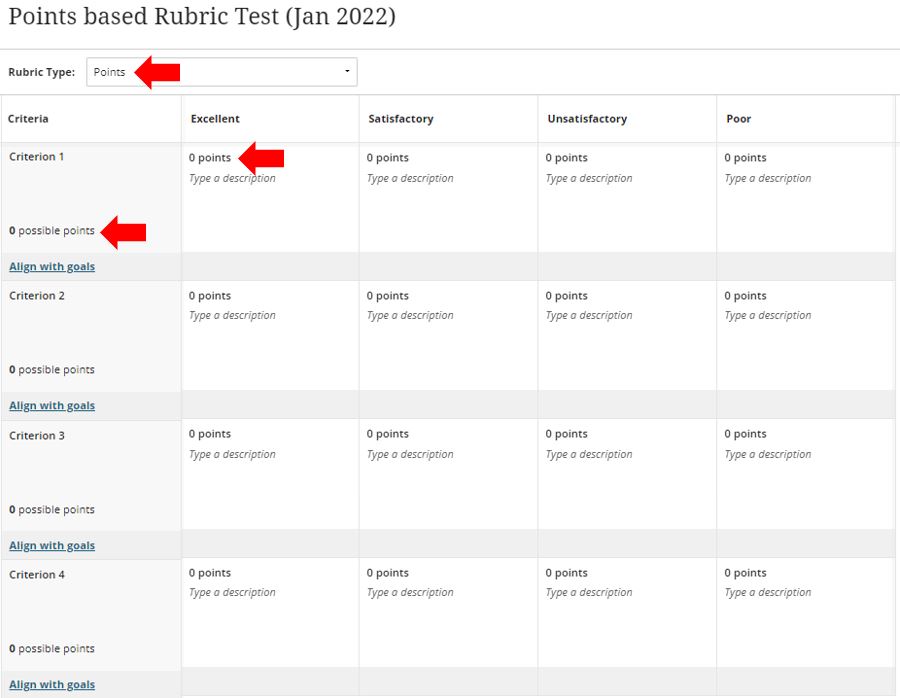
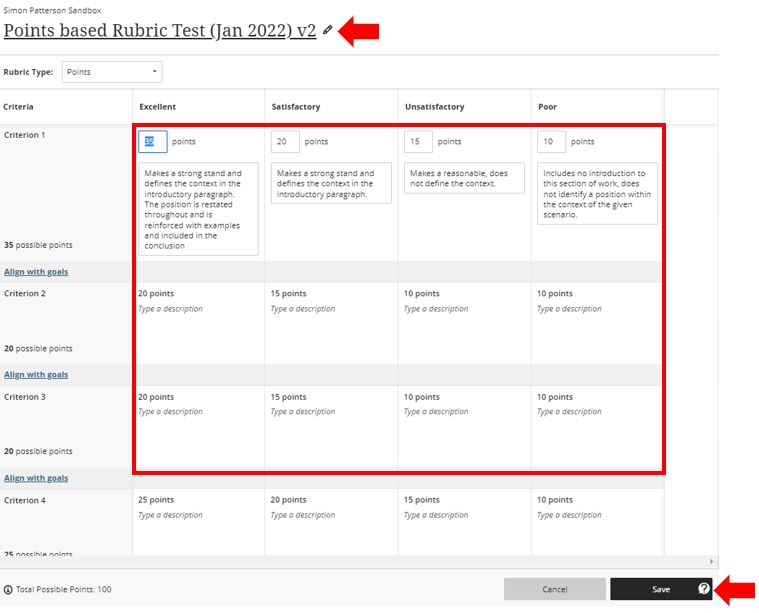
The example below is taken from a four-criteria-based assignment, only criteria 2 is shown in this example. It will be marked out of a maximum available points value of 25. In this example, the points per criterion will be allocated as follows:
- Excellent = 25 points
- Satisfactory = 20 points
- Unsatisfactory = 15 points
- Poor = 10 points
To enter the points available values for the four columns listed above (Excellent, Satisfactory etc.), hover the mouse over any of the four grade boundary points cells that are specific to the criteria in question, a pencil icon will appear, click this and enter values for all the associated grade boundaries.

By setting the point values for the four grade boundaries, the maximum points available per criterion are automatically assigned based on the highest value entered. In this example, the “Excellent” grade boundary was set as 25 points, so this becomes the maximum possible points value.

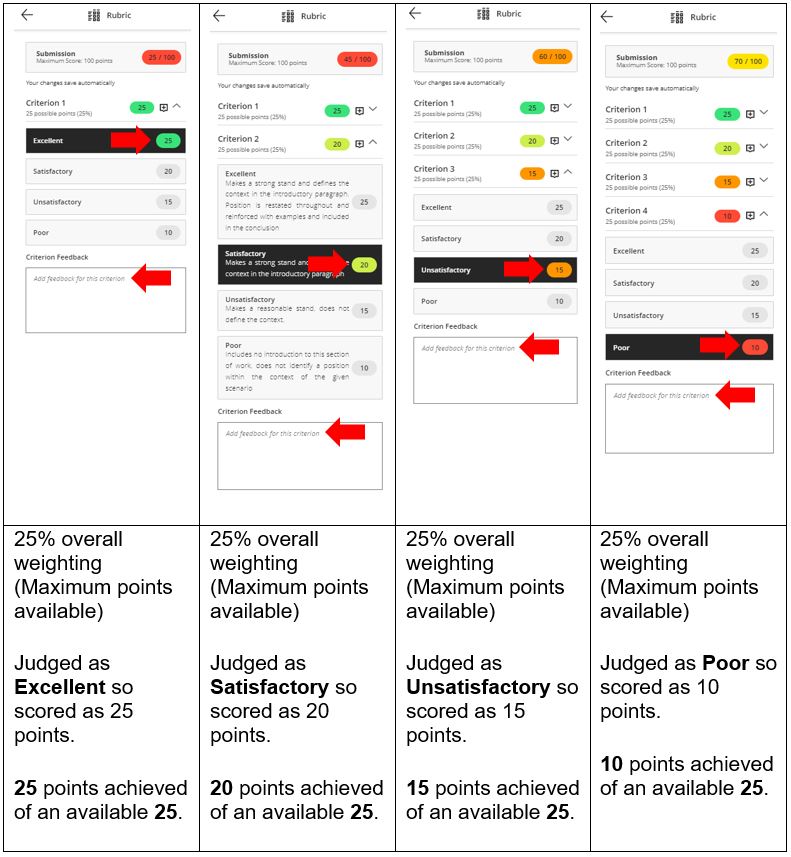
For each grade boundary (Excellent, Satisfactory etc.) you should also add a description that identifies how that assessment grading decision has been achieved. This can be done by hovering the mouse over the grading boundary and clicking on the pencil icon.
For example:
To achieve Excellent in Criterion 2: “Makes a strong stand and defines the context in the introductory paragraph. The position is restated throughout and reinforced with examples and included in the conclusion”
Or
To achieve Satisfactory in Criterion 2: “Makes a strong stand and defines the context in the introductory paragraph”

Once the points-based rubric has been set up and all assessment criteria and grading boundaries have been added and updated accordingly, click Save to complete the points-based rubric setup.
When assessing a Blackboard Ultra assessment using a Points-based Rubric each criterion can be assessed within the student’s work and a grade boundary is selected. As each boundary is selected, the overall Submission score is updated. After each section of the rubric, Criterion Feedback can be added to support and justify assessment decisions.
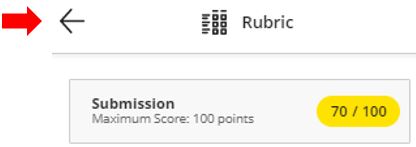
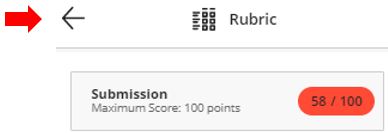
Once the assessment of the student assignment using the rubrics has been completed, click on the arrow next to the Rubric heading.
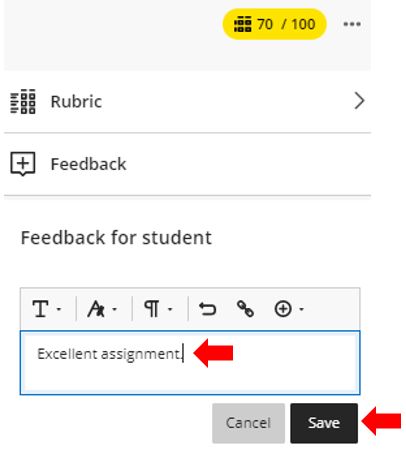
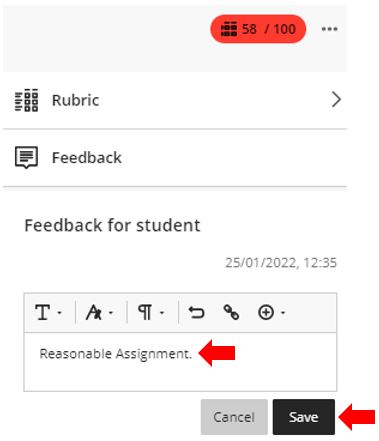
You can now add feedback to the assignment submission and click save to complete the assessment process.
Benefits and Drawbacks of using a points-based Rubric
Benefits
- Speed: You only need to select which of the grade boundaries to apply to each criterion. For example, Excellent or Satisfactory etc.
- Setup: This system is quick to set up as each criterion to be graded needs only one variable setting.
Drawbacks
- Lack of control: A grade of Excellent has only one specific point total associated with it so all students who achieve an excellent in a criterion will achieve the same point mark. To differentiate scores, more grade boundaries would need to be added to the default four. For example:
- Excellent = 25 points
- Good = 20 points
- Satisfactory = 15 points
- Unsatisfactory = 10 points
- Poor = 5 points
- Non-submission = 0 points
Using this system would take longer to set up and still wouldn’t allow unique grades to be awarded to students.
Points-range Rubrics
For points-range rubrics, each level of achievement (Excellent, Satisfactory etc.) has a range of point values. When a student’s work is graded, a level of achievement must be selected and then an appropriate number of points for a particular level of achievement awarded.
By default, when selecting this rubric type, similar to other rubrics previously covered, the rubric grid will include four criteria (Criterion 1, 2 ,3 and 4) and four grading boundaries (Excellent, Satisfactory, Unsatisfactory and Poor). No overall points will be allocated to any of the criteria and no points will be allocated to the grading boundaries. These must all be manually set.
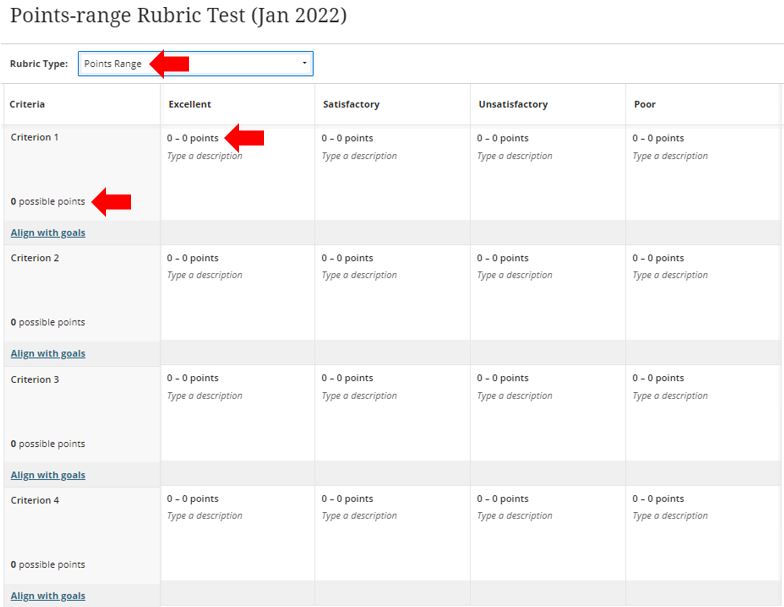
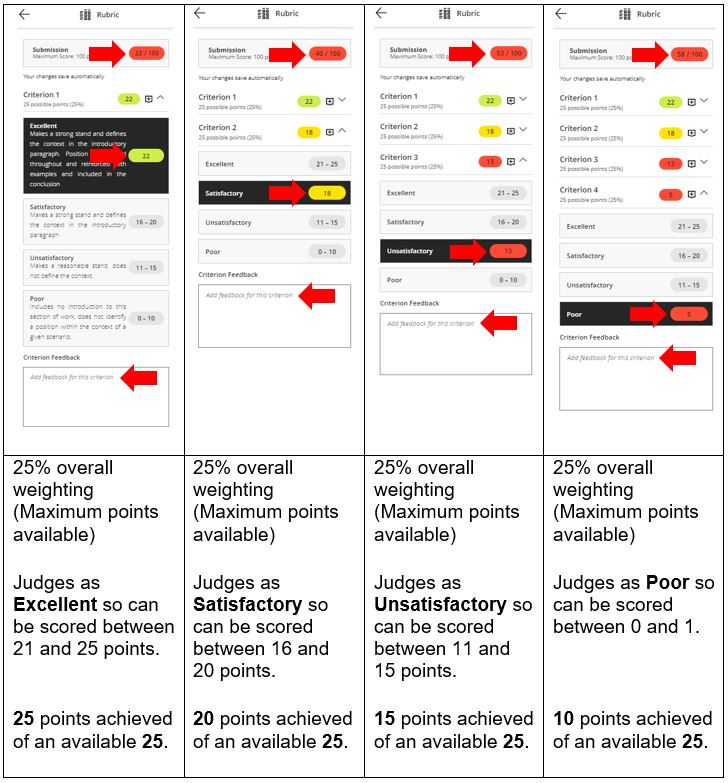
In the example below there are four criteria (only criterion 1 is shown) that all carry an available points value of 1 to 25 (the assignment is being marked out of 100 points). In this example, the points per criterion will be allocated as follows:
- Excellent = 20 to 25 points
- Satisfactory = 16 to 20 points
- Unsatisfactory = 11 to 15 points
- Poor = 0 to 10 points
To enter the available point values for the four columns listed above (Excellent, Satisfactory etc.), hover the mouse over any of the four grade boundary point cells that are specific to the criteria in question, a pencil icon will appear, click this and enter values for all the associated grade boundaries.
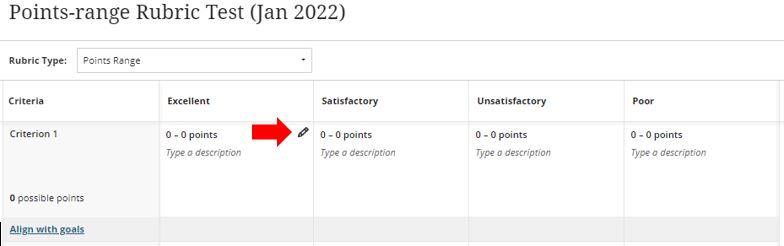
By setting the points values for the four grade boundaries, the possible points available per criterion is automatically assigned. In this example, the “Excellent” grade boundary was set as 25 points, so this becomes the maximum possible points value.

If you incorrectly enter a point range value, Blackboard Ultra will inform you of the mistake, which must be corrected before the changes can be saved. In the example below the 26 value that has been entered should be lower than the highest possible value of 25. Changing this to any value lower than 25 will rectify the error.

For each grade boundary (Excellent, Satisfactory etc.) you should also add a description that identifies how that assessment grading decision has been achieved. This can be done by hovering the mouse over the grading boundary and clicking on the pencil icon.

For example:
To achieve Excellent in Criterion 1: “Makes a strong stand and defines the context in the introductory paragraph. The position is restated throughout and reinforced with examples and included in the conclusion”
Or
To achieve Satisfactory in Criterion 2: “Makes a strong stand and defines the context in the introductory paragraph”

Once the points-range rubric has been set up, all assessment criteria and grading boundaries have been added and updated accordingly, click Save to complete the points-based rubric setup.
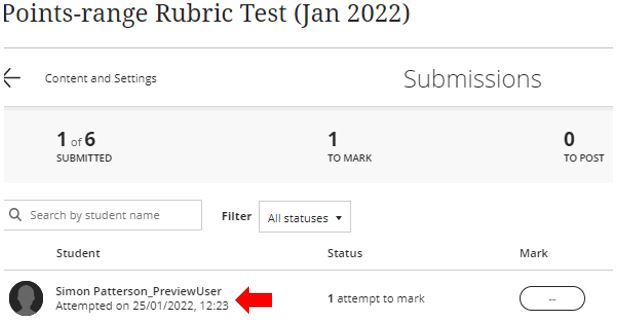
To access the submitted work, open Blackboard Ultra and the specific module in question and access the Gradebook. Open the assessment in question.

Select the student’s submission to assess. (Do not enter the mark manually.)
Click on the Rubric option to start assessing the work.
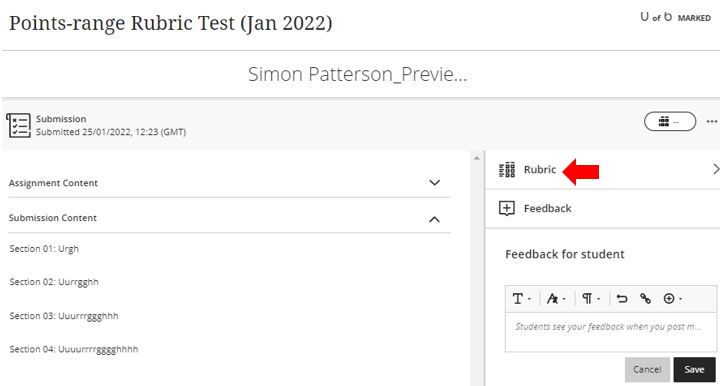
Each criterion can now be assessed within the student’s work, a grade boundary selected, and a specific point score given within the boundary point range. As each criterion’s grade and points are added, the overall Submission score is updated. After each section of the rubric, Criterion Feedback can be added to support and justify assessment decisions.
Once the assessment of the student assignment using the rubrics has been completed, click on the arrow next to the Rubric heading.
You can now add feedback to the assignment submission and click save to complete the assessment process.
Benefits and Draws of using a points-range Rubric
Benefits
- Control: Two students can be graded as “Excellent” in the grade boundary decision but can then be differentiated by assigning different points within the allowed range for Excellent.
For example, Student 01 achieved Excellent and was given a percentage score of 24 and Student 02 also achieved Excellent but was given a percentage score of 21. Both percentage decisions that have been awarded can be justified within the assessment feedback and Blackboard Ultra rubric.
Drawbacks
- Speed: Every criterion being assessed will need a grade boundary to be chosen (such as Excellent or Satisfactory etc.) as well as a specific point total from within the allowed range (such as for Excellent the grade boundary might be between 21 points and 25 points).
- Setup: This system will take longer to set up as each criterion to be graded will need multiple variables setting.
Importing Rubrics from other Blackboard Modules
Previously created rubrics can be imported from other modules to which Module Leaders are attached. This process uses a Pull technique (Pulling the Rubric(s) from other modules to the required module).
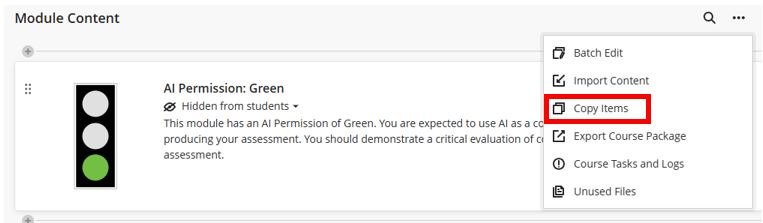
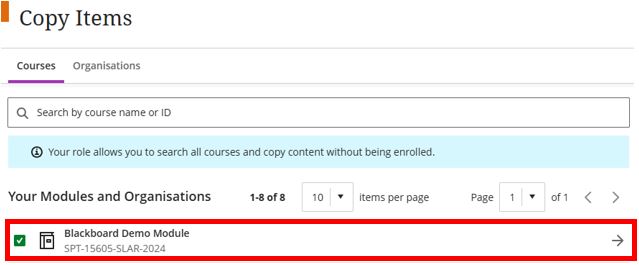
From the Module Content page, click the more options (three dots) then select copy items.
Select the module from the list that contains the Rubric to be imported and either click on the module name or the arrow shown on the right-hand side.
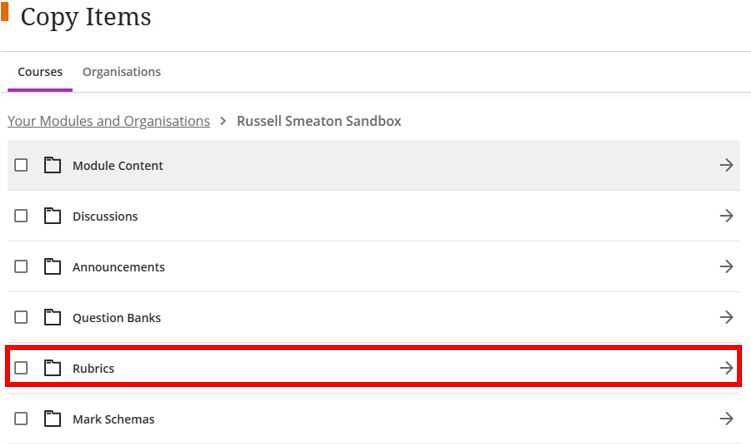
From the list of available content, either tick the Rubrics folder to copy all Rubrics from this Module or open the Rubrics folder to select only specific Rubric(s).
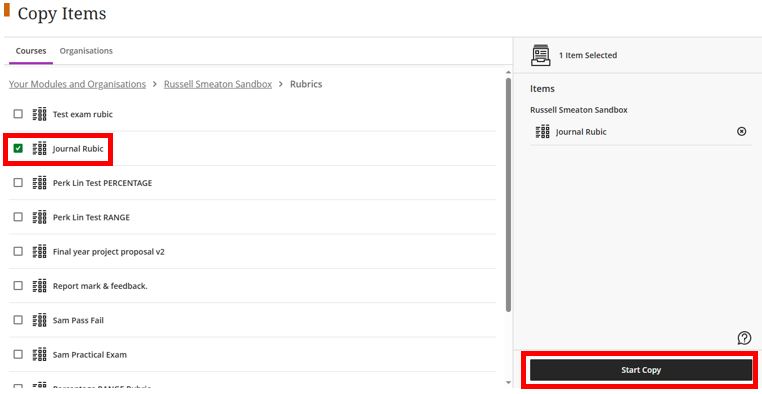
Select the required Rubric(s) to be imported (the module may contain more than one Rubric) and now click the Start Copy button.
If no problems were encountered during the copy process a copy successful message will appear briefly to confirm the copy has been successful and the selected Rubrics will now be copied and made available in the module you have open (remember the process involves ‘pulling’ the content from elsewhere).
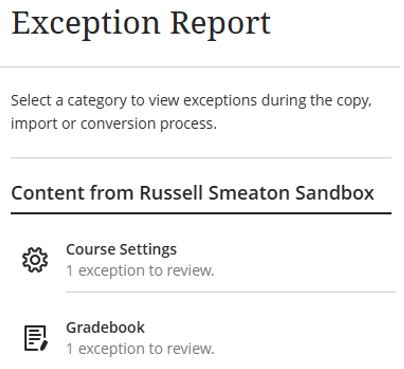
If for any reason problems were encountered during the copy process a warning message will appear in your Blackboard module and an Exception Report will be generated. It is possible to view the reasons for this copy-related problem via the Course and Gradebook Setting exceptions.
For more information, please contact the Digital Learning Specialist team.