
An Assignment is Blackboard’s facility for electronic submission. Blackboard facilities multiple file submissions, and allows students the ability to submit large files if appropriate. Blackboard’s Assignment tool can be used to add assignments to any content area in your module, but most modules will come with an Assessment space already created. You can also create a group assignment and release it to one or more groups in your course. When you create an assignment, a Gradebook item is created automatically to retrieve completed assignments from students, and grade these assignments.
Accommodations
You can set accommodations for students and make them exempt from certain course requirements, such as assignment due dates and time limits. To select accommodations, go to the Class Register from the Details & Actions panel. This will display all students in the module. Click on the ellipses (three dots) next to a student and select Accommodations. From here, you can now decide what accommodations you’d like to apply to that student.
Accepted File Formats
Blackboard assignments have many accepted file formats. To use inline grading with Bb Annotate in the Blackboard Gradebook submissions will need to be in a supported file format (includes PDF and MS Word and PowerPoint). If you intend to use annotated marking you may wish to clarify in the assignment information the file type required.
Create the Assignment
On the Module Content page, select the Plus icon wherever you want to add an assignment. In the menu, select Create to open the Create Item panel and select Assignment. The New Assignment page opens. If you prefer, you can also expand or create a folder and add an assignment within that space.
New Assignment page
Name
Provide a descriptive name so students can easily find the assignment among your course content. On the Course Content page, the name appears as the link students select to view the materials. If you don’t add a title, “New Assignment” and the date appear in the content list.
Instructions
You will see a text box labelled Instructions. Use this space to build your assignment. Add text and any supporting files such as the assessment criteria and additional instructions.
Availability to students
By default, the assignment will be hidden from student view. This can be adjusted in the top right of the screen. You can keep it hidden, make it visible, or use Release Conditions to define when you want the assignment to be available.
Apply assignment settings
To the right of the Assignment, the most common settings are visible. From here, you can quickly set things like the Due Date.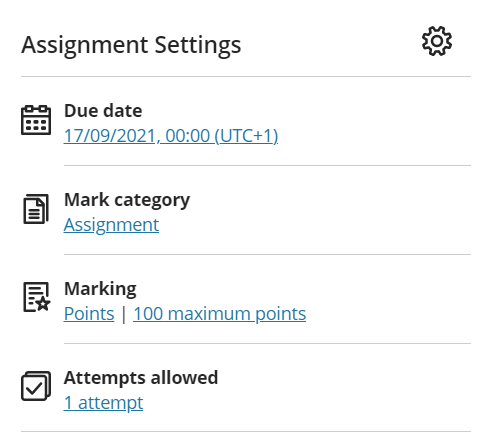
More settings can be unpacked by selecting the Assignment Settings cog. This will open the panel where you can customise your assignment in more detail.
Provide a due date. Due dates appear on the calendar and in the activity stream. Late submissions appear with a Late label in the course Gradebook. You can prohibit late submissions to prevent students from submitting after the Due Date.
Collect submissions offline. You may want to grade student work that doesn’t require students to upload a submission. For example, you can provide marks and feedback in the Gradebook for oral presentations, science fair projects, acting performances, and artwork delivered in person. By checking the Collect Submissions Offline box, this prevents students from uploading any content.
If you wish, you can assign an Assignment to be formative, which can also be used in the Gradebook for grade calculations.
Determine the Number of Attempts. You can let your students submit more than one attempt at an assignment. When you allow multiple attempts, you can also choose how the final grade is calculated.
Select the Marking schema. The default is to mark via Points, but you can also mark as a Percentage or even apply different schemas. You can change the grading schema at any time and the change will show to students and in your Gradebook.
Other options
Anonymous marking. You can decide to hide student names on an assignment, but this option MUST be selected before students start making submissions.
Under evaluation options you can enable delegated marking (sometimes referred to as Parallel Marking) by selecting the Two markers per student option. This allows you to allocate both markers and reconcilers to an assignment. Markers grade the work initially, Reconcilers decide on the final grade and feedback. Alternatively, you can enable Peer review to allow students to mark each others work. You also have the option to add a group of markers using a Group Set and apply this group to be markers via the Delegated Marking option.
Marking rubric. Rubrics can help you evaluate student submissions based on key criteria that you define. You can create a new rubric or associate an existing rubric. A rubric is a scoring tool that you can use to evaluate graded work. At this time, you can only add a rubric to as assignment without questions.
If you have changed any settings, click Save at the end of the settings panel.
When finished building the assignment, close down the Assignment panel by clicking the orange X in the top left hand corner. The assignment will be saved and can always be viewed in the Module Content area by module instructors.
How students upload work to assignments
Once you have created a new assignment, learners can begin submitted. They start the process by accessing the assignment link, and initially they will be provided with the Details of the assignment – such as the Due Date, how many attempts they have and how it will be marked. They then continue by clicking the link for View Instructions, which will display any more details you might have included. From here, they can start their submission process.
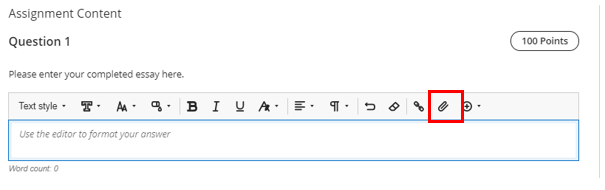
Option 1
This allows learners to upload a previously created file (such as a word-processed document) through the paper clip icon. Students can upload multiple files at this stage. They can continue adding (or removing) files, and if possible, the file(s) uploaded will be accessible through the inline rendering.
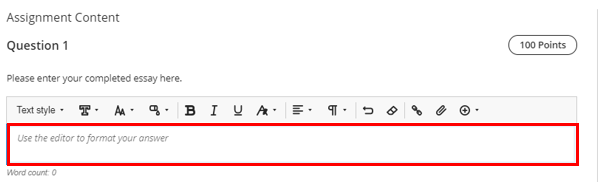
Option 2
This allows learners to simply type/input their completed work using the text editor provided, this can include copying and pasting from a previously completed document.
There are also other options available within this section where students can upload a series of other content types and links (Maths, Image, Media, YouTube Video, Cloud Storage & LTI Image
Once students are satisfied with their assignment, they can complete the process by clicking Submit, whereupon they will be informed of their submission and provided with the opportunity to download a digital receipt. It is strongly recommended the student checks their submission after submitting to ensure they have submitted the correct work, and to do this before the Due Date.
Further guidance on Creating and Editing Assignments.