Create a Turnitin Assignment
This guide explains how you can create Turnitin assignments for summative assessment within your modules. Students can then upload their work to the module assignment allowing you to easily collate assignments and view Turnitin originality reports.
About Turnitin
Turnitin works by checking through a database of previously submitted assignments, Web sites and other sources. If a match between a submitted assignment and another work is found, Turnitin will highlight the matching text in an originality report accessible through the Control Panel of the module. By adding a Turnitin assignment to your module students can upload work themselves.
Turnitin assignments only allow one file to be uploaded by students per submission. If your planned assessment will require multiple files to be submitted, multiple Turnitin assignments should be created or alternative arrangements should be made. Consider combining files into a single document or setting up an additional offline Blackboard Ultra assignment.
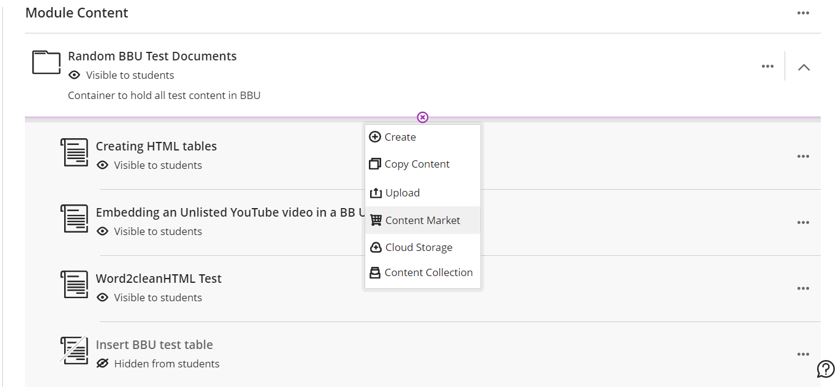
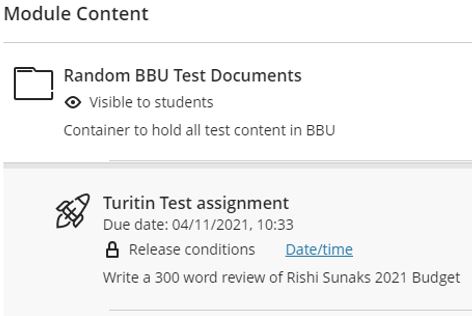
To create a new Turnitin assignment, go into your module and identify where you wish to place the assignment. Click on the purple plus sign that appears when you hover between your content items. Select Content Market from the dropdown menu.
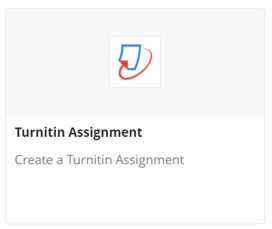
Select Turnitin: Create assignment in Ultra from the list of options.
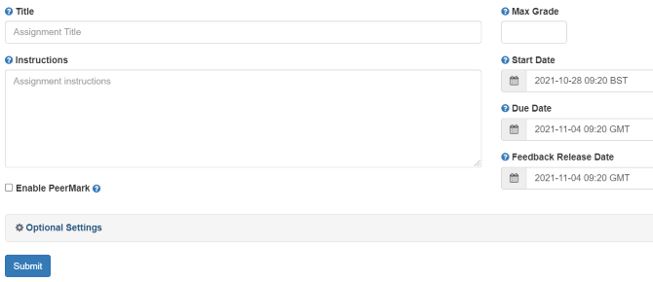
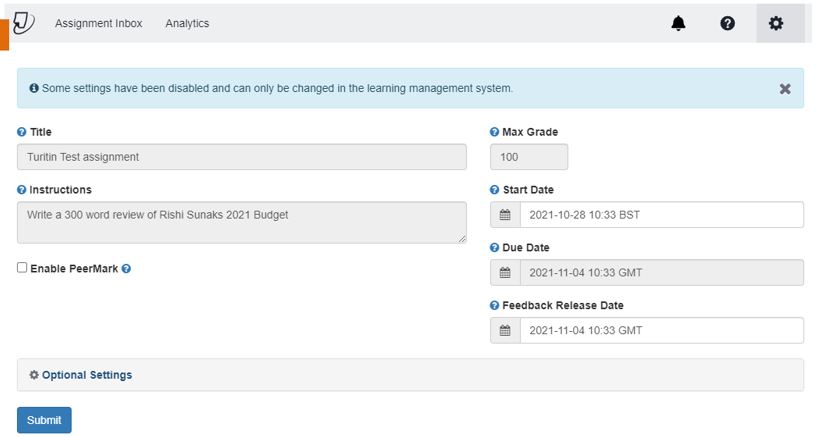
Once Turnitin loads, you’ll be able to add a title, instructions and maximum grade to your assignment. If you’d like the item to be peer-reviewed, you can tick the box to Enable PeerMark.
Learn more about creating a PeerMark assignment
Enter a Start Date (when the assignment is visible to students), Due Date (when the assignment is due) and Feedback Release Date (when grades and feedback are released to students).
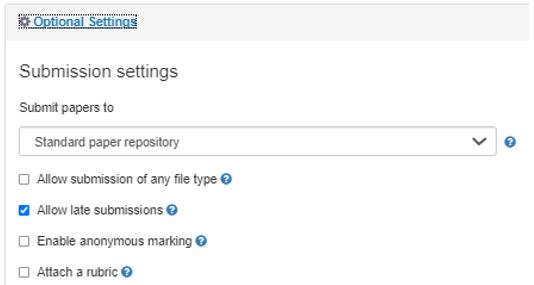
Click on Optional Settings to see more options for your assignment.
Within Submission Settings, you can select where papers are submitted, allow late submissions, enable anonymous marking and attach a rubric.
Allowing submissions of any file type allows students to upload scanned documents, image files, etc. This would usually be used for items that you’re not interested in getting a similarity report for.
Turnitin will only generate Similarity Reports for the following file types:
Microsoft Word, PowerPoint, WordPerfect, PostScript, PDF, HTML, RTF, OpenOffice (ODT), Hangul (HWP), Google Docs (submitted via the Google Drive submission option), plain text files.
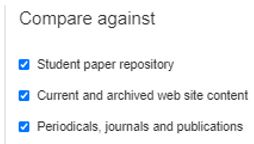
The Compare against section allows you to select what you would like the similarity report to compare submissions to.
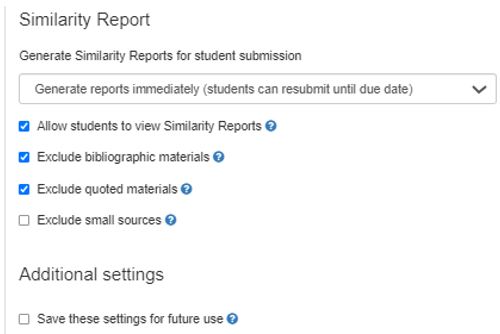
Within the Similarity Report section, you can configure the similarity reports.
This includes:
- Generate similarity Reports for student submission: Select from the dropdown list when, after student submission, that you would like Similarity Reports to be generated. There are three options for this assignment setting
- Generate reports immediately (students cannot resubmit)
- Generate reports immediately (students can resubmit until due date)
- Generate reports on due date (students can resubmit until due date)
- Allowing students to view Similarity Reports: This setting can be enabled to allow students to view the Similarity Reports generated based on the assignment that they have submitted.
- Exclude bibliographic materials: This setting can be to exclude text appearing in the bibliography, works cited and reference sections from submitted Turnitin assignments being checked when generating Similarity Reports.
- Exclude quote materials: This setting can be enabled to exclude text appearing in quotation marks from submitted Turnitin assignments being checked when generating Similarity Reports.
- Exclude small sources: This setting can be enabled by instructors to exclude matches that are not of sufficient length (determined and set by the instructor) from being considered when generating Similarity Reports from submitted Turnitin assignments
Once you have configured your Turnitin setting you have the option to save those settings for future use, so you won’t need to go through these steps again.
Click Submit to create your assignment.
Editing a previously created assignment
Should you wish to make any changes to the assignment, you can edit it after creation.
There are two approaches to editing.
Small changes can be made by clicking the ellipses (the three dots) over to the right of the assignment name. This will open the peek pane to allow you to adjust things like Due Dates and Points Possible.
More substantial changes can be made by:
- Click on the assignment name
- This will open the assignment inbox
- In the top right-hand corner, click the cog icon
- You can now change all the parameters
- Click Submit when done

