Using Adobe Rush (Mobile version)
Rush for learning and teaching:
- Recording and editing formative assessment plus feedback
- Recording and editing practical assessments
- Recording and editing Interview techniques
- Recording and editing presentations
- Recording and editing user guides
- Edit videos on any device
- Instantly share and publish to blackboard or social media
Rush is Adobe’s first all-in-one video app that allows you to edit and share videos, quickly and easily from your smart phone, tablet or from a computer. This free mobile, tablet and desktop video editing app has been designed for creativity on the go. Wherever you are, from your phone to your computer, you can shoot, edit and share high-quality videos. Within the app, you will have access to hundreds of new in-app assets, including audio, transition graphics and animated titles.
Within it you can edit, colour correct, record and clean-up audio, customise animated titles and graphics and publish to social media, all in one tool.
Adobe rush gives built-in access to professionally designed motion graphics templates with 100s more being made available via the Adobe stock collection. Rush has been designed and created for the fast-paced video creator.
All Rush projects are saved into the cloud, this means that when you make an update on one device, those changes are reflected across all of your devices. The mobile app version of Rush also contains all of the exact same features as the desktop version means you can do everything on a tablet or mobile phone that you can do working in your office or on a desktop computer.
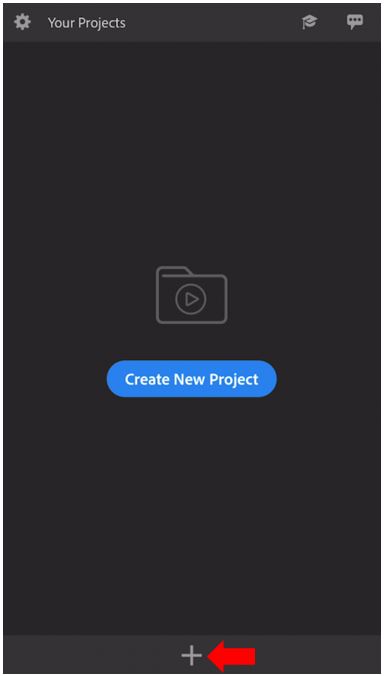
Step 1
With the Rush app open, the first thing you’ll see is the Startup menu. Click on the + icon and import your media from the location you have it saved. Rush can open media from your Camera Roll, Creative Cloud, or Dropbox.
Step 2
You can add videos from various locations, such as your local device or from Creative Cloud and Dropbox. The order you select your media in is the order it will appear on your project timeline. So, to make your editing faster, you can choose each clip in order. If you’d like to keep your project synced with the other devices you have Rush installed on, you can keep Sync with CC selected
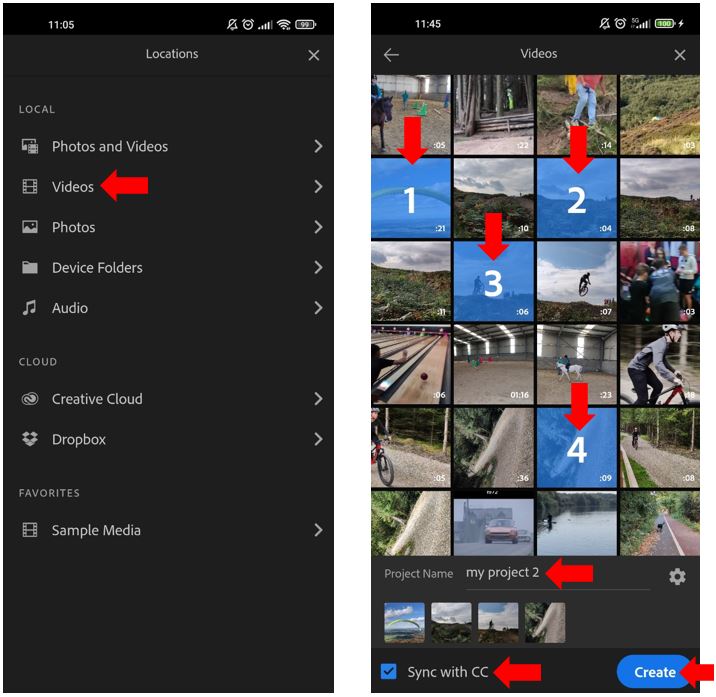
Next, tap on Project Name, name your project, then tap Create, and your project will open.
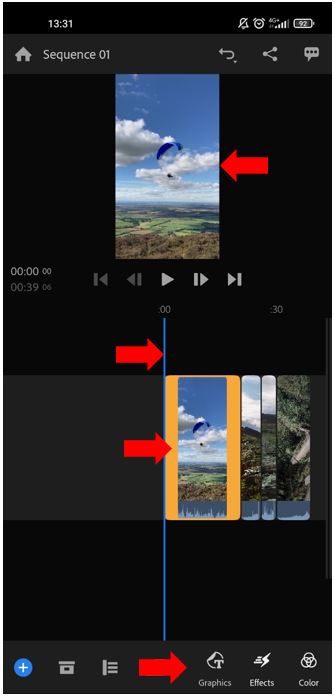
Step 3
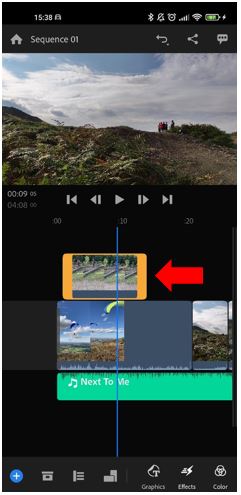
The preview monitor at the top of the screen shows the point in the clip where your playhead is. The timeline is where your playhead can be found and where you will arrange and edit your project. At the bottom of the screen, you’ll find the toolbar where you can access tools and effects to apply to your media. To select a clip on your timeline, tap it. An orange border will appear around it. You can use your fingers to scroll through the timeline from left to right, and pinch in or out to zoom in or out.
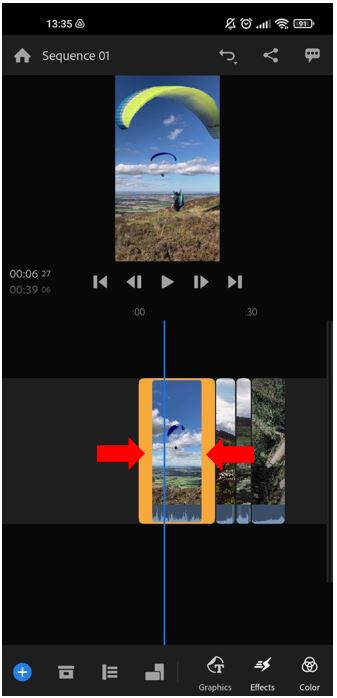
Step 4
To trim a selected clip, drag the right or left side of it inward.
You can use the trash bin to delete a clip you’ve selected (you may need to drag the bottom menu to the left to be able to see the additional tools).
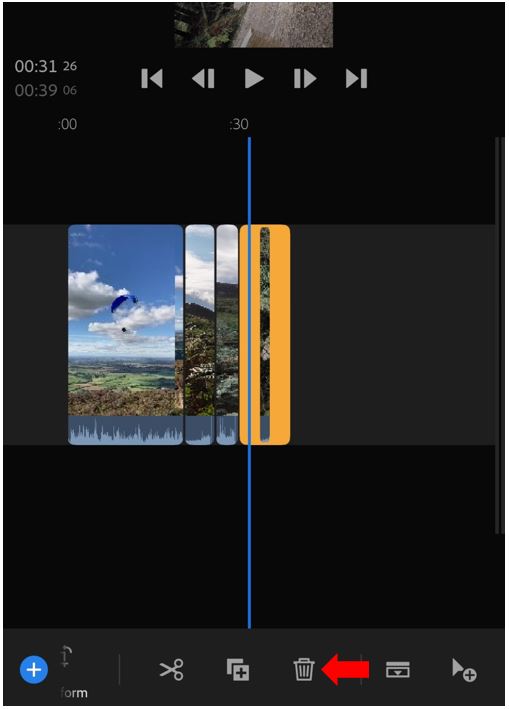
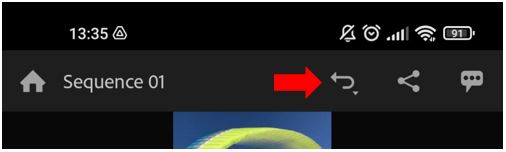
If you want to undo or redo your last action, click and hold on the half-circle, arrow icon and choose Undo or Redo.
Step 5
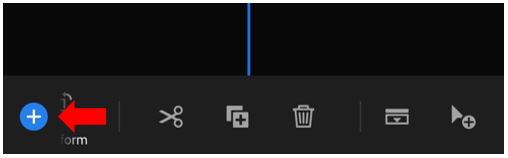
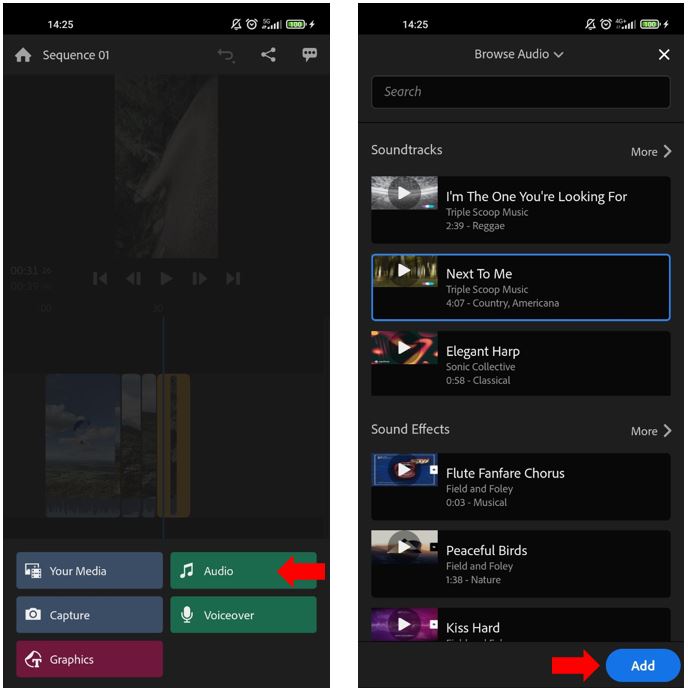
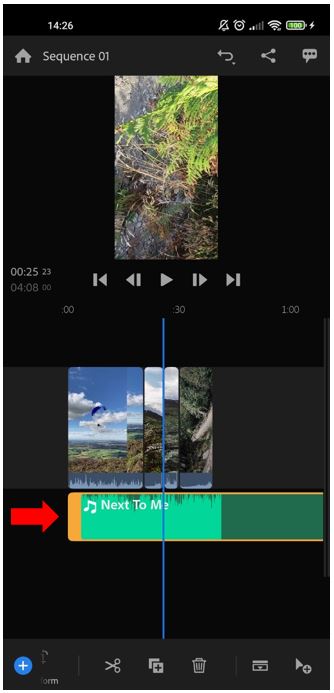
To add a music track to your project, click on the + icon. Navigate to the folder where you have your music track saved, select that music track and press the Add button, which will import your music onto the audio track on your timeline.
Step 6
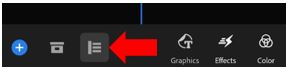
Now let’s explore our toolbar starting on the left. Tap on the Track Controls icon, which allows you to see all your project assets.
Tapping on the icon reveals a more advanced timeline with features that allow you to lock tracks, record audio, and turn tracks on/off.
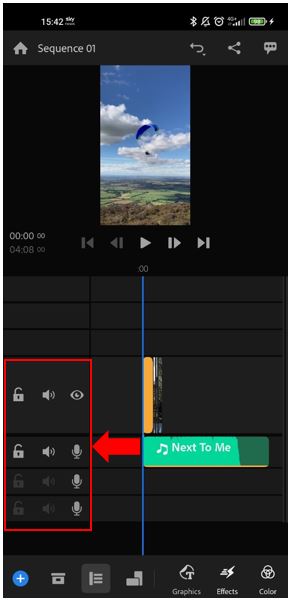
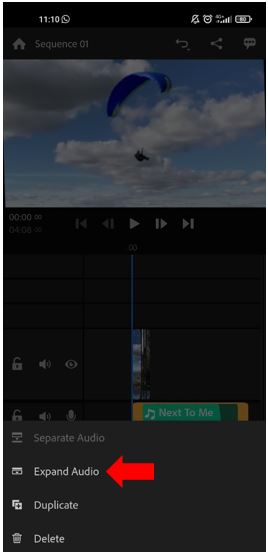
Tap and hold the music track on your timeline to bring up the option to Expand Audio. Tap on that to get a closer look at your audio.
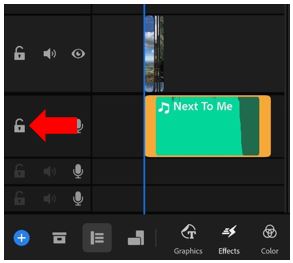
You can lock any of your tracks by clicking on the lock icon. That way, you won’t accidentally move, delete or alter the media on that track.
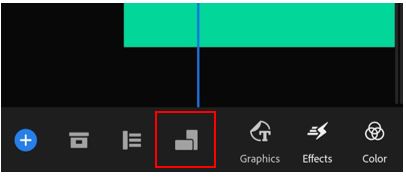
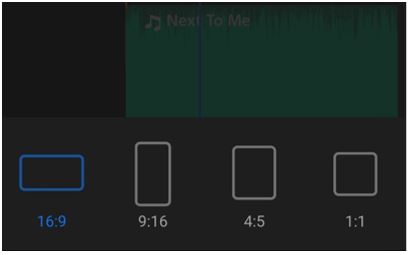
Step 7
The third icon makes it easy to change the aspect ratio from Landscape to Portrait to Square. Square is an excellent option for videos you’d like to upload to Instagram.
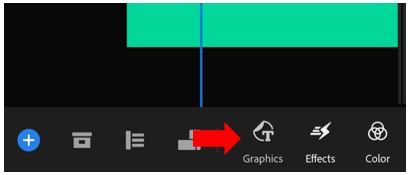
Step 8
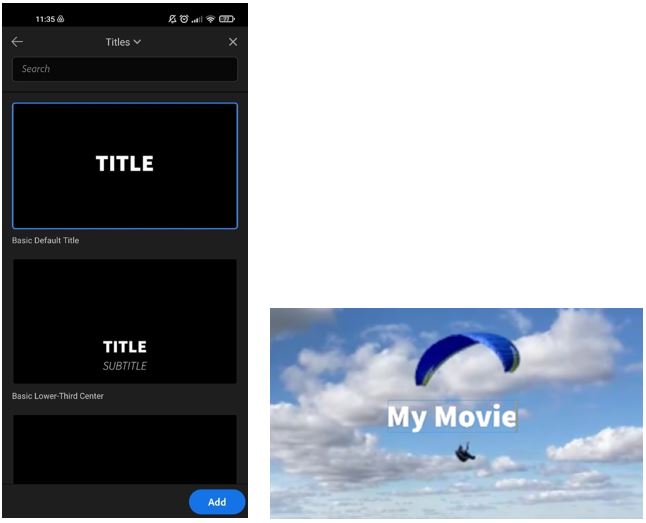
To add text to your video, tap on the Graphics tool.
Now choose Add Graphic
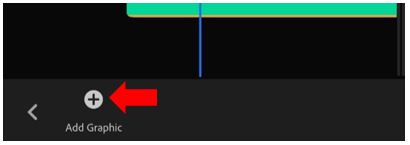
You’ll find lots of title presets, lower third titles, and call out banners. Choose a title preset, then tap and hold on the title on the preview monitor to edit the text. You also can change the size of the font, the font colour, font type, and font spacing.
Step 9
Move your playhead in between two clips, tap on the Effects tool.
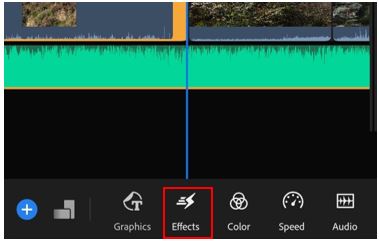
Now choose a transition to apply between those two clips.
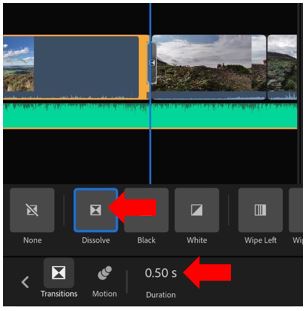
Click on Duration and use the slider to increase or decrease the length of the transition effect.
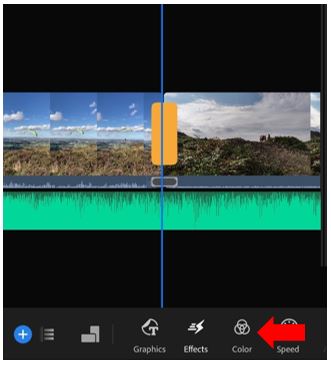
Step 10
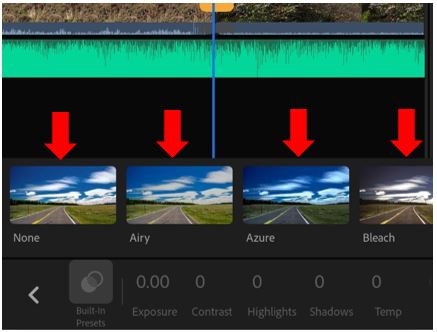
To adjust the colour of a clip, tap on the Colour tool. This brings up various colour presets to choose from. Scroll through the toolbar to customise the intensity, colour temperature, saturation, and more.
Step 11
Rush allows you to add up to 4 video tracks. You can drag any of your clips onto the next track and stack them on top of other clips as well.
Step 12
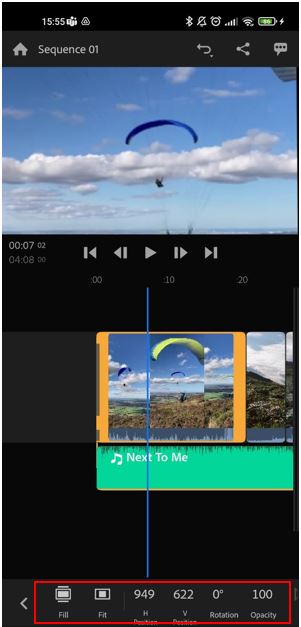
Tap on Transform to adjust the position, rotation, scale, or opacity of a clip.
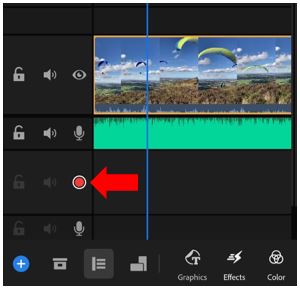
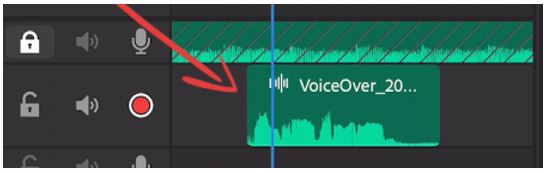
Step 13
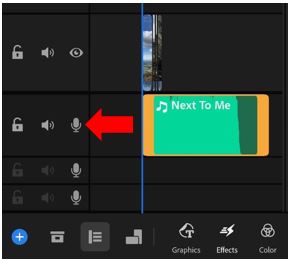
If you want to record voiceover directly in your project, you can tap on the microphone icon on an empty audio track, which will bring up a record button. Tap the record button, and a 3-second countdown will indicate when you can start recording your voiceover. Tap the record button again when you’re finished, and your voiceover file will appear on your timeline.
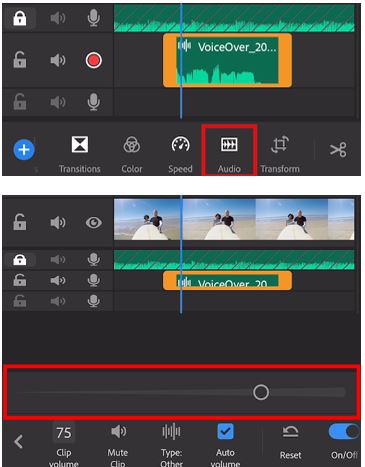
You can tap on the Audio tool to increase or decrease the volume of your audio file and customize other audio adjustments.
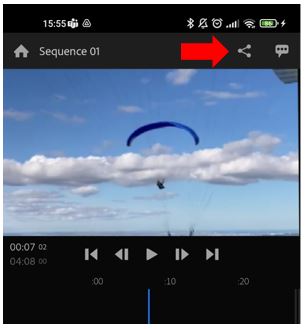
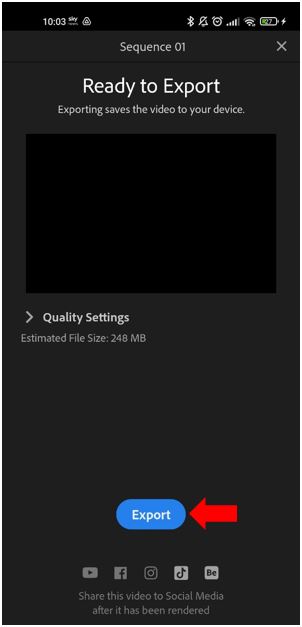
Step 14
Finally, when you’re ready to export your video, tap on the share icon in the top right of your screen and click Export.