This article provides a comprehensive guide on harnessing the potential of Adobe Podcast at Teesside University. Designed to empower staff members in creating dynamic and compelling audio content, Adobe Podcast offers a suite of powerful tools and features to enhance your podcasting experience. In this guide, we will explore how to navigate the platform effectively, from recording and editing audio to publishing and sharing your podcasts.
Contents
- What is Adobe Podcast?
- Key features of Adobe Podcast.
- Adobe Podcast workflow.
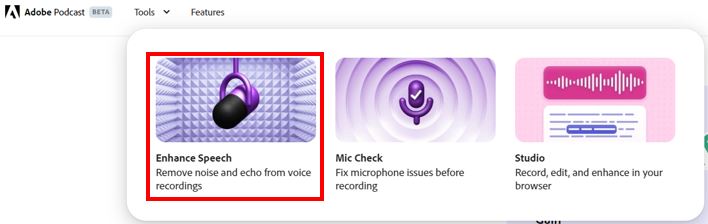
- What is ‘Enhance Speech’?
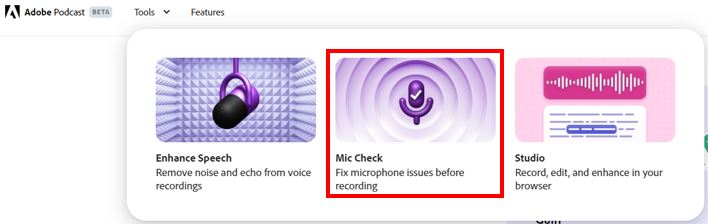
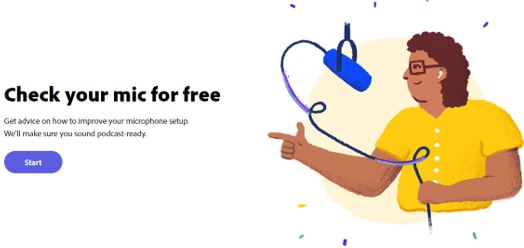
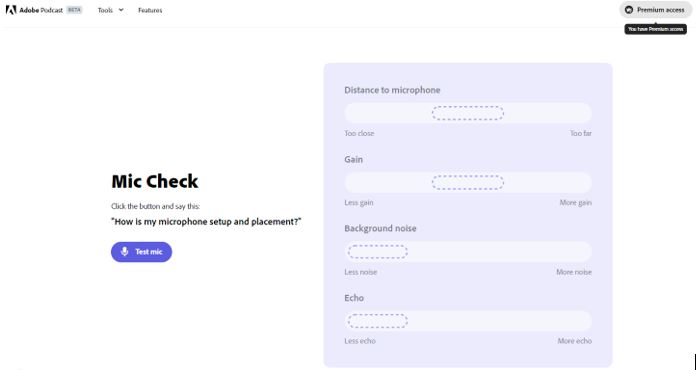
- What is ‘Mic Check’?
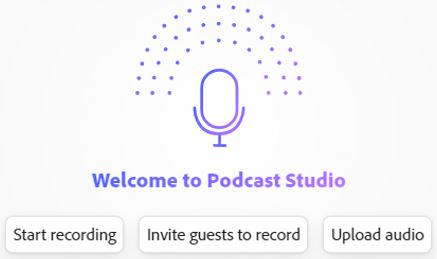
- What is ‘Studio’?
- Studio Features
- Invite a guest.
- Creating a podcast recording.
- Naming your podcast project.
- Automatic generation of audio recording transcripts.
- GenAI-powered Transcription and Editing.
- Removing recorded content using the built-in GenAI.
- Copy & paste recorded content.
- Adding a placeholder to a podcast project.
- Adding music to a podcast project.
- Downloading a complete project.
- Resource from Adobe: How to start a Podcast: A step-by-step guide
What is Adobe Podcast?
Adobe Podcast is a web-based platform that can be thought of as a personal digital podcasting studio and is designed to help anyone create high-quality audio content and share it.
It uses GenAI (generative artificial intelligence) to allow for post-production editing and can clean up background noise, eliminate echoes, and boost your voice to make you sound more professional. It also lets you record interviews remotely with crystal-clear quality, even if your guest is on the other side of the world.
Key Features of Adobe Podcast
Here are some of the key features that make Adobe Podcast a powerful tool for creators:
- AI-powered audio: Remove the background noises and sharpen voice frequencies from the given audio clip to improve the audio quality to a professional level. It makes it sound as if everything was recorded in a professional studio. There is no need to spend an insane amount of money on costly microphones.
- AI-powered editing: Adobe Podcast uses GenAI to automatically transcribe recordings, making editing a simple task.
- Enhanced Audio: Worry less about background noise or poor microphone quality. Adobe Podcast can clean up background noise, eliminate echoes, and even boost your voice for a professional polish.
- Remote Recording: Participants don’t need to be in the same location! It is possible to record interviews with guests in different locations and still get high-quality audio.
- Studio in the Cloud: Everything you need to record, edit, and enhance your podcast is accessible from any device with a web browser. No need to download bulky software – it’s all there for you online.
- Project Templates: Pre-built project templates are available including things like intros, outros, and music beds.
- Mic Check: The mic check feature helps you identify and fix any audio issues before you hit record.
- Royalty-Free Music: improve your podcast with access to a library of royalty-free music tracks.
Regardless of the level of experience in creating podcasts, these features can help you produce high-quality podcasts and share your voice with the world.
Workflow for Adobe Podcast to create your podcast:
- Get Set Up: Access the online tool at https://podcast.adobe.com/ and sign in using your University account Adobe account
- Start a New Project: Click “New Project” and give your podcast a catchy title.
- Record Your Audio: You can record directly in Adobe Podcast using your microphone or upload pre-recorded audio files.
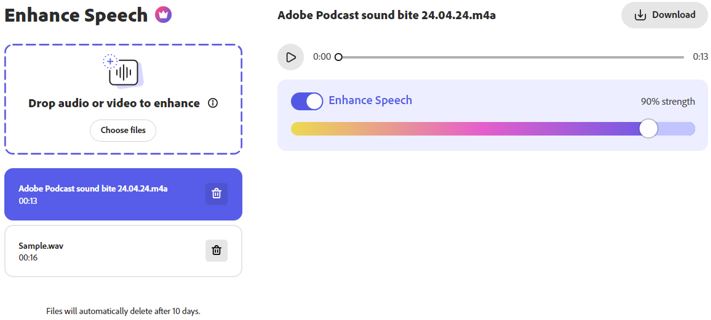
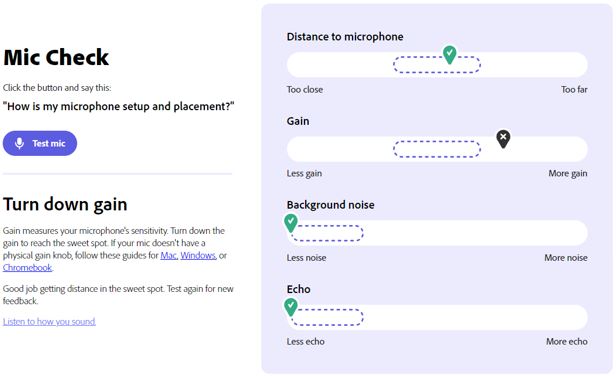
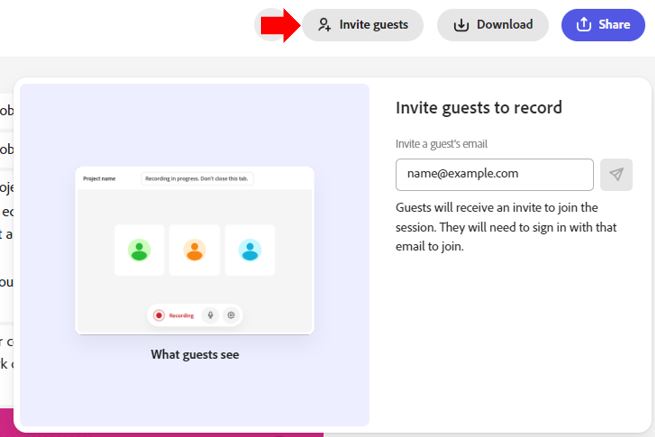
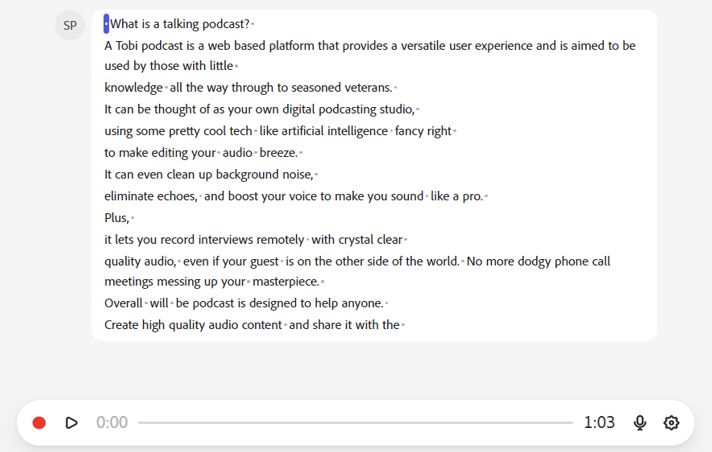
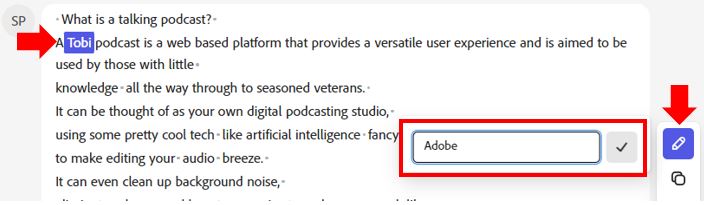
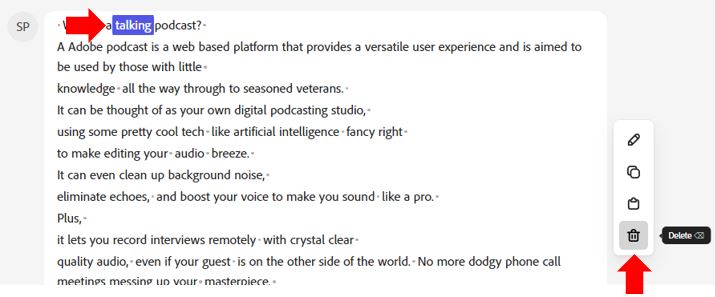
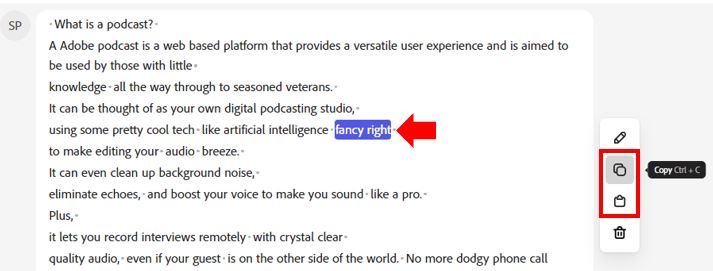
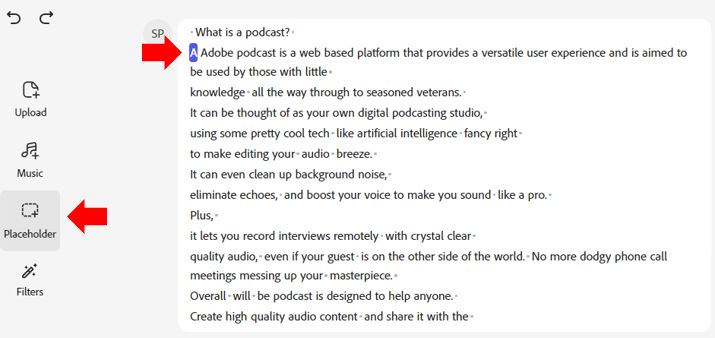
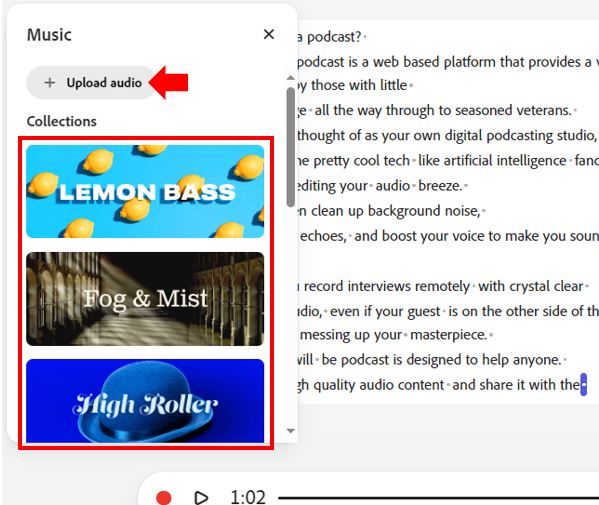
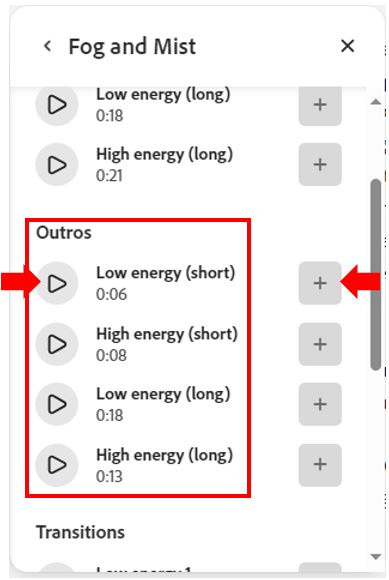
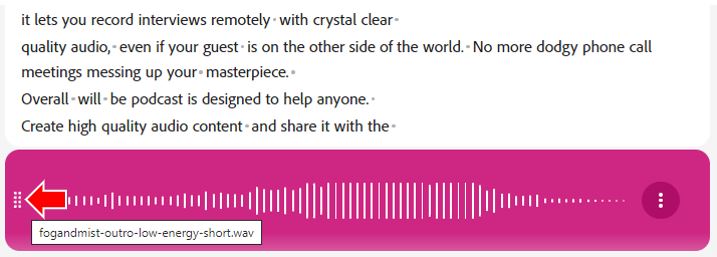
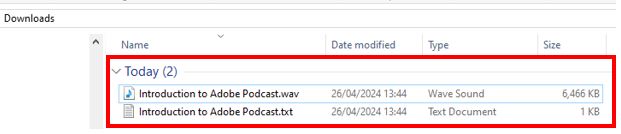
This feature can be used to remove background noises and sharpen voice frequencies from the given audio clip to improve the audio quality to a professional level. It makes it sound as if everything was recorded in a professional studio. There is no need to spend a large amount of money on costly microphones. To use this feature, a sound clip must have been previously recorded and uploaded to the Adobe Podcast platform. There is an ‘Enhance Speech’ option that includes a ‘strength’ slider (by default is set to 90%) that can be used to apply the AI enhancement functionality. Once a sound file has been uploaded and ‘enhanced’ by the Adobe Podcast feature, use the Download button to download a copy of the enhanced file. The enhanced file will be downloaded in .wav format. Currently, this is the only available format. Enhance Speech Example The following is a short recording that was made on an Android phone in a relatively quiet room at the university. The following is the same recording once processed by the Enhance Speech feature. Use this feature to get advice on how to improve your microphone setup. This will help to make the recorded audio sound podcast-ready. Click on the ‘Test mic’ button, then, as instructed on the screen, repeat the line, “How is my microphone setup and placement?”. The results of the test will give you feedback on: In this example, three of the four tests have passed within acceptable tolerances. However, as the gain test has failed, suggestions have been made on how to rectify this problem. This also includes links to online sources of information to support implementing these solutions. Once you believe you have corrected the problem, you can re-run the test to check the updated results. This is the most advanced feature included in the Adobe Podcast platform and for many, this will go above and beyond what is required to produce a simple audio recording. However, this feature does provide some excellent additional functionality that can enhance an audio recording. The goal of Adobe Podcast Studio is to make it easy for anyone to record, edit and share the spoken word. Using Studio will help anyone trying to record audio and make it sound like a professional. This could be a podcast, voiceover, or even a short audio ad. Adobe Podcast Studio allows staff to invite guests to take part in the recording. For example, you could invite someone to be interviewed. Adobe Podcast Studio includes the following advanced features that can take an audio recording to the next level: The Music menu option allows you to add pre-created royalty-free audio clips from the Adobe Podcast music collections library. These audio clips have been developed by Adobe to act as intros, outros and backgrounds. Exactly what is needed when recording a podcast. The Placeholder menu offers the ability to leave a placeholder in an audio recording about what music or additional audio recording to add later. The Filters menu includes GenAI technology that will enhance any speech to sound as if it was recorded in a real studio with a single click. To start a simple podcast project, simply press the record button and start to talk. Once you have finished, click the stop button. Click on the default podcast project name in the top left corner of the screen. Clicking on the current title and selecting the current text will allow the overwriting of this with the new name the project is to be given. The audio recording will then be transcribed and the text displayed on the screen. Clicking on any word within a recording transcript will also position the playhead at the moment in the recording the text is spoken. The AI-powered transcription and Editing feature within Adobe Podcast Studio offers automatic transcription of audio recordings. It simplifies the process of editing and searching through audio files. This feature is an invaluable time-saver for podcasters, particularly when creating comprehensive episode notes or transcripts. With the ability to seamlessly cut, copy, and paste audio just like a text document, audio editing has never been more efficient. In my case, I recorded an audio, in which I introduced what an Adobe Podcast is. In that audio, the “Adobe” is incorrectly transcribed. It transcribed Adobe as “A Tobi”. I edited it by clicking on the wrong word and clicking on “Correct Transcript.” . It is also possible to record an additional section following the main podcast recording and simply cut and paste it into the main podcast section using the same Copy & Paste transcript feature. Using the same GenAI technology that is used to correct/change a word(s) in the audio recording transcript, you can also remove word(s) that appear in the transcription using the ‘Delete’ icon. It is also possible to copy any word(s) that appear in the transcript following the recording and paste them into any other area of the transcript. Theoretically, this process could be used as a workaround to introduce additional content, if a word(s) are duplicated and then modified. Just like adding a comment in a Microsoft Word document, placeholders can be used in Adobe Podcast to leave a ‘reminder’ to do something within a recording transcript at a later point. This could be to add some additional content, introduce a sound bite(s), such as an introduction to the podcast, or in some other way modify the recording. To add a placeholder, select the location in the transcript to insert the placeholder and click the placeholder button from the lefthand menu. The placeholder appears in the transcript. Click on the placeholder to add a description of what to place. Once the placeholder’s requirements are complete, simply click on the placeholder and press the delete icon located on the righthand menu. Adding music to an audio recording can enhance it and make it sound more professional. To add a placeholder, select the location in the transcript to insert the music track, then click the Music button from the left-hand menu. A menu will appear that includes a variety of different music types and also offers you the option to upload your own. Selecting a category will open a new menu that includes music divided into intros, outros, transitions and underscores. In this example, the playhead has been positioned at the end of the transcript, and then an outro will be selected. Before selecting a specific track, each track can be previewed by pressing the play button to the left. Click the plus button to add the music to the audio recording. Once inserted, the audio can be moved by holding the left-hand dotted area and then dragging it to the required position. Once an Adobe Podcast project is complete, simply click the Download button to download the audio and transcript of the project. It should be noted that at the time this support guide was created, after pressing the Download button, no confirmation message is shown once the download operation is complete. You will need to check the default download location on your device to find the downloaded project content. The following resource has been created by Adobe to support staff and introduce students to podcasting. It includes an introduction and a step-by-step guide on how to create engaging, meaningful, and exciting podcast recordings using Adobe Podcast.
Enhance Speech
Mic Check
Studio

Invite a Guest
Studio features
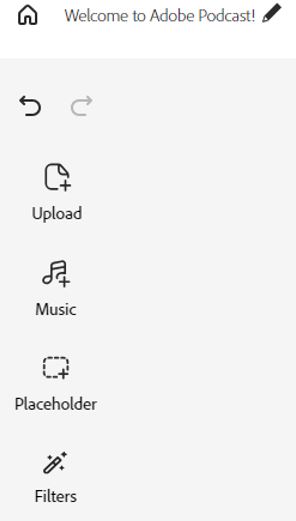
The Upload menu option allows previously created audio to be uploaded and added to the project from a local source.
Creating an audio recording

Naming your Adobe Podcast Project

![]()
Automatic generation of recording transcript
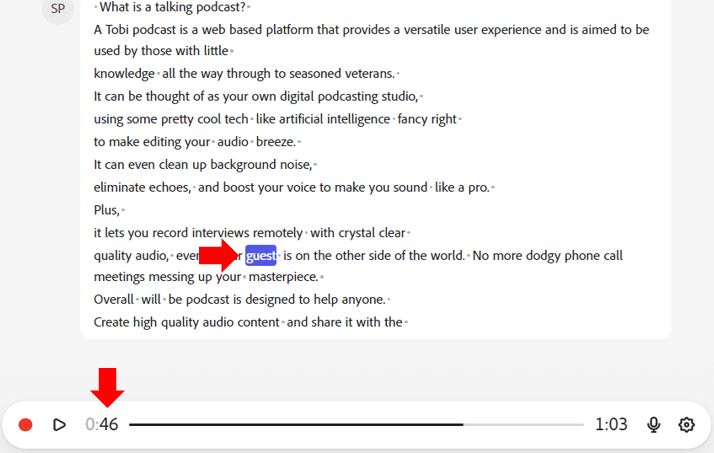
AI-Powered Transcription and Editing
Removing content from the audio recording
Copying and pasting recorded content
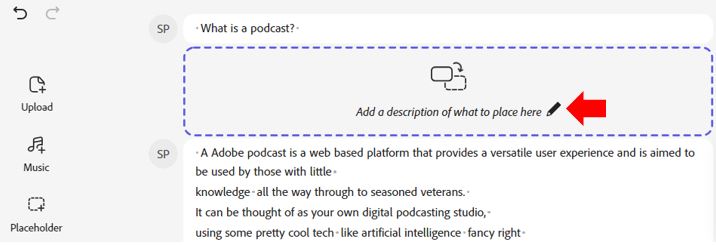
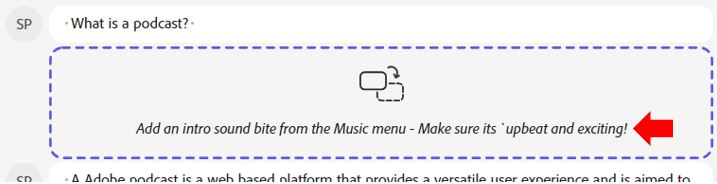
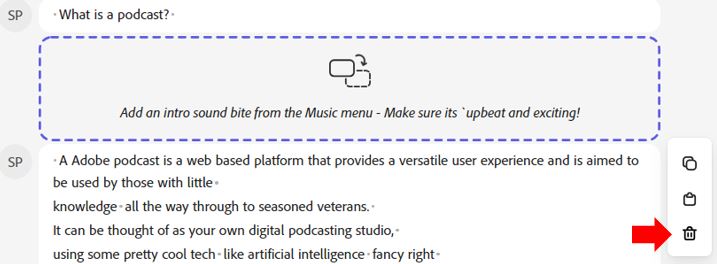
Adding a Placeholder
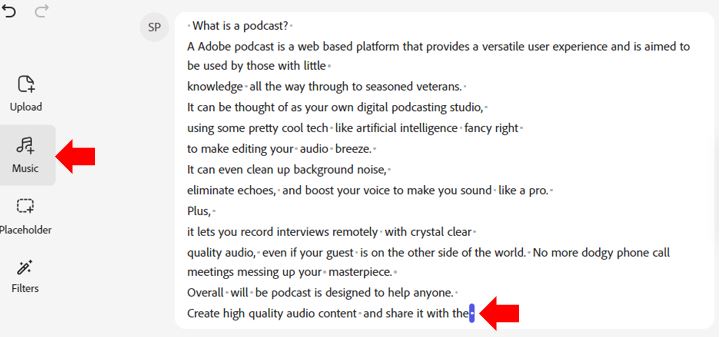
Adding Music to the podcast
Downloading a completed project.

Resource from Adobe: How to start a Podcast: A step-by-step guide