
Add Graphics to a project
Graphics you add to an InDesign document need to be in a frame, you can create a place holder frames to add the images to later or InDesign can create the frame for you as you place or import a graphic file.
To start, create a placeholder frame and then you can place a graphic in it. As mentioned previously, there are three different placeholder shapes to choose from.
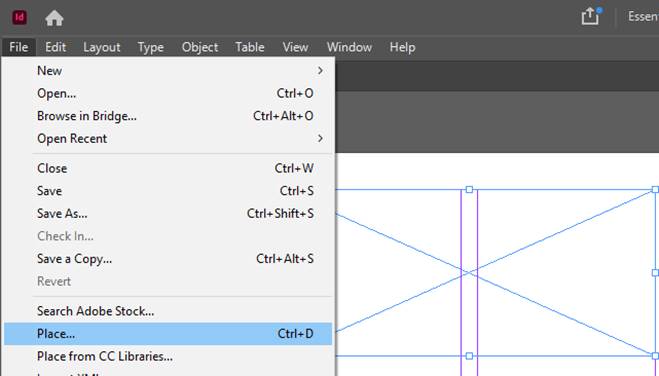
Drag the rectangular placeholder across the middle and right column towards the top of the page. The placeholder shape should snap to the columns and will turn green to represent this. To place a graphic in the placeholder, choose the File menu and select Place (or Ctrl+D).
The place command is used to import graphic, text files and more. When you place a graphic, if the selected frame already includes a graphic, the graphic in the frame is replaced by default.
You can also import multiple images at once. If you click on the Import file in the Properties panel.
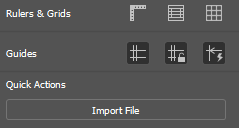
When multiple images are inserted simultaneously, the images will be available to be placed one after the other with a number available on each. You can switch between the images being imported using the left and right keyboard keys.
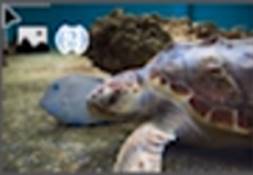
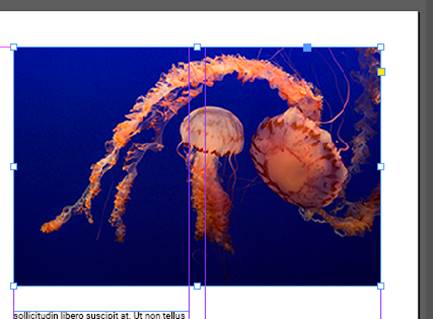
Use the Import file option to select both the Sealion and Jellyfish images. Select image one and in the blank area in column three press and drag to make a custom placeholder, this placeholder will maintain the aspect ration of the image so that when place its dimensions are not changed making the image difficult to view. Release the mouse button to place the graphic.
With the second image that is still in the loaded graphic cursor, to place it in the empty placeholder in the bottom of the first column, you can move the cursor over the placeholder and click to place the image.
Move, Resize and fit graphics
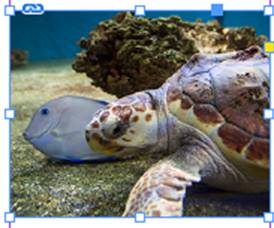
To crop and hide parts of an image that you might not want to show in your InDesign document. Using the selection tool, hover over the image of the jellyfish at the top right corner of the screen. The pointer should show a little black box next to it, click to select that frame and the graphic held within. If you now click and hold to resize from the top right corner to the purple line that marks the corner of the document it will crop the image to first the document, the crop removes the part of the image outside of the purple line rather than resizing the image.
To resize a frame and the graphic held within it at the same time, hold down the Shift and Ctrl keys at the same time and drag out the graphic frame. The Ctrl key resizes the frame and the graphic whereas the Shift key maintains the proportions or aspect ratio so you don’t distort the image. You can also use the white handles to crop aspects of the image (such as from the bottom up etc.).
The image Fitting command, this saves time by making image scaling and other transformational functions much faster. To activate this function hover over an image until the circular icon appears. The boundaries of image are shown by a brown colour frame. This means that part of the image may have already been cropped. This means that some of the image has been cropped and can be introduced to the InDesign document.
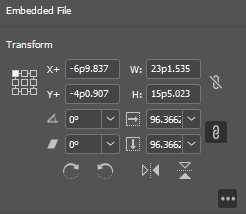
There are more details about images that can be viewed in the Properties pallet to the right on the screen, you can click on the more options in the transform section of the property menu.
Linked Graphics
When you place graphics in InDesign, by default they are linked to the original graphic outside of InDesign. This way the document file size is smaller, and you can update graphics easily. We will learn about graphics linking in the Links panel and how to replace and repair image links.
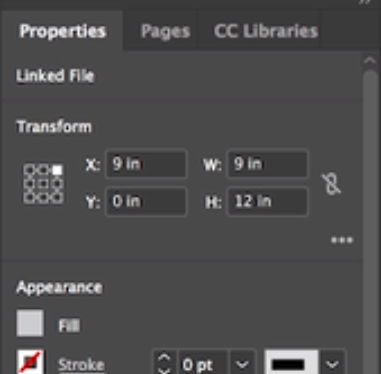
To replace a previously inserted graphic you can use the select panel option to select the specific image, in the properties of the image you can check if the image is linked or not. For more information on this graphic and all other graphics contained within the InDesign document you can open the Links panel. Click on the Window menu and then Links.
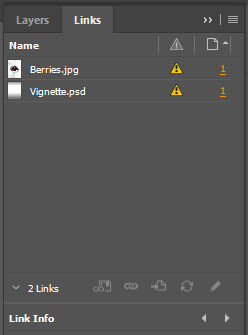
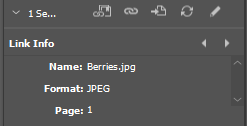
Using the Link Info section of the Properties panel you can see a lot more information about the image in question such as Format, file size, dimensions etc (If you do not see this menu you may have to click the dropdown button). The number that appears to the right of the graphic, represents the page number the graphic is shown on, the number is also a hyperlink that will jump to the page the image is placed on.
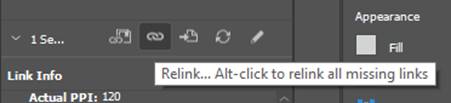
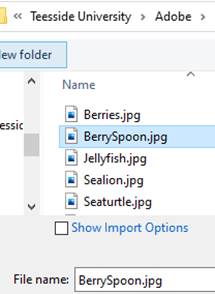
Using the links panel, you can change an image currently placed on the InDesign document. With the image you want to replace selected (in this example the Berries.jpg) in the Links panel click on the Relink option.
When you replace a graphic using this method any transformations that you applied to the original graphic are preserved and is also applied to the new graphic. This includes things like scaling and rotating. If an image is edited or renamed outside of InDesign then InDesign will warn you as the links graphics are important for printing, exporting etc.
It is important to note that any graphics shown in InDesign will be shown at a lower quality simply to improve the performance of the application.
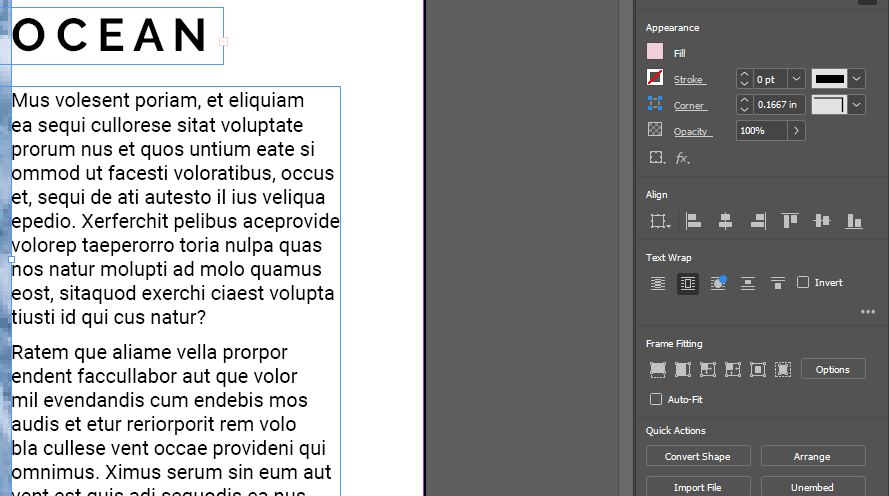
Wrap Text around Objects
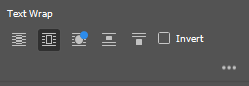
Using the Select tool, click on the ocean graphic, select the frame of the image and not the content grabber (covered previously). The text wrap functionality can be used to so that the text doesn’t cross over the image. An easier option might be to resize the text frame so that the text fits within a certain area but if you ever move the image or resize it, you will have to resize the text frame again. Instead, if you wrap the text around the image then the text will always wrap and stay the same distance away. When wrapping text around content, you apply the text wrap to the object that the text is wrapping around (so the image in this case). This way, if the image ever moves or you add other text, all text will wrap around it. With the image selected, in the Properties panel there are several wrapping options that can be used. The simplest text wrap option is to Wrap around bounding box of the selected content. Using this option, the text will no longer cross onto the image and instead stops at the frame edge. Now, even if the image moves, the text will wrap around the image. Using this option, the text although not over the image, still goes right up to the image frame.
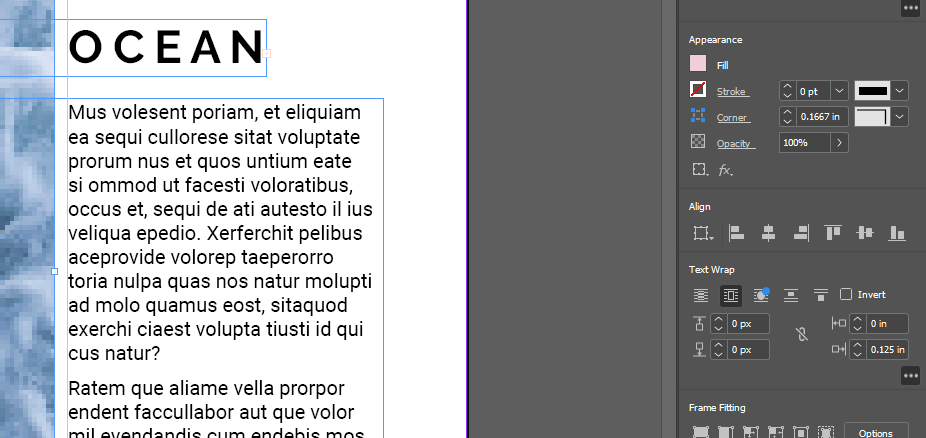
In this example, it would look better if the text was moved away a bit from the image. This can be achieved by applying an offset to the different image frame edges (the top, bottom, left and right edges). Select the More options by clicking the three dots in the bottom right corner of the Text Wrap menu. Clicking here opens the Offset values menu, by default changing one option automatically updates all offset values, however if you click Make all setting the same option off then you can change just one value (such as the right side of the text in the working example). Positive values move the wrap away from the frame and negative values move the wrap within the frame.
Reshape Image Frame
Select the Direct Selection tool and hold the mouse cursor over the top right corner of the image frame, the cursor should change appearance and now you can click and drag to reshape the image. Although the image has now moved the text has stayed in position, this is because it is still set to wrap around the bounding box set around the image.
Using the Selection tool (this ensures the frame is selected and not the image). Now select the Wrap around object shape option, you will also want to add an Offset to move the text further away from the edge of the image. When you wrap text around an object shape, there is only one offset value you can alter. To change the value faster you can hold down the Shift key and click the Up Arrow (this keyboard shortcut works for almost all fields in InDesign).