Transferring Adobe Express projects between Adobe User Accounts (Staff & Students)
In this learning support guide, you will learn how to transfer and/or share Adobe Express files/projects between user accounts, which supports collaborative working.
Why would I copy an Adobe Creative Cloud Project?
Without this feature, users must create the same content multiple times unnecessarily. It can be challenging if the layer or design is part of your core design on multiple projects. This workflow can also be useful for transferring Adobe content if staff members are leaving the university.
Step-by-step instructions to transfer Files & Projects from one Adobe Express account to another
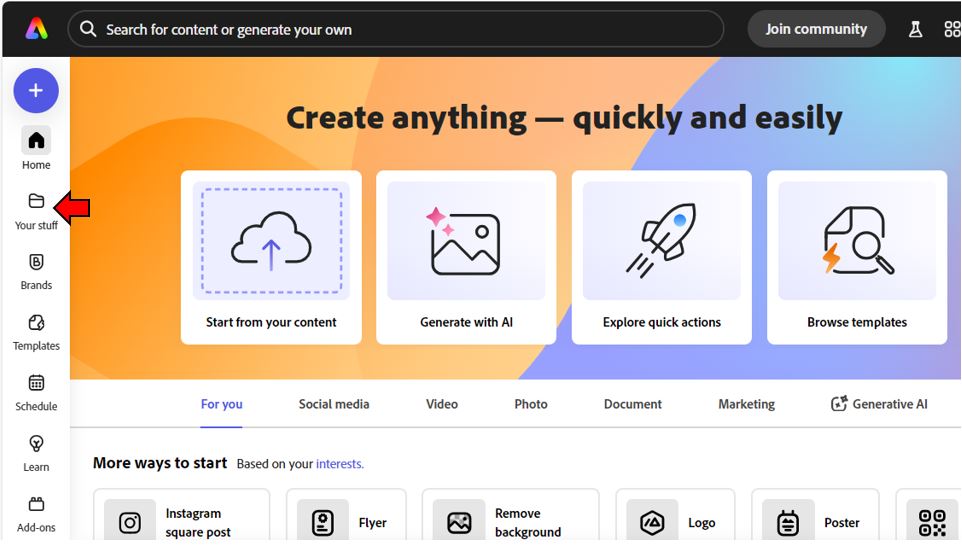
1. Log into Creative Cloud Express on your desktop. https://express.adobe.com and click the Your Stuff button located in the left-hand menu.
2. Open the project to be transferred, click the Share button located in the upper-right corner and then select Invite.
3. Enter the email of the person you want to transfer the project with and type their name (If they are not a member of Teesside University you will need to enter their full email address).
There is also a text box below the Invite People option where a brief message can be added to pass on additional information to the recipient(s). Once you have added the details of all required collaborators (and optional message), click on the Invite to edit option. Make sure you change the access permission option to ‘can edit’ as well.
The Get link option offers the ability to share a project via weblink with others who have been granted access. If they have not been granted Edit rights, they will need to request this from the creator/owner of the project. Use the drop-down menu to select one of the three options including: Only invited people can access, Everyone at Teesside University Staff and Students or Anyone with the link.
Click the Copy link button and share the link via email, MS Teams, Blackboard etc.
Receive projects
If you are the recipient of the file being transferred, follow these steps to transfer to your account.
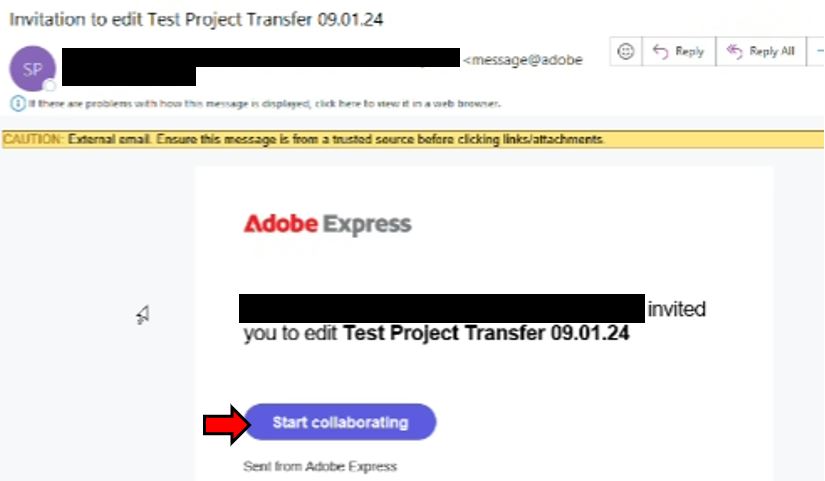
1. Accept the project invitation that you will receive in your email inbox by clicking the Start Collaborating link or from the in-app notification centre.
2. By clicking on the link in the email this should automatically open Adobe Creative Cloud Express and the project that has been shared with you
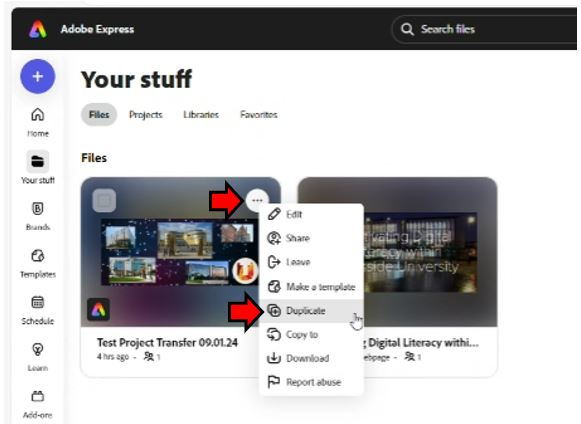
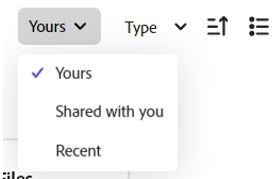
3. Locate the project under Your Stuff > Files > Shared with you
4. Locate the shared file, click on the three dots in the top right and select Duplicate.
The shared project has now successfully been duplicated; this new copy can now be found `by moving back to the Yours section via the drop-down menu.
Any changes made from this point on will not be reflected in the shared copy. As shown in the screenshot below where the recipient of the file transfer has renamed the duplicated file ‘Test’
For more information, please contact the Digital Learning Specialist team.


