
Create a web page using Creative Cloud Express
In this guide, you will learn how to create single-page web pages, host them, and share them publicly using Adobe Express.
What is an Adobe Express web page?
Using Adobe Express, you can create single-page web pages that can be hosted and shared publicly. It is ideal for projects such as portfolios, resumes, presentations, blog posts, and photo galleries. You can also use these web pages to showcase a product catalogue, advertise a special offer, or act as a weekly or monthly newsletter for businesses.
Follow these steps to create a web page:
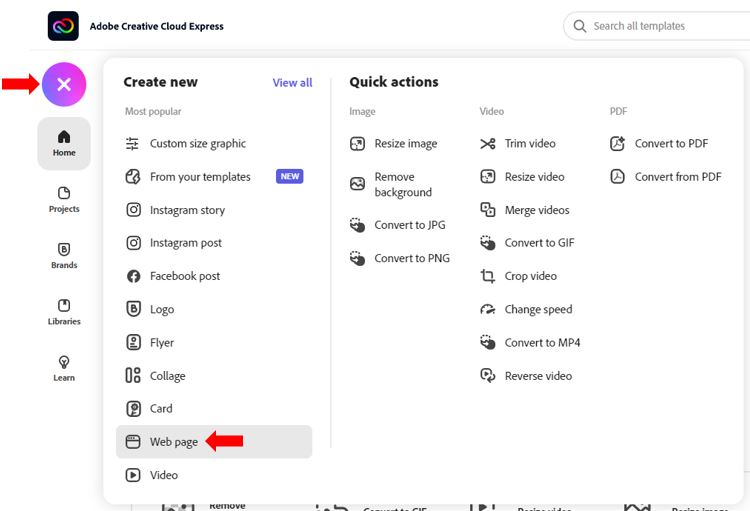
From the Adobe Express home page, click the (+) icon and select web page.
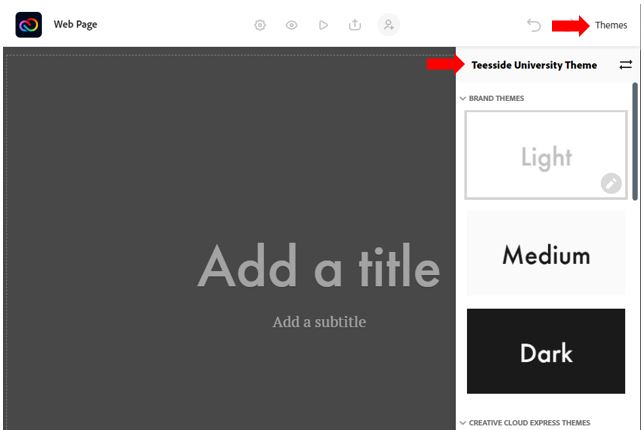
Select Themes from the upper-right corner of the page to apply a theme and set fonts and styles that will completely transform the look and feel of your content. You can change it at any time by simply selecting another theme. If you do not select a theme, the default theme is applied. If you have set up a brand or theme, you will be able to select it from the top of the theme list.
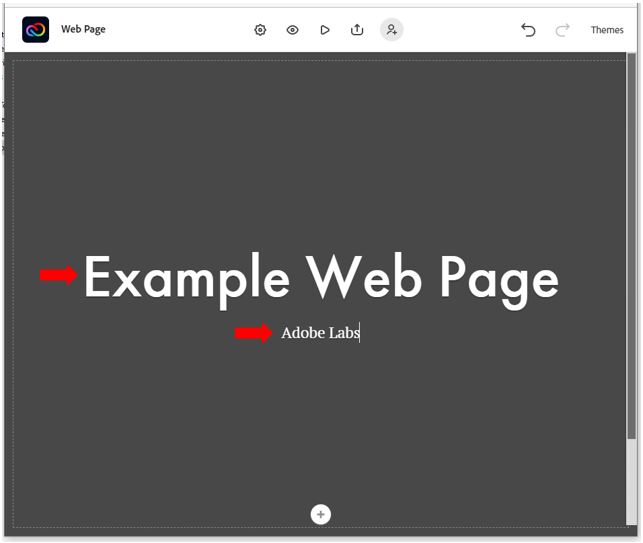
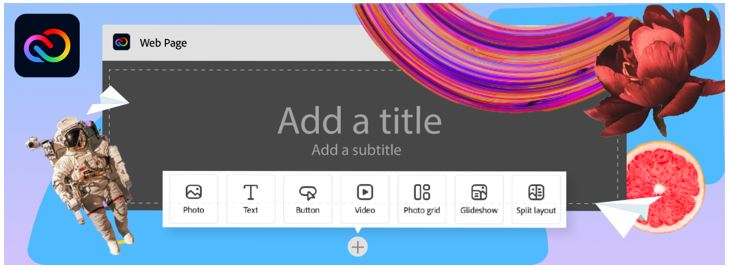
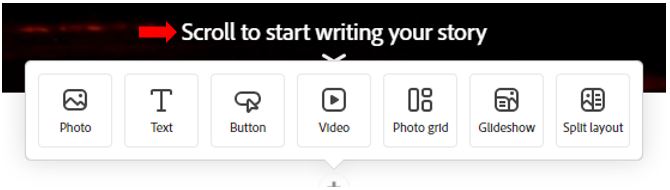
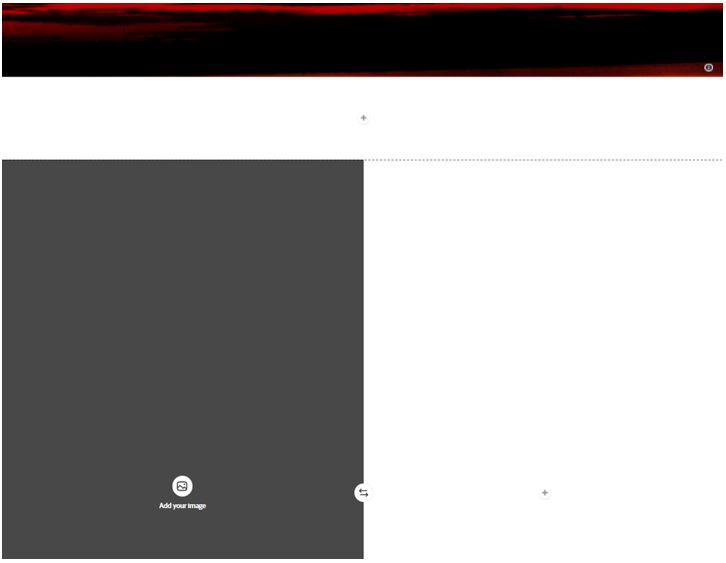
Get started by adding a title. Choose from options to add text, buttons, images, or videos.
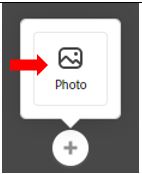
Click on the plus button to add a background image to the title section of your web page.
 |
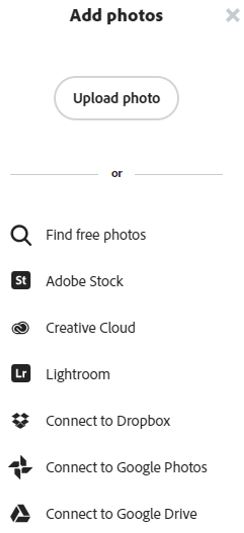 |
| Click on the Photo icon to choose an image to be used. | To add a photos, you can search for free photos from Adobe Stock or bring them in from your Libraries, Lightroom, Dropbox, Google Photos, and Google Drive. |
Once you have created the title section of your webpage you can now start to add content to the main body of the web page. To do this click on the plus button displayed just below the title section. Each option is explored in the following section.
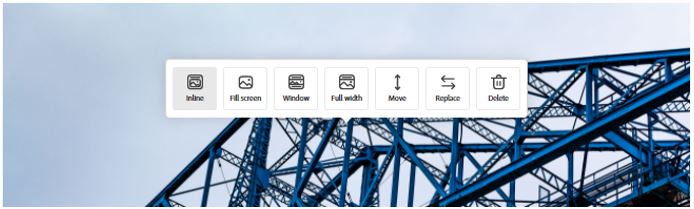
Photos: As mentioned above, you can search for free photos from Adobe Stock or bring them in from your Libraries, Lightroom, Dropbox, Google Photos, and Google Drive. Once an image has been inserted into the web page several formatting options can be explored. These include:
- Inline: Displays the image aligned with the current content of the web page
- Full Screen: Displays the image filling the entirety of the browser window, if the browser window is resized then the image will resize to fill the resized window.
- Window: Displays the image across the width of the page however limits it height and is revealed as the web page is scrolled through (both upwards and down)
- Full width: Displays the image across the width of the page
- Move: Selecting move displays both an Up and Down arrow to allow you to re-organise content on the web page.
- Replace: Allows you to select a different image using any of the import photos options previously covered.
- Delete: Removes the photo from the web page.
Text: Add your text and adjust format and alignment. Assign H1 or H2 component to make a heading.

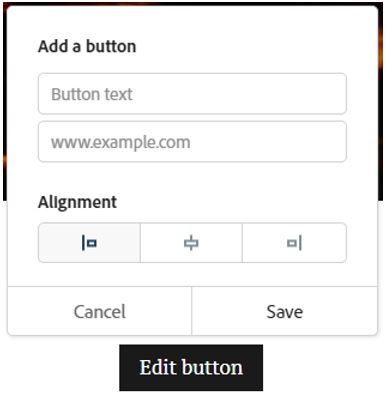
Button: Add a button text and assign a URL.
Videos: Add a link from YouTube, Vimeo, or Adobe Express Video.
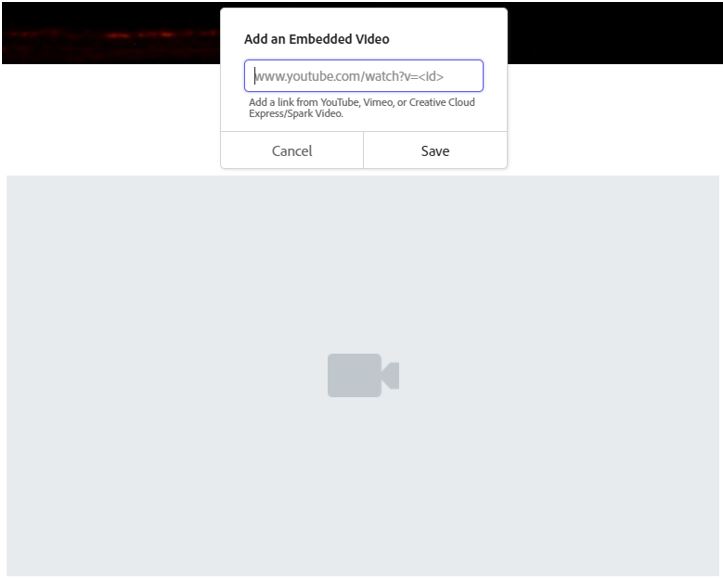
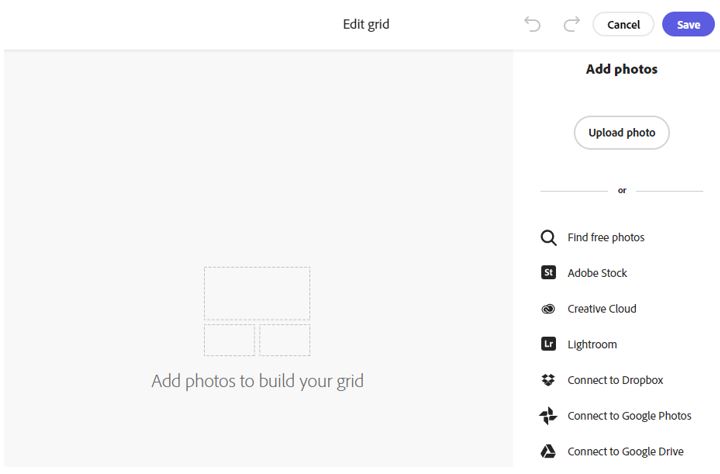
Photo grid: Add multiple photos to build your grid. You can move around the photos and adjust their size.
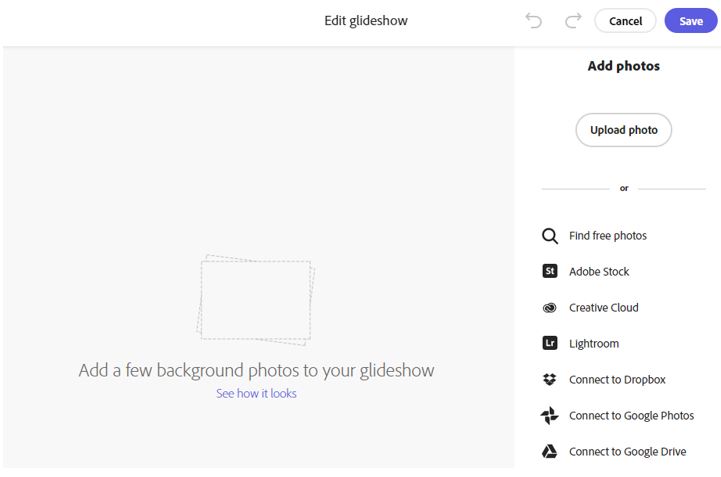
Glide show: Glideshow gives you a beautiful new way to tell your story. Choose photos, then add text, block quotes, images, and more.
Split layout: Use this component to split screen between image and text.
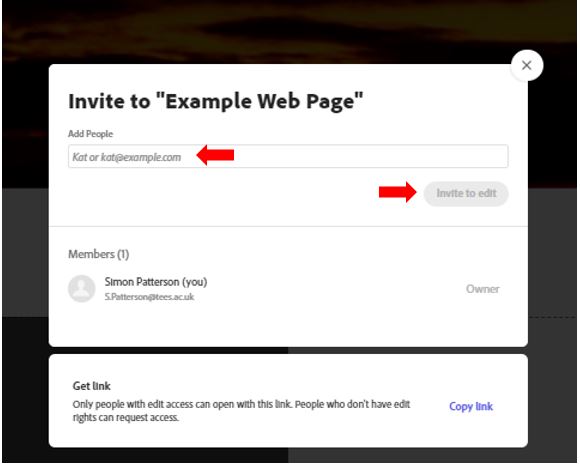
Invite your teammates and friends to collaborate on the project by clicking the Invite icon and entering their email. Only one person can edit the project at a time.

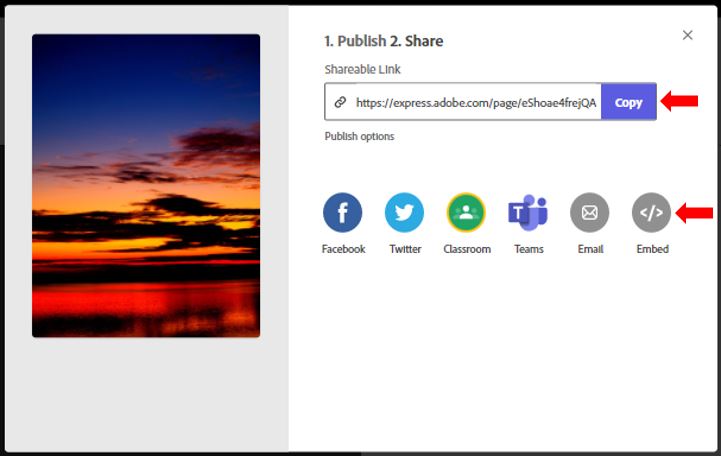
When your page is complete, click Share to get a new, unique URL. Your page is now ready to be shared across social media platforms, emailed, or added to newsletters and other publications.
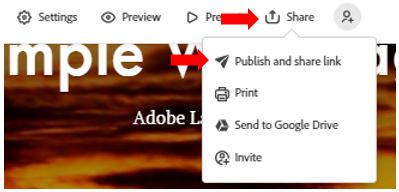
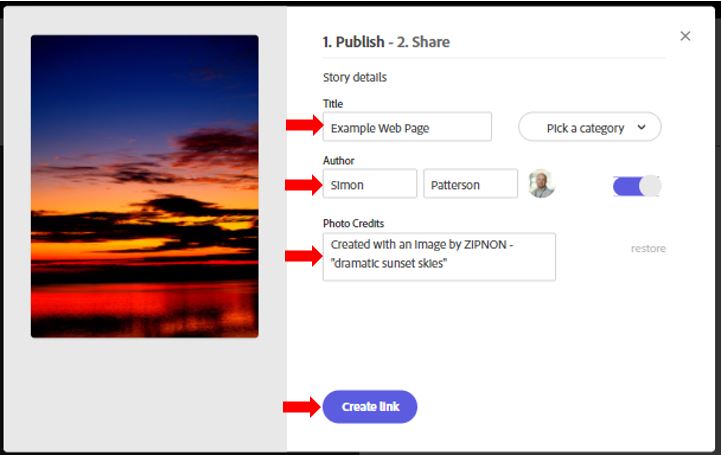
To publish the site, click on the Publish and share link option you will be asked add details that relate to the new web page including:
- Its title
- A category (Business, Causes, Education, Events etc.)
- Author (including upload and allow use of an image)
- Photo credits
Like with all other Adobe Creative Cloud products, there are several share options available. The Share tool can also generate a snippet of code that allows you to embed your new page into an existing website by pasting the code into your site files. You can also print your project or send it to Google Drive.
More videos on Creative Cloud Express can be found here: Creative Cloud Express – YouTube