This article has been created to introduce staff to Adobe Character Animator. It offers guidance through the process of setting up a character and adding simple enhancements. The following sections have been included:
- What is Adobe Character Animator and what are the available modes?
- Creating animations.
- Enhancing the performance
- Export the finished Character Animation
What is Adobe Character Animator and what are the Available modes?
Character Animator enables expressive, high-quality performance-based animations. It’s so fast that it can even be used live. Adobe character animator comes in two usable modes. Starter Mode and Pro Mode. Starter Mode makes Character Animator accessible to everyone. With Starter mode, everyone can start animating without prior experience. The simplified interface focused on performing, recording, and exporting characters, makes it easy to create animation.
What is Starter mode?
Starter Mode in Adobe Character Animator comes with a streamlined workflow and user interface, making character animation easy for everyone. Use the sample puppets to perform, record, and export your characters. Starter Mode helps anyone make character animations at any level of experience.
Character Animator Starter Mode is for everyone, you can start character animation without any prior experience or knowledge of Photoshop or Illustrator.
How does Pro mode differ?
Starter Mode in Character Animator is a simplified interface that concentrates on puppet performance, recording, and exporting. You do not need a Creative Cloud subscription to use Starter Mode. You can switch between the two modes and when you are ready, upgrade to Pro Mode. Once a Pro Mode feature has been used on a project you cannot return to Starter Mode.
Functional differences between Starter and Pro mode
| Starter Mode | Pro Mode |
 |
 |
| Starter Mode is a free, streamlined mode in Character Animator that lets anyone make quick animated videos. | Pro mode is a full-featured app mode having a professional, in-depth interface. |
| Everyone can start animating through performance. No need to be an expert rigger. | Pro mode requires a Creative Cloud All Apps subscription. |
| Starter mode has sample puppets allowing you to create animations in no time. Select a puppet or import a puppet and add or record a voice. | You can create puppets using layered Adobe Photoshop and Illustrator documents. You can also use Puppet Maker or Characterizer. |
| Every sample puppet has a full Controls panel with available poses and emotions. | Pro mode offers a multi-track timeline with multiple characters possible in a scene. |
| Starter mode cannot open projects created in Pro mode. | Pro mode offers the Auto swap feature that allows Triggers automatically to switch the puppet’s movements to different positions. |
| Export animation to an H264 (MP4) file directly using Quick Export. | You can convert any Starter project to a Pro project by switching to Pro mode. |
| You can’t convert a Pro project into a Starter project. | |
| Quickly export animations directly to H264 files without needing the advanced controls found in
Adobe Media Encoder. |
Create your animation in only a few easy steps.
Before you start you must check whether you’re in Starter mode or Pro mode using the App mode button at the upper right corner.

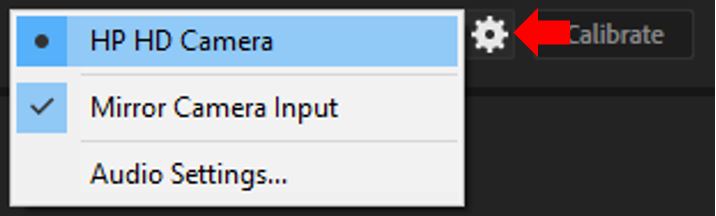
Set camera and microphone preferences.
Click the Camera and microphone settings to select the preferred webcam to use face and body tracking.
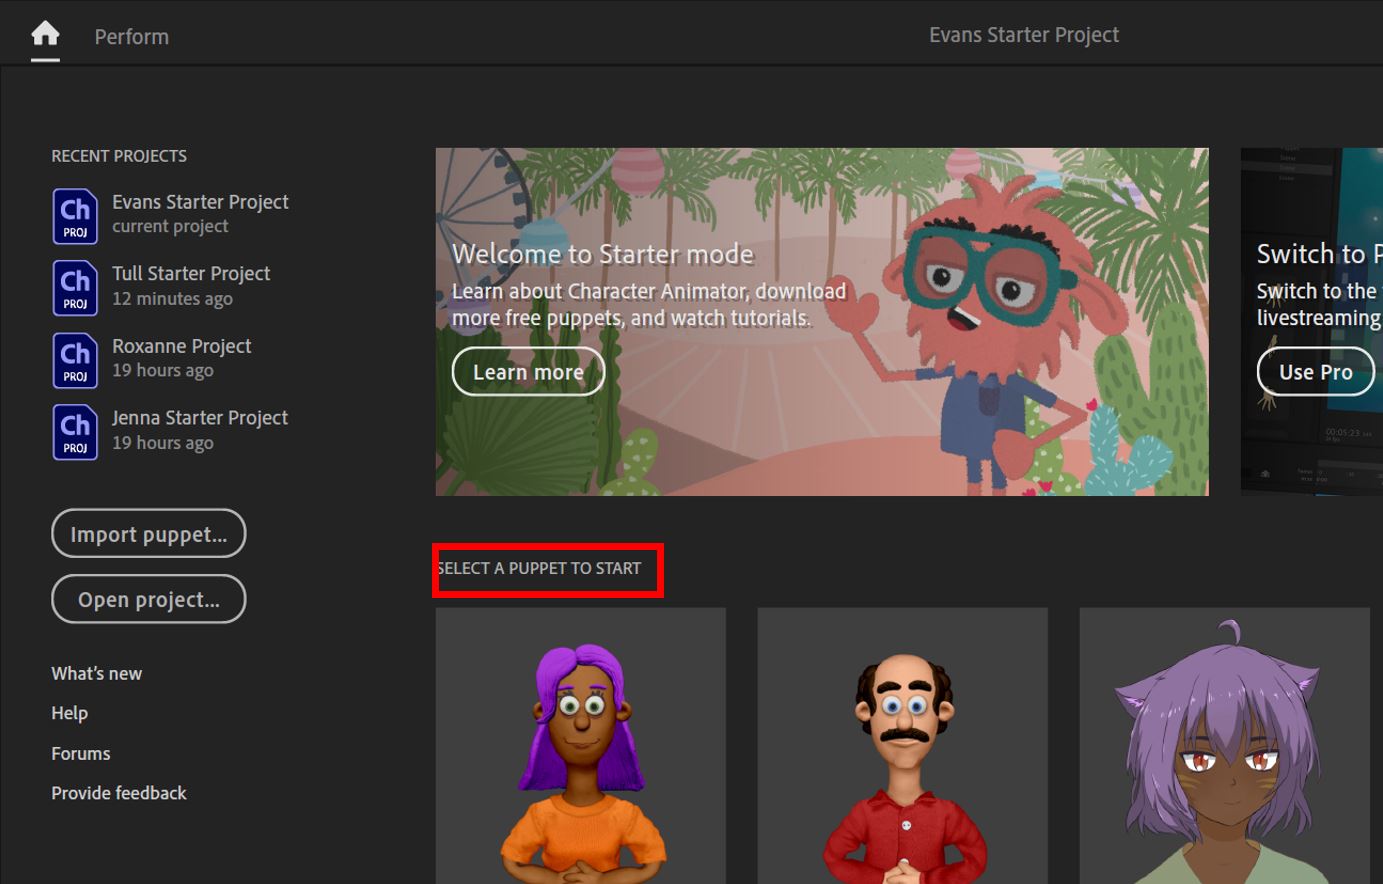
Select a puppet.
Select a puppet from the example puppets on the Starter mode home screen. You can also import a puppet. More puppets can be downloaded (including both free and paid for).
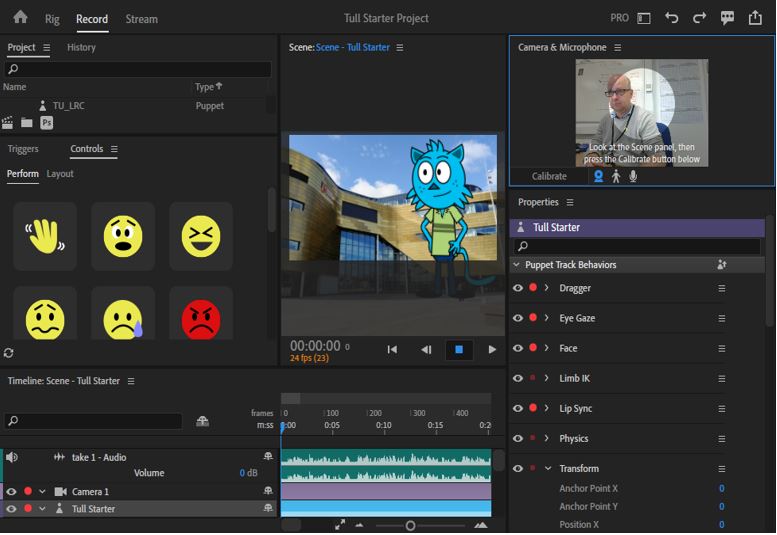
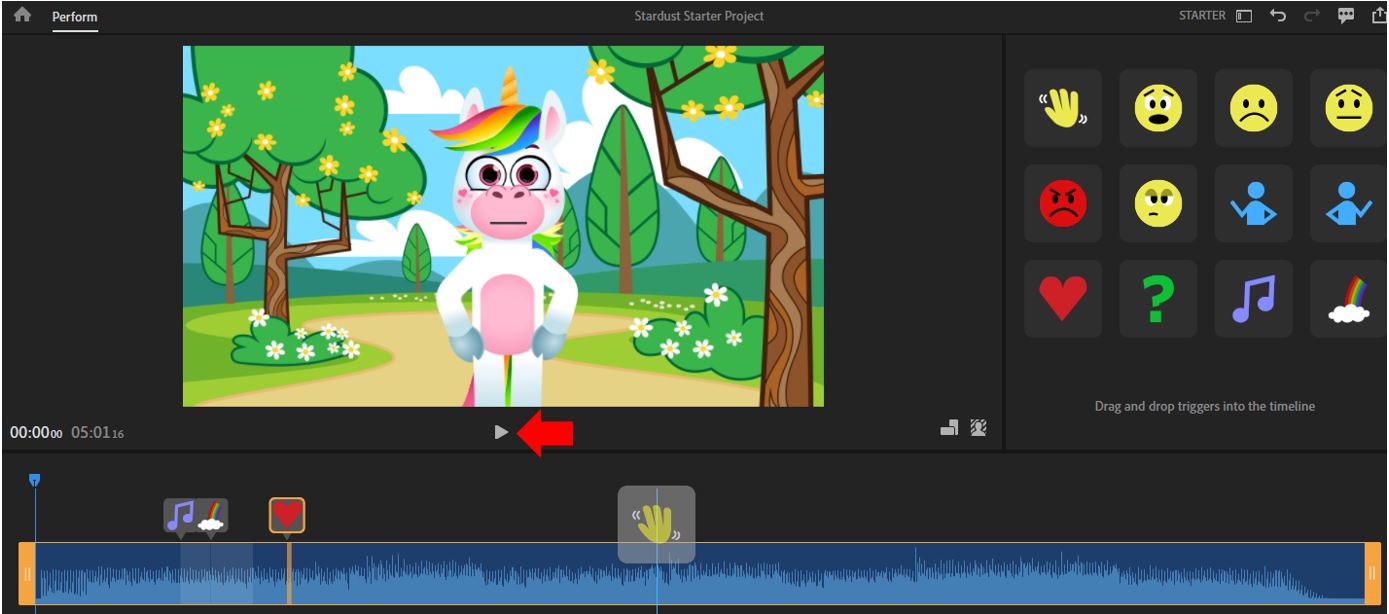
Perform a scene
Character Animator opens the puppet in the Scene panel of the Perform workspace, where you can do the following functions:
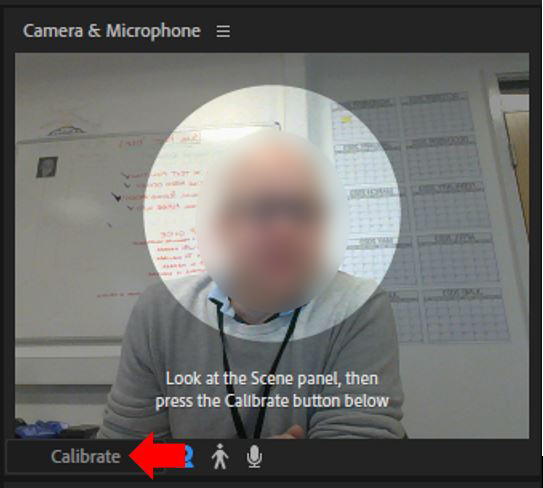
Set your rest pose using the Calibrate button in the lower right corner to improve face tracking.
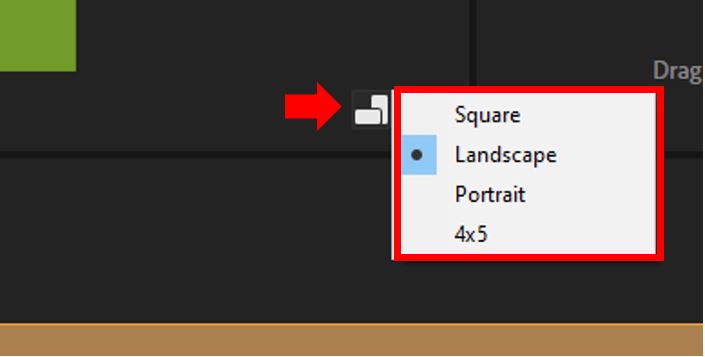
Use the Aspect Ratio menu to change the dimensions of your animation.
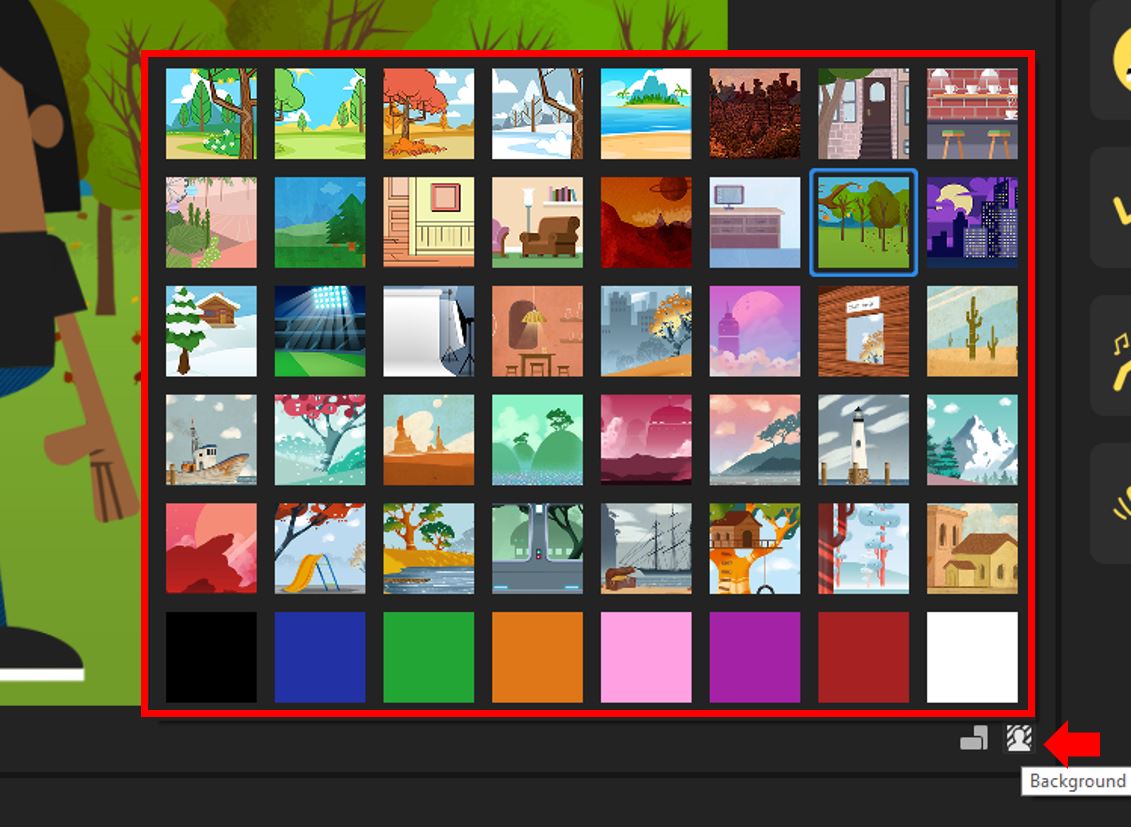
Use the Background menu to change the background for your animation.
Click Record face and voice to use the webcam to control the puppet and record the voice via webcam.
Select Import recorded speech to import audio in AIFF, MP3, or Adobe Wave PCM file formats.
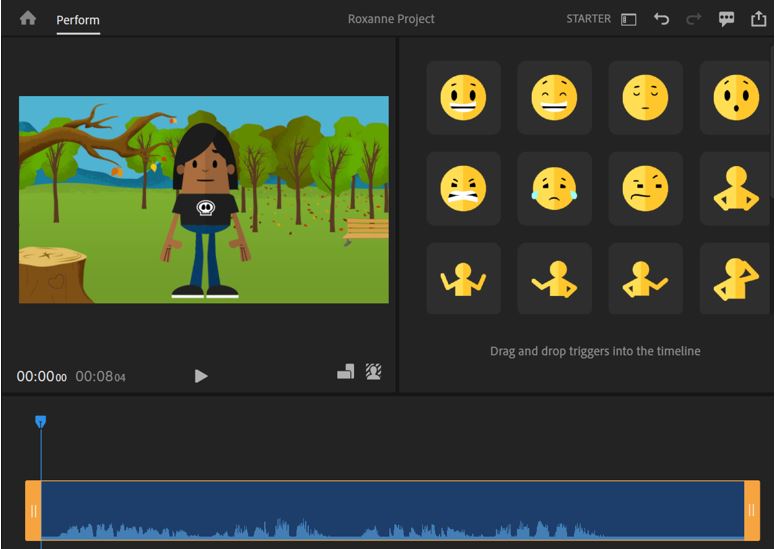
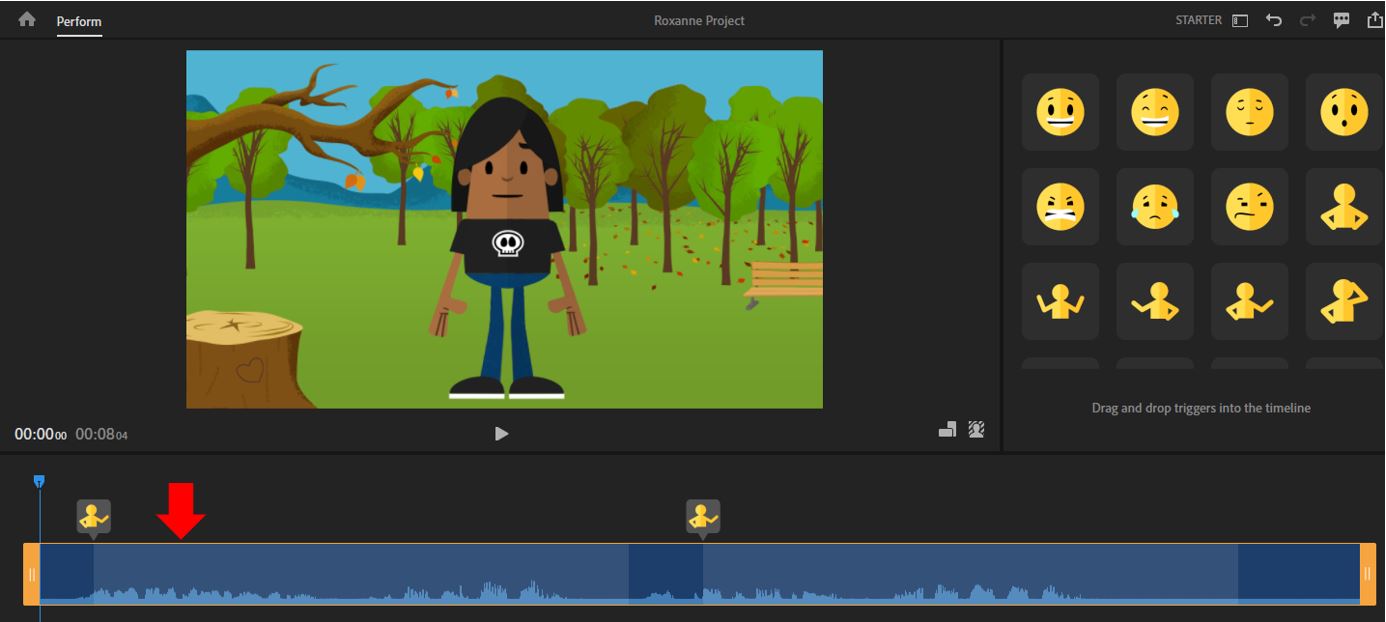
Enhance your performance
After the recording finishes, the Timeline panel displays the audio waveform and the duration of your recorded performance as a track. The Controls panel window opens, displaying several stances and emotions that might help you enhance your recorded performance.
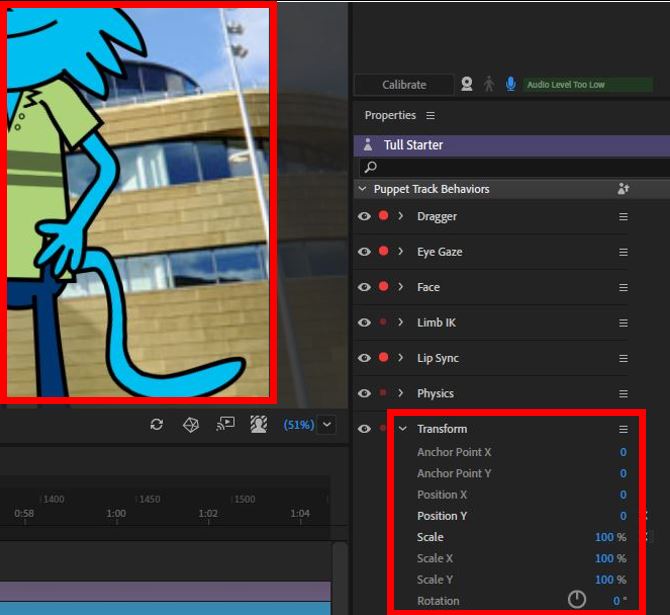
Scale your character
Some of the default puppets (characters) in Adobe Character Animator can take up large areas of the screen. The scale of the puppet can be altered to increase or decrease the size of the character.
Examples of using a scaled character and the associated settings |
|
 |
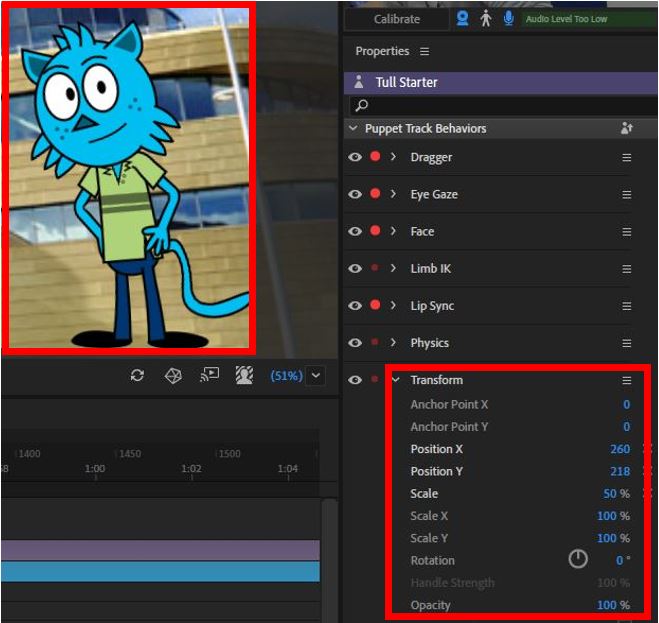 |
| This image shows the original character with all of the default settings scaling and positional settings configured. | This second image shows the character after being scaled to 50%. Its position on the screen has needed to be updated to reposition it in the bottom left-hand corner. |
To rescale a puppet, select the puppet in the timeline assets and from the associated properties, expand the Transform options and change the Scale value as a percentage (there is also an option to change only the X or Y scale).
Adding character controls (animations):
Hover over the icons in the Controls panel to see a preview. Drag and drop them to the Timeline to apply them to your puppet.

To preview your animation, click Play, then Stop when you’re ready to make further adjustments.
Trimming animations and projects:
Use the Trim Handles on either end of the puppet track to trim the scene’s duration.
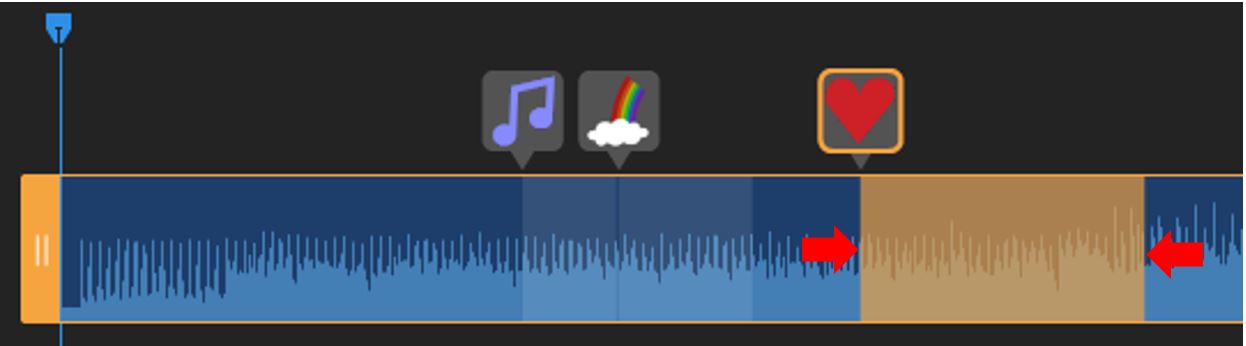
Select a small icon to trim an applied control’s length, then trim the edges overlaid on the track.
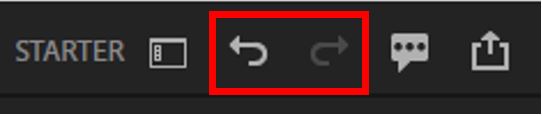
Use Undo and Redo in the header bar to undo a recent change or redo an undone modification.
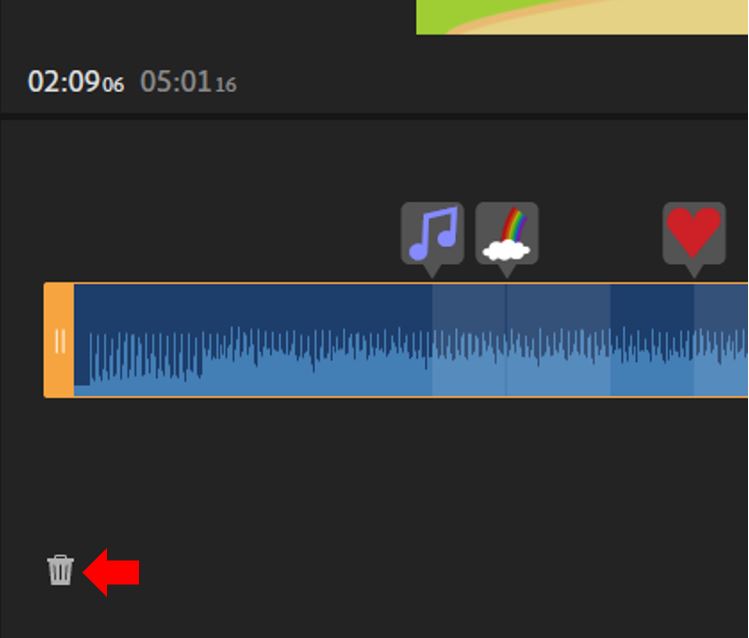
In the timeline, click Delete recording to undo all changes to a puppet and restart the recording.
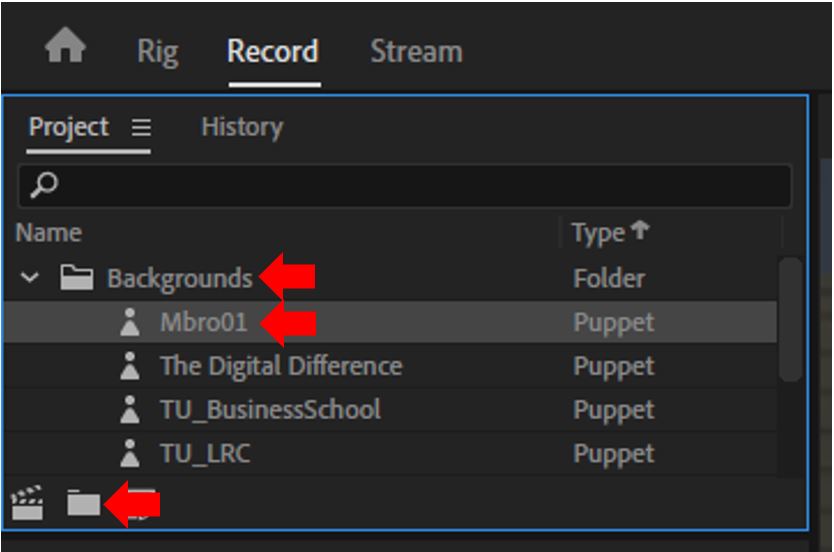
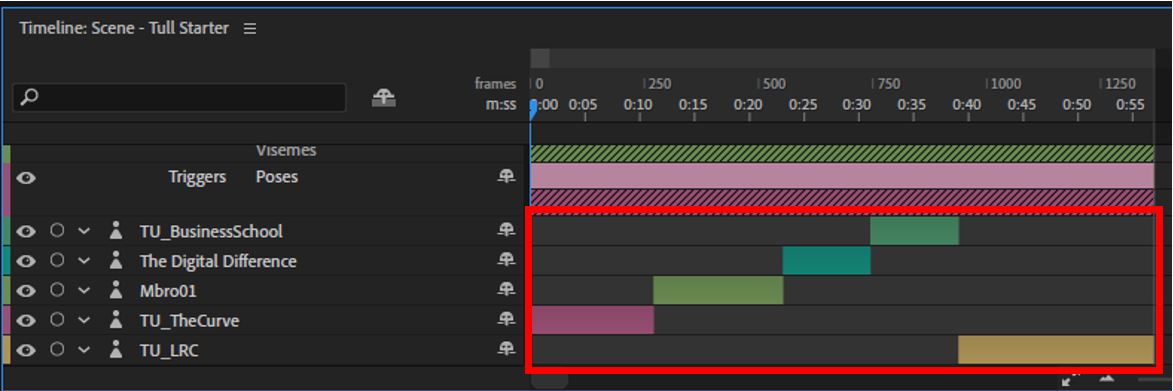
Adding custom backgrounds
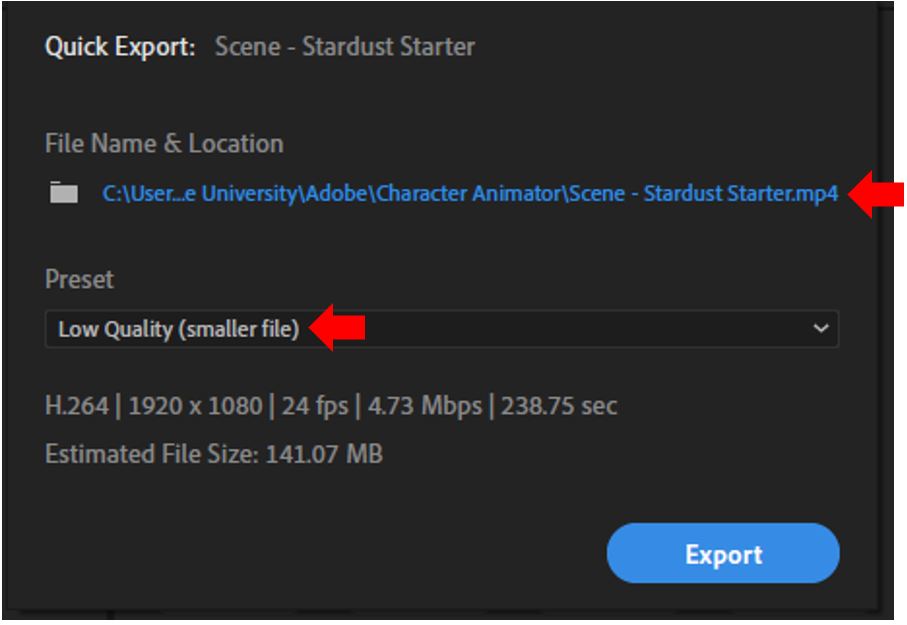
Once you have your background selected, resize it to 1920×1080 pixels, and then follow these steps to add it to your scene. Images can be scaled up and down, as with any image that is scaled up quality can be lost. 1. Select File > Import. 2. Select your background image by locating its file on your computer. Once you’ve found it, select Import. (1920x1080px). 3. Click and drag the image from the Name window onto the Scene Timeline just below your puppet. You should now see the new background image. Additional folders can be created to better organise 4. Multiple images can be imported and added to the timeline so that background image changes can be applied. You can use Quick Export to export an H264 file in just a few clicks. In the header bar, choose Quick Export. Modify the file name, location, and pre-set if necessary, before clicking Export. Choose from a list of high/medium/low-quality presets. To enhance accessibility and improve compression it is recommended to import the newly created project into Panopto. This allows captions to be automatically generated and applied to the video. For more information on using Panopto see the following Panopto guide here. 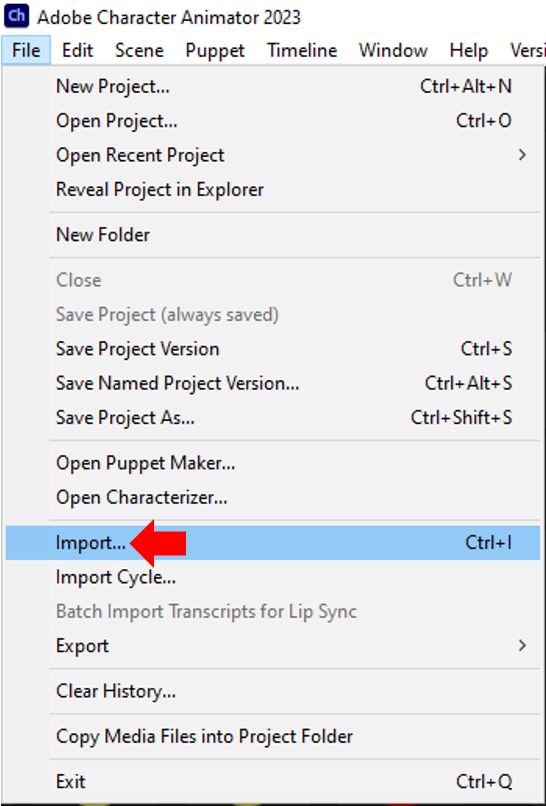
Export animation