This article provides a comprehensive guide to support staff in gaining the knowledge and skills needed to create a Microsoft OneNote Class Notebook and configure some basic functionality.
This guide will explore three different methods for setting up a OneNote Class Notebook, each offering benefits tailored to your specific needs and preferences. Microsoft OneNote Class Notebook can be set up and shared with students in the following ways:
- Blackboard Ultra
- Microsoft Teams
- OneNote application (both desktop and web-based versions)
Use this guide to discover the method that best suits your workflow and enhances your teaching practices.
Contents
- Setting up a Class Notebook in Blackboard Ultra
- Setting up a Class Notebook in Microsoft Teams
- Setting up a Class Notebook within the OneNote application
- Basic configuration of a Class Notebooks
1. Setting up a Class Notebook in Blackboard Ultra.
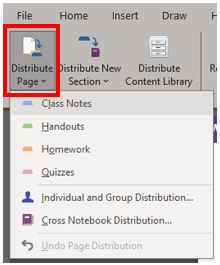
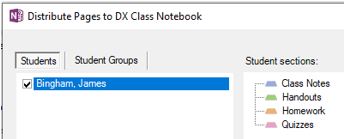
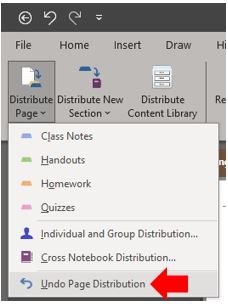
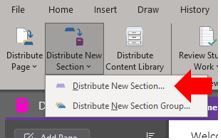
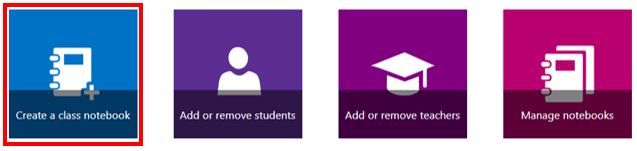
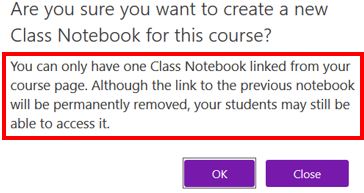
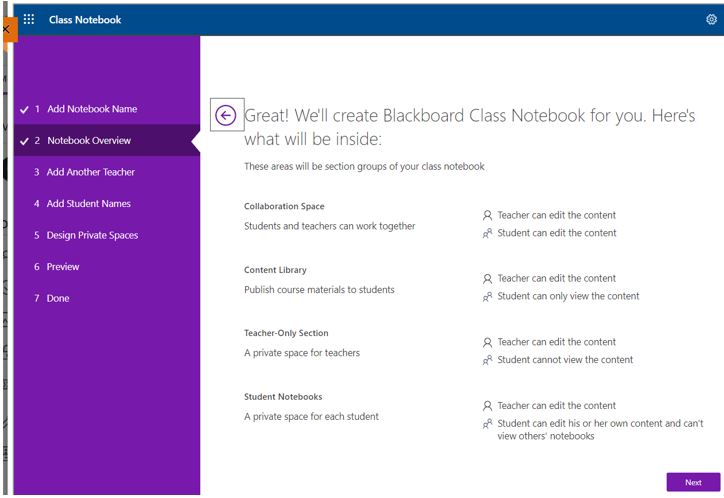
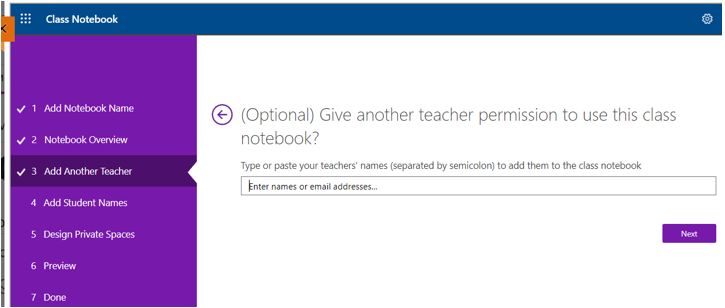
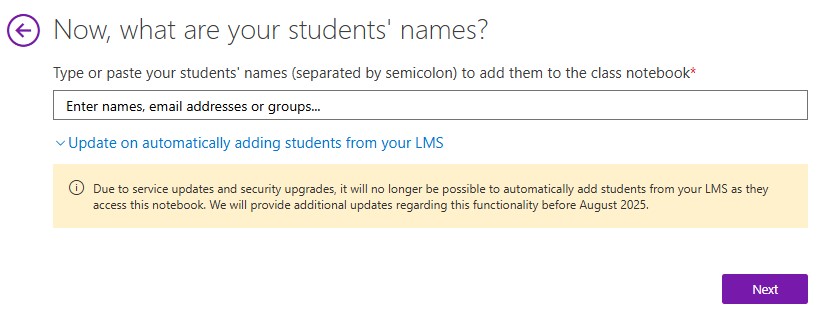
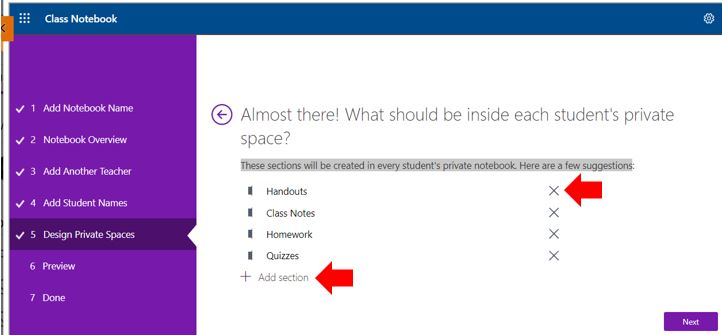
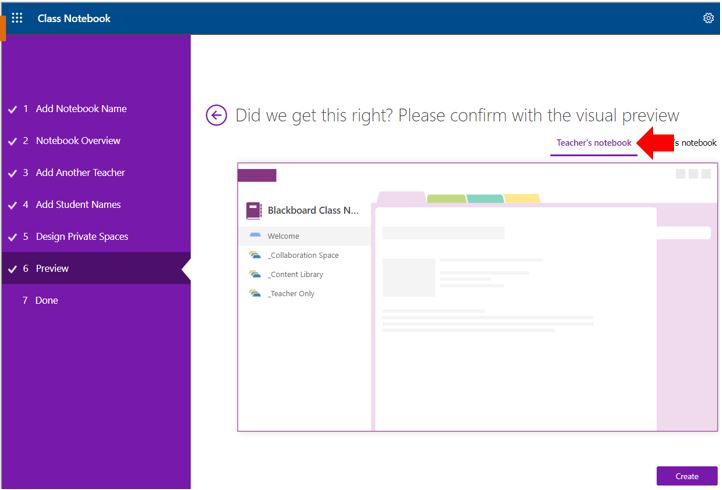
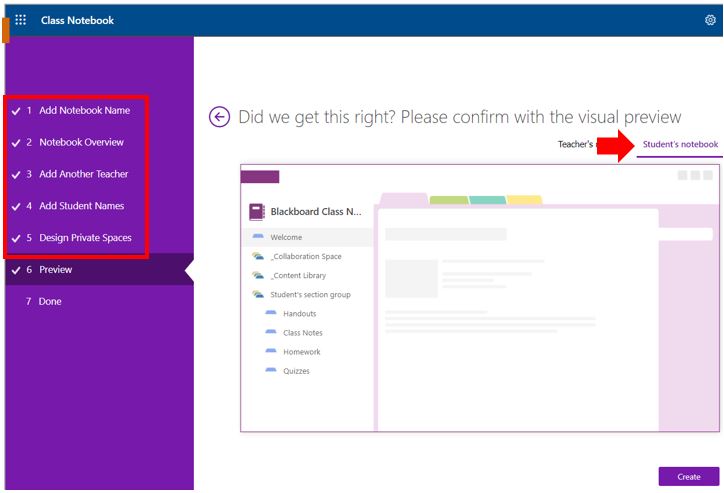
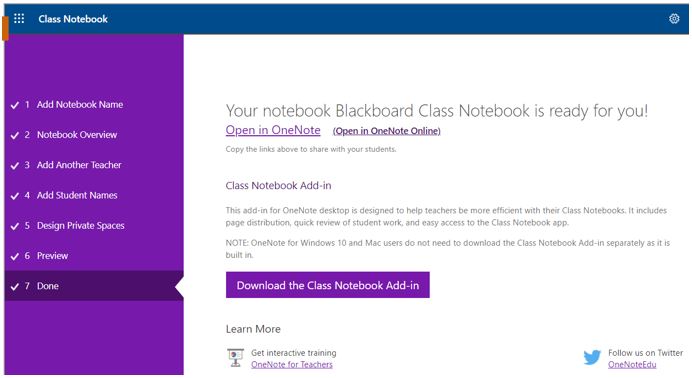
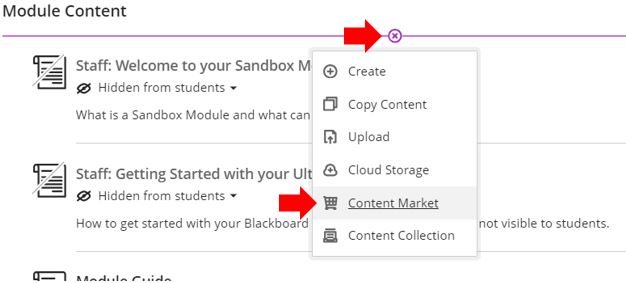
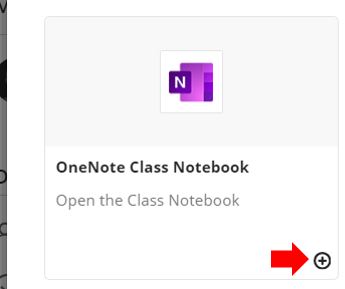
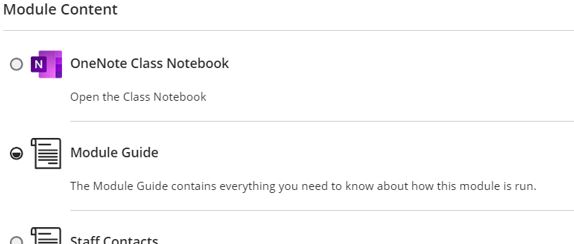
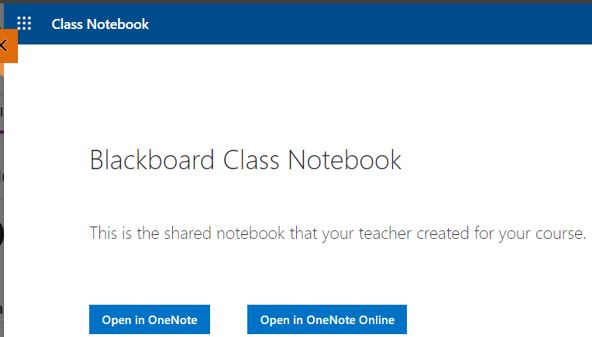
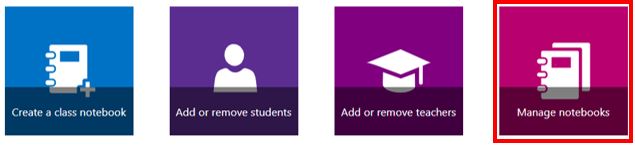
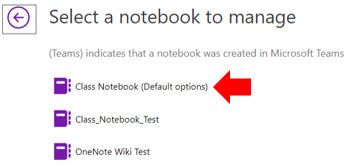
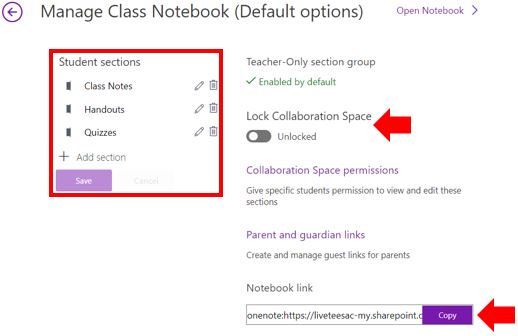
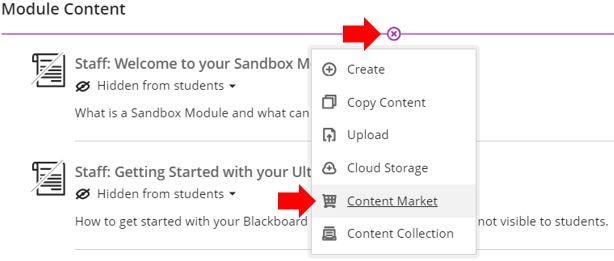
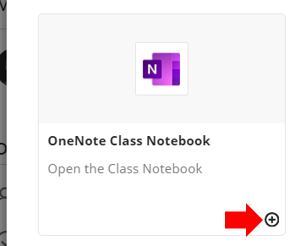
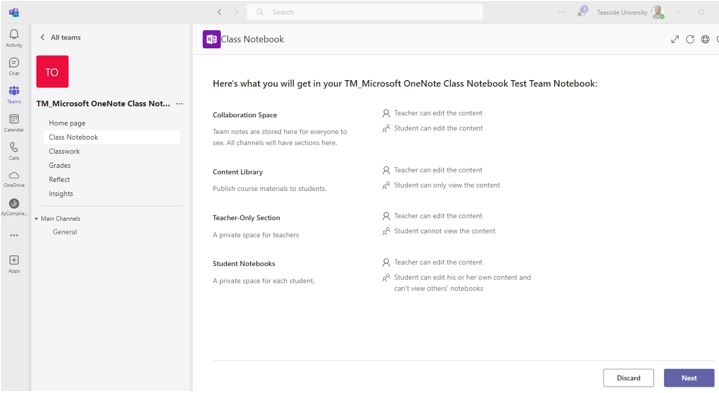
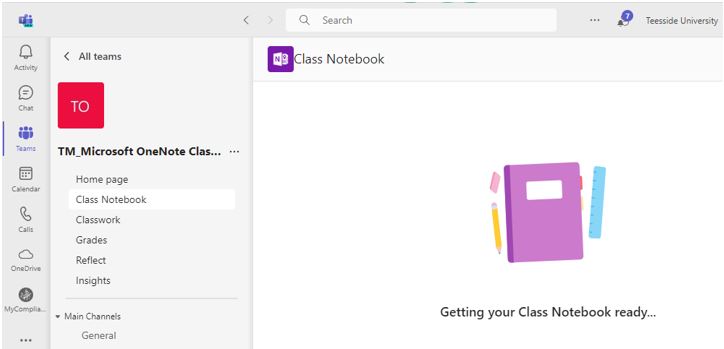
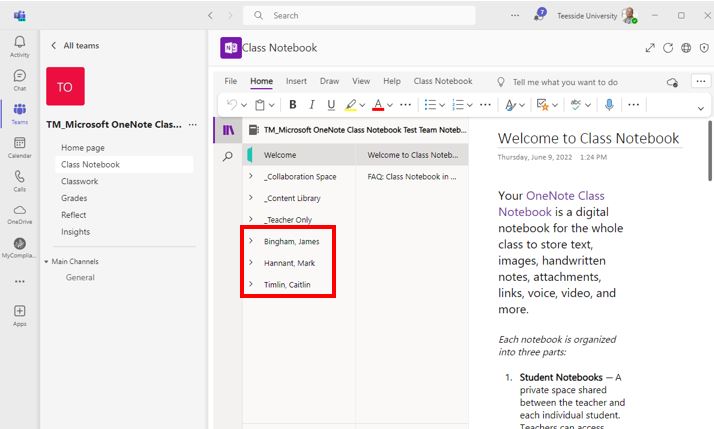
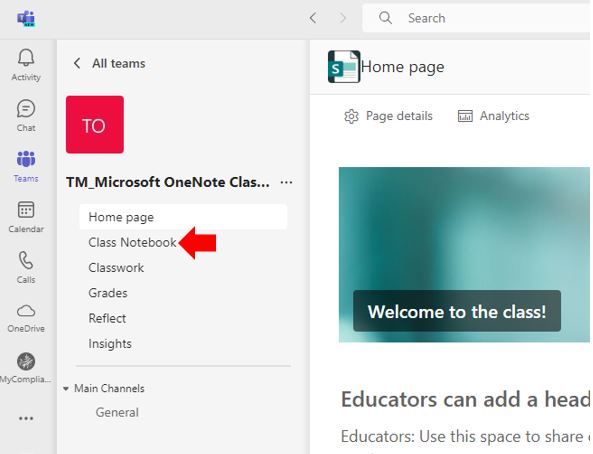
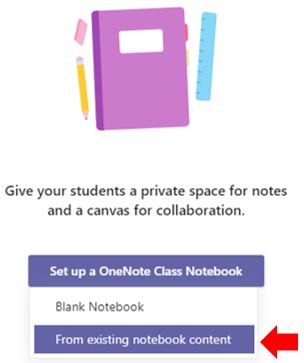
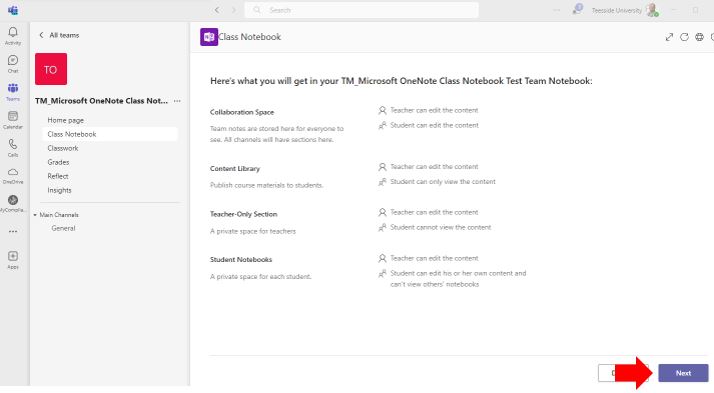
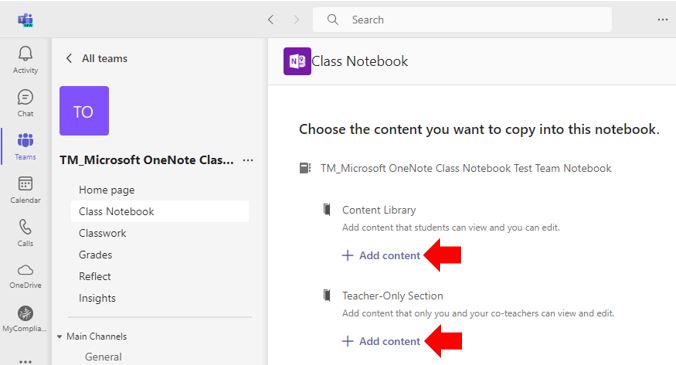
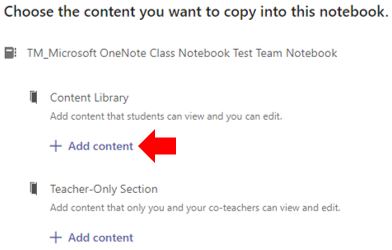
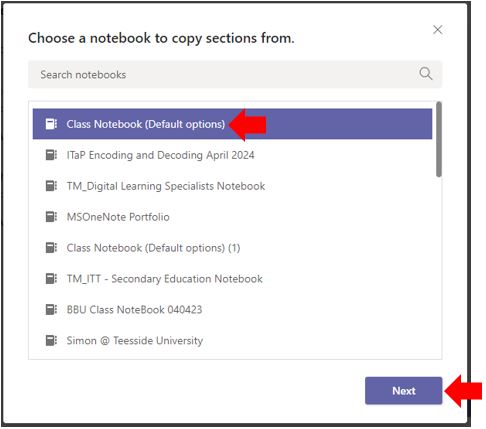
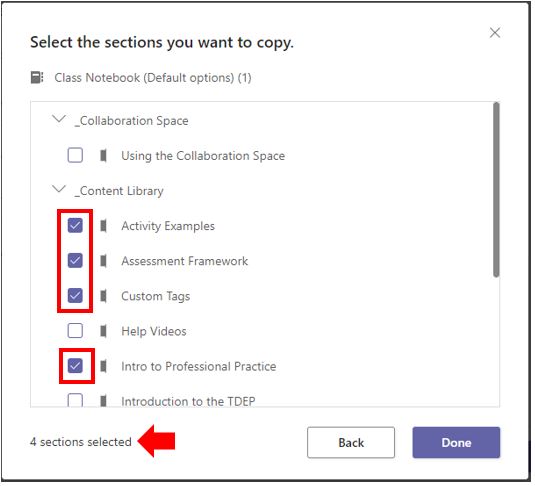
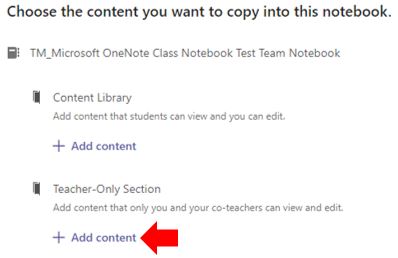
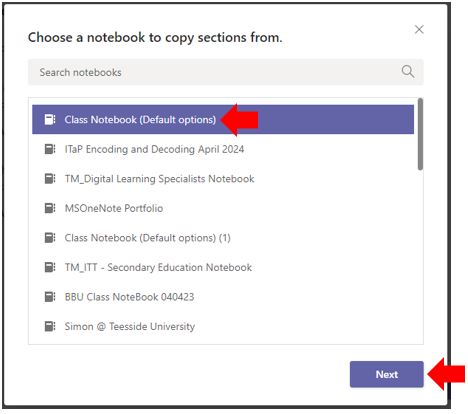
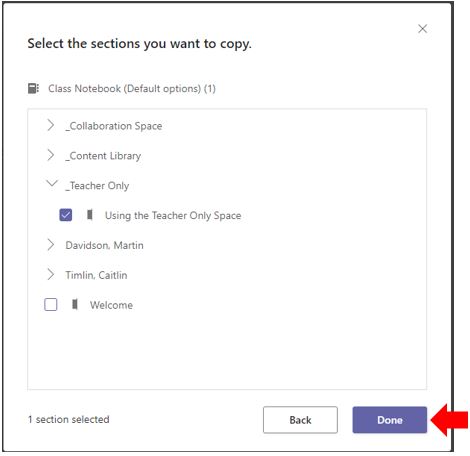
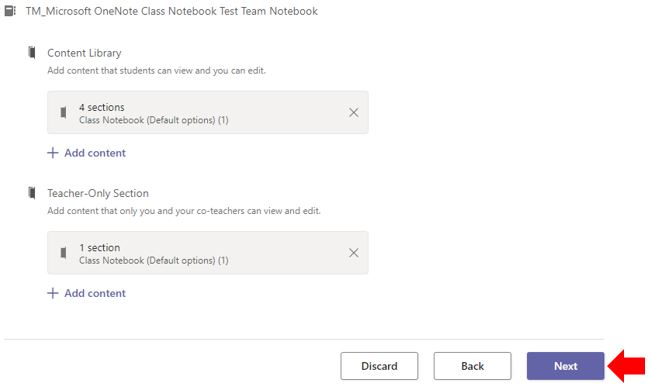
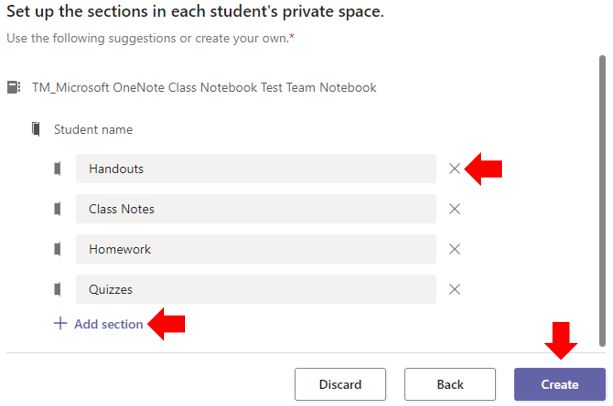
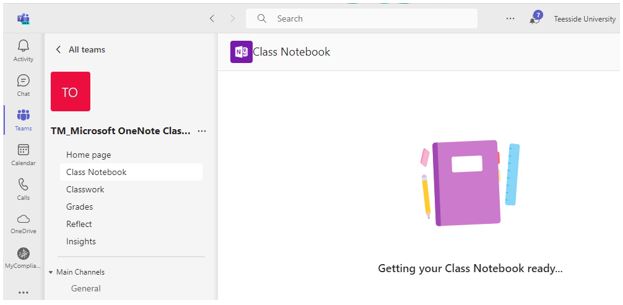
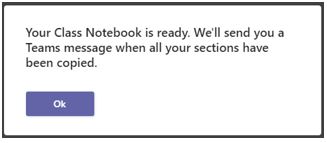
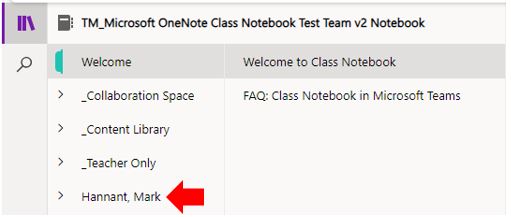
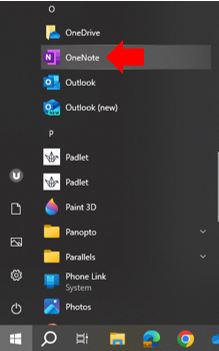
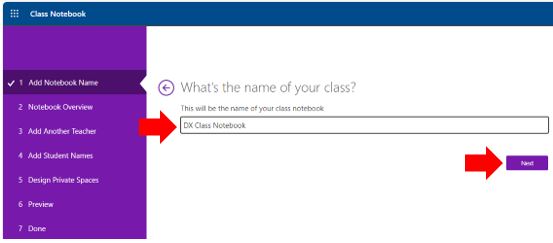
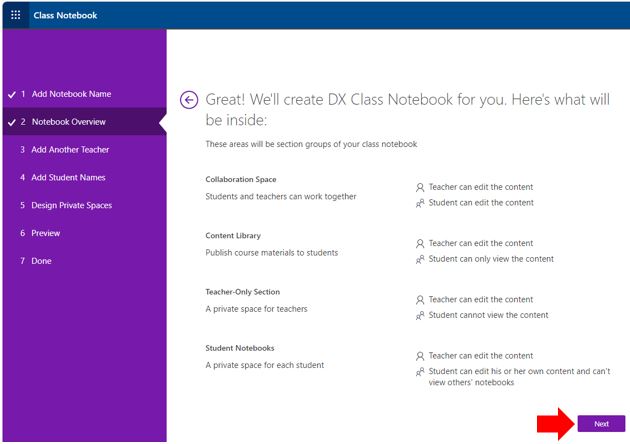
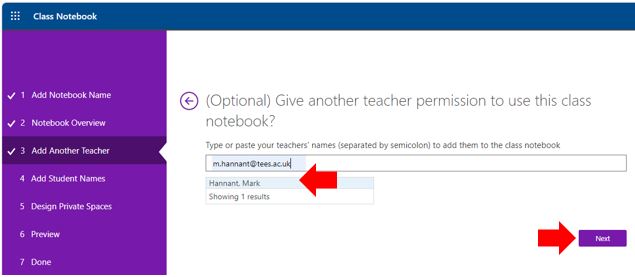
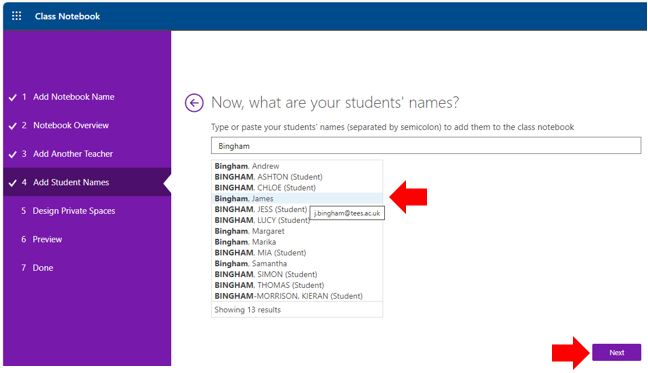
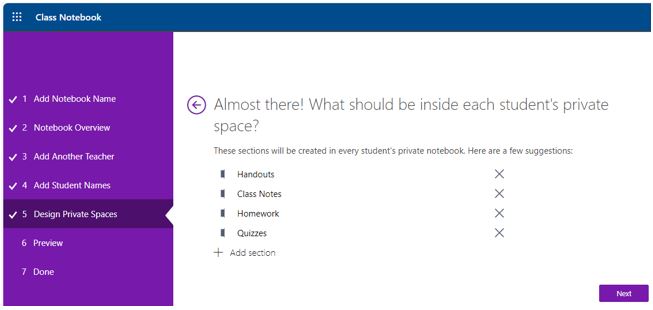
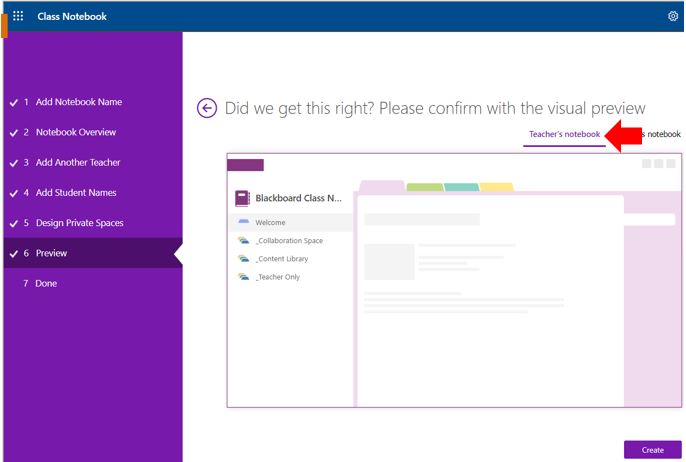
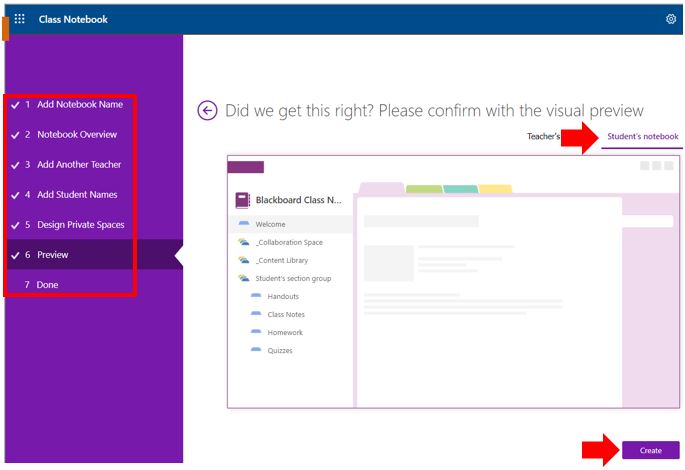
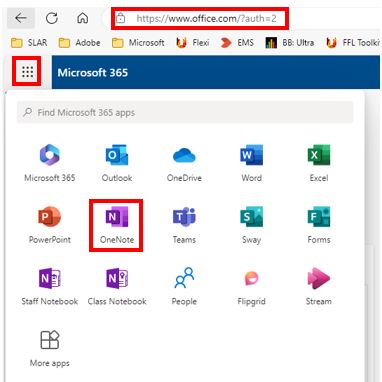
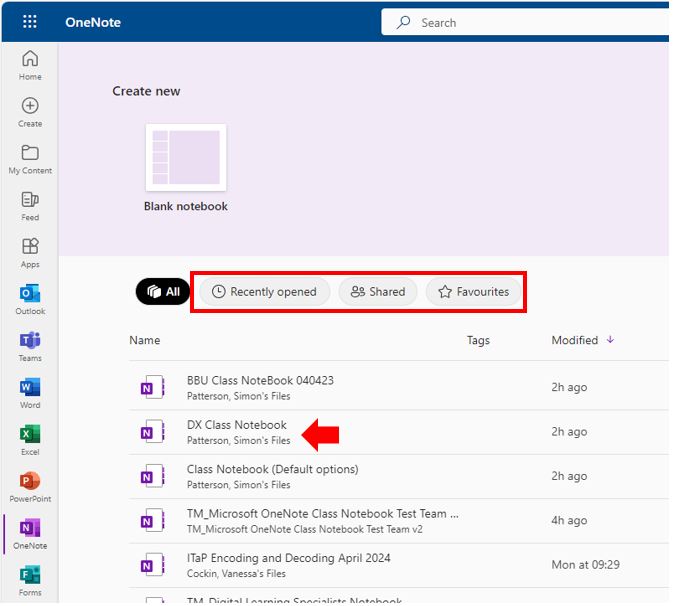
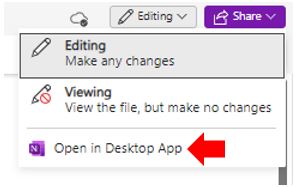
To use this method, the Class Notebook is set up using the built-in Notebook option in the tools section of Blackboard Ultra. Class Notebook spaces that have been set up outside of Blackboard will require students to be added manually by the instructor. To do this staff members will need to sign into their Office 365 accounts. Log into Blackboard and open the module where the Class Notebook is to be created. Staff can choose to create a new class notebook or link to a previously created notebook. To create a new Class Notebook, click Create a Class Notebook. *NOTE If a Class Notebook has previously been associated with this module, the following message will be displayed: Creating a new Class Notebook will delete the previous one. If you have never set up a Microsoft OneNote Class Notebook in your Blackboard module, various sections will need to be reviewed and actioned. Add Notebook Name The default name relates to the module name the Class NoteBook is being created in however, this can be changed to something else. Notebook Overview This is an information screen; no options can be altered. Add Another Teacher If multiple staff deliver on this module and will need permission to access and manage this Class NoteBook then they can be added here via their email addresses. Teachers can be added or removed once the Notebook is created. Add Student Names ALERT* As mention previously, Microsoft have removed the feature that automatically enrols students into the Class Notebook via the Blackboard module register. This means that students need to be manually added (similar to adding additional staff). Decide what sections to include inside each Student’s Private Workspace. When students open the Class Notebook for the first time a private workspace section will be created for each student that only the students and teachers attached to the Class Notebook can see. These sections can be modified (added, removed and renamed) later. By default, four sections are suggested and if left will be added to each student’s private workspace. These include: Some or all of these default sections can be removed, and new sections added. The Preview screen will give a visual overview of how the Teachers and Students Notebooks will look if the settings previously configured (above) are used. To switch between the Teacher and Student View use the tabs in the upper right corner of the preview. Teacher Preview Student Preview If mistakes are identified or updates to the Notebook are required based on these previews, click on any of the first 5 sections listed on the left-hand side of the screen to review and update. Once the Microsoft OneNote Class Notebook is correctly set up and configured, click the ‘Create’ button to complete this process. This may take a few minutes to complete. Click the Close button to complete this setup process. To allow students to access the new OneNote Class Notebook via the Blackboard module Decide where within Blackboard to create the Class Notebook shortcut, click the purple ‘plus’ button and select Content Market. Once the Content Market has loaded, scroll down until you find the OneNote Class Notebook icon. Do not press the Icon, Title or Description! Located in the bottom right corner of the tile, click the small circle with a plus symbol. A shortcut (link) to the OneNote Class Notebook should now appear in the Blackboard Module. This is the link referred to above that the student(s) will need to click on the first time they access the Class Notebook. Student View of the Class Notebook inside the Blackboard Module When students access the Blackboard module, they will see the link to the OneNote Class Notebook. Clicking on the link will give students the option to open the Notebook in the desktop application. To link to a previously created Notebook click the Manage notebooks and select the notebook to manage and add. In this example, the ‘Class Notebook (Default options)’ is to be selected. The sections of the new Notebook that will be made available to students will need to be selected and or added. By default, the Collaboration Space is unlocked. To allow students to access the new OneNote Class Notebook via the Blackboard module Decide where within Blackboard to create the Class Notebook shortcut, click the purple ‘plus’ button and select Content Market. Once the Content Market has loaded, scroll down until you find the OneNote Class Notebook icon. Do not press the Icon, Title or Description. Located in the bottom right corner of the tile, click the small circle with a plus symbol. A shortcut (link) to the OneNote Class Notebook should now appear in the Blackboard Module. This is the link referred to above that the student(s) will need to click on the first time they access the Class Notebook. The main benefit of setting up the Microsoft OneNote Class Notebook inside Microsoft Teams is the automatic auto-enrolment of all students into the Notebook from those already enrolled in the Class Team. To use this method, Class Notebook is already integrated with the Team. set up using the built-in Notebook option in the tools section of Blackboard Ultra. Students who join the Microsoft Team at a later date will need to be manually added by the instructor. 1. Open the Microsoft Teams site in which the Class Notebook is to be created. 2. From the left menu, select the Class Notebook option. 3. Click on the ‘Set up a OneNote Class Notebook’ button that appears in the main screen area. 4. Staff can choose to create a new Class Notebook or link to a previously created Class Notebook. To create a new Class Notebook, click the ‘Blank Notebook’ option. There will now be a series of settings/options that will need to be configured. Notebook Overview menu option screen This is an information screen; no options can be altered. Decide what sections to include inside each student’s Private Notebook menu option screen When students open the Class Notebook for the first time a private workspace section will be created for each student that only the students and teachers attached to the Class Notebook can see. These sections can be modified (added, removed and renamed) later. By default, four sections are suggested and if left, will be added to each student’s private workspace. These include: Some or all these default sections can be removed, and/or new sections added. Once the Microsoft OneNote Class Notebook is correctly set up and configured, click the ‘Create’ button to complete this process. This may take a few minutes to complete. Once complete, the OneNote Class Notebook will appear within the Microsoft Teams user interface. In the example below, the three students added to this Teams site have automatically been added and have private workspace created. To allow students to access the new OneNote Class Notebook via the Microsoft Teams site. When students access the Teams site, navigate to the Class Notebook section, and the Class Notebook will open directly inside the Teams site. To link to a previously created Class Notebook click on the Class Notebook channel, click the Setup a OneNote Class Notebook and choose ‘From existing Notebook content’. Once the ‘From existing notebook content’ has been selected, a series of configuration screens will need to be completed to finalise this process. These are shown below. Notebook Overview menu option screen This is an information screen; no options need to be configured here. Click the ‘Next’ button to continue. Choose the Content you want to copy into this notebook menu option screen You can use the Add Content option to include in this Class Notebooks Content Library from previously created Class Notebooks. Add Content from the Content Library Clicking on this option will open the ‘Choose a notebook to copy from’ menu. Select the Class Notebook to copy the Content Library items from and into your new Teams Class Notebook. Select the Next button. Select which specific sections to copy; also notice the total number of sections selected in the bottom left and click Done once complete. Add Content from the Teacher-Only Section Clicking on this option will open the ‘Choose a notebook to copy from’ menu. Select the specific Class Notebook to copy the ‘Teacher only’ section content from and into your new Teams Class Notebook. Select the Next button once complete. Select which specific sections to copy. The selection of content to copy from isn’t limited to just the corresponding Teachers Only section, the selection can be from any other section as well). Click the ‘Done’ button once complete. Once both sections have had content selected, click the ‘Next’ button to continue. Set up the sections in each student’s ‘Private Worksapce’ menu option screen. When students open the Class Notebook for the first time, a private workspace area will be created for each student that only the students and teachers attached to the Class Notebook can see. These sections can be modified (added, removed and renamed) later. By default, four sections are suggested, and if left, they will be added to each student’s private workspace area. These include: Some or all of these default sections can be removed, and/or new sections added. Once the Microsoft OneNote Class Notebook is correctly set up and configured, click the ‘Create’ button to complete this process. This may take a few minutes to complete. Once completed, the OneNote Class Notebook will appear within the Microsoft Teams user interface. In the example below, students who have been added to this Team site are automatically added and have a private workspace area created. This tutorial will explain how to create a Microsoft OneNote Class Notebook using the Microsoft OneNote Desktop version. 1. Open OneNote: This can be done from the start menu 2. Navigate to the Class Notebook tab and click on Create a Class Notebook. 3. Add a Notebook name and click the Next button. 4. Notebook overview (change nothing). Click the Next button. 5. Add additional teacher by their names or emails (these can be easily added later) Click the Next button. 6. Add students via names or emails (these can be easily added later) Click the Next button. 7. Edit, Add and/or Delete default folders for the student’s area of the book. When students open the Class Notebook for the first time, a private workspace will be created for each student that only the students and teachers attached to the Class Notebook can see. These sections can be modified (added, removed and renamed) later. By default, four sections are suggested and if left will be added to each student’s private workspace. These include: Some or all these default sections can be removed, and new sections added. Click the Next button. 8. Preview, the teacher and student’s view of the notebook click the Create button Teacher Preview Student Preview If mistakes are identified or updates to the Notebook are required based on these previews, simply click on any of the previous sections listed on the left-hand side of the screen to review and update. Once the Microsoft OneNote Class Notebook is correctly set up and configured, click the ‘Create’ button to complete this process. This may take a few minutes to complete. Click the ‘Back to home’ link to complete this setup process. To access the newly created Microsoft OneNote Class Notebook for the first time, open an internet browser and access the site ‘https://www.office.com’. Click on the App Launcher located in the top right-hand corner of the webpage and select the OneNote icon. Locate the Notebook in question and click it to open. Depending on the number of Notebooks a user is attached to, there are also some filter options and the ability to favourite those more commonly used. Once the Notebook is opened within the browser, both staff & students can work on the online browser version or open the Desktop App from here. The following section introduces some of the basic configuration options and provides support on how to execute these configurations. When the Class Notebook is opened, the Collaboration Space and the Content Library are visible, these open as separate ‘Sections’ in the Notebook. Add/Remove Students Add/Remove teachers Once you have added students/teachers you need to let them know you have shared the notebook with them to do this click on Get Notebook Links, copy the correct link and email it to the students/teachers they can click the link and open the notebook. The Preview screen will give a visual overview of how the Teachers and Students Notebooks will look if the settings previously configured (above) are used. To switch between the Teacher and Student View use the tabs in the upper right corner of the preview. The following section introduces and gives a basic overview of some of the techniques that can be used to distribute teaching and assessment material within a OneNote Class Notebook directly to students and their private workspaces. For a more comprehensive guide on distributing and removing content, please visit the ‘Microsoft Class Notebook: Distribute and Remove Content‘ guide. Distribute page: Use this to easily distribute pages to all students in a class. Individual and Group Distribution Use this feature to push out a page to specific students rather than everyone in the class. It is also possible to set up and define groups of students to differentiate the distribution. Undo a Distributed Page It is possible to undo (or recall) a page that has been distributed. Choose Distribute Page, and then choose Undo page distribution. This will recall the page and delete it from the student notebooks. If any student has updated the page, then the Undo command will be disabled to ensure the teacher doesn’t accidentally delete student work. Distribute New Sections You can use this to create a new section in each student’s private workspace, then push a set of pages to them with the Distribute Page feature explained above. To distribute new sections, check the More options box. This will expand the box, type the name at the top by Section Name, select where it will be placed; and click Create.Workflow to set up a Class Notebook in Blackboard
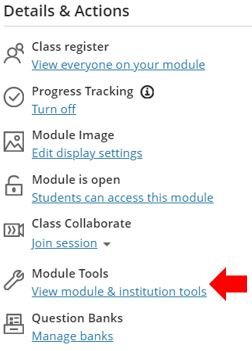
Click on the Module Tools option located under the Details and Actions menu.
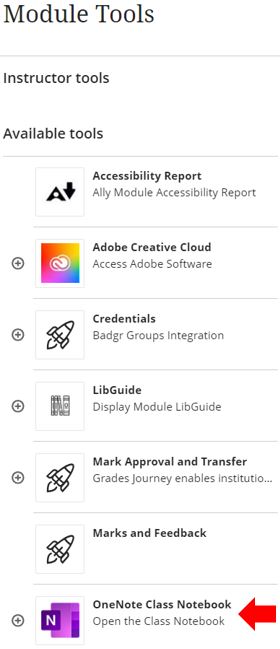
Click on the OneNote Class Notebook option.

Creating a new OneNote Class Notebook in Blackboard

Linking to a previously created OneNote Class Notebook in Blackboard
2. Setting up a Class Notebook in Microsoft Teams
Workflow to set up a Class Notebook in Microsoft Teams
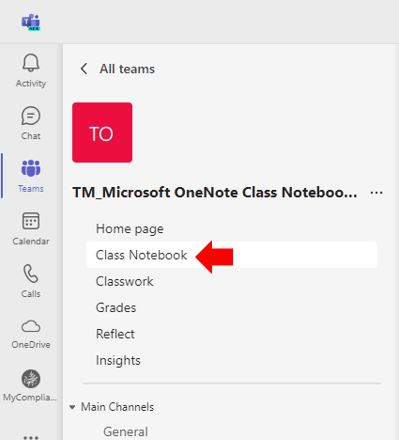
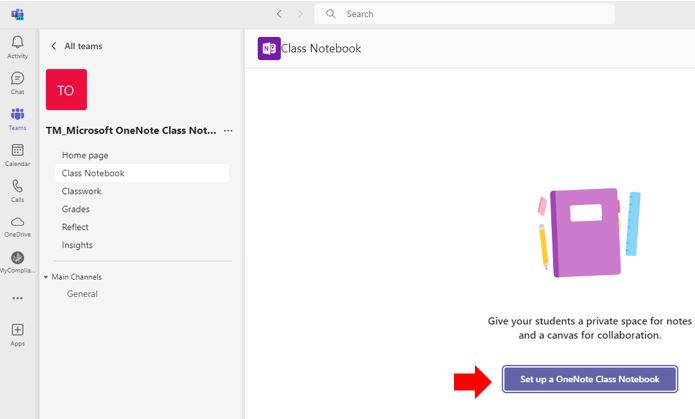
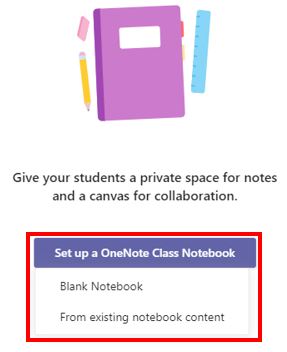
Creating a new OneNote Class Notebook in Microsoft Teams

Linking to a previously created OneNote Class Notebook in Blackboard
3. Setting up a Class Notebook within the OneNote Desktop Application
Workflow to set up a Class Notebook


To access and view the new OneNote Class Notebook
4. Basic configuration of a Class Notebooks
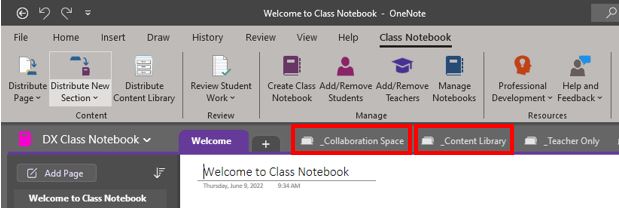
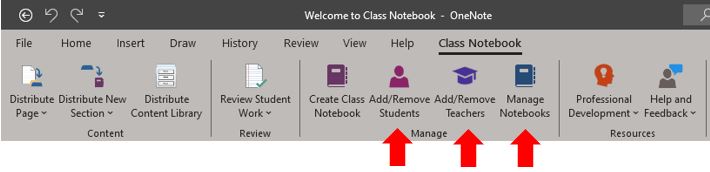
Navigating and setting up Class Notebook
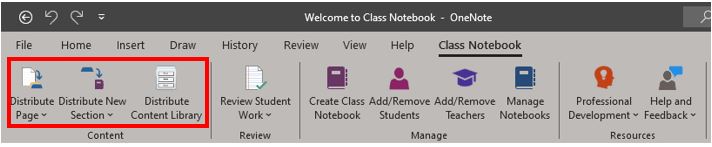
Distribution of content to students: