As an educator, using Microsoft OneNote Class Notebook can enhance classroom workflows and optimise the learning experience.
This guide introduces features available in Microsoft OneNote Class Notebook that allow for Pages and Sections to be automatically distributed (Copied) to students’ private workspace which in turn supports the management of content and streamlines classroom collaboration and organisation.
Contents
- Distribute a page(s) to all students in a Class Notebook
- Distribute a page(s) to individual students
- Distribute pages to groups of students
- Distribute pages from one Notebook to another
- Distribute a Section
- Distribute a New Group Section
- Immediate ‘Undo’ option for Page distribution (Desktop version only)
- Delete previously distributed pages (Web version only).
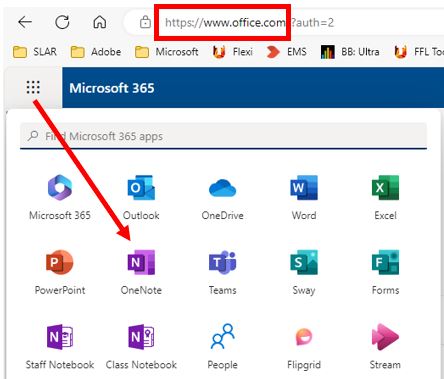
All workflows and associated screenshots in this guide are based on the web version of Microsoft OneNote Class Notebook which can be accessed at https://office.com and selecting OneNote from the App Launcher.
Distribute a page(s) to all students in a Class Notebook
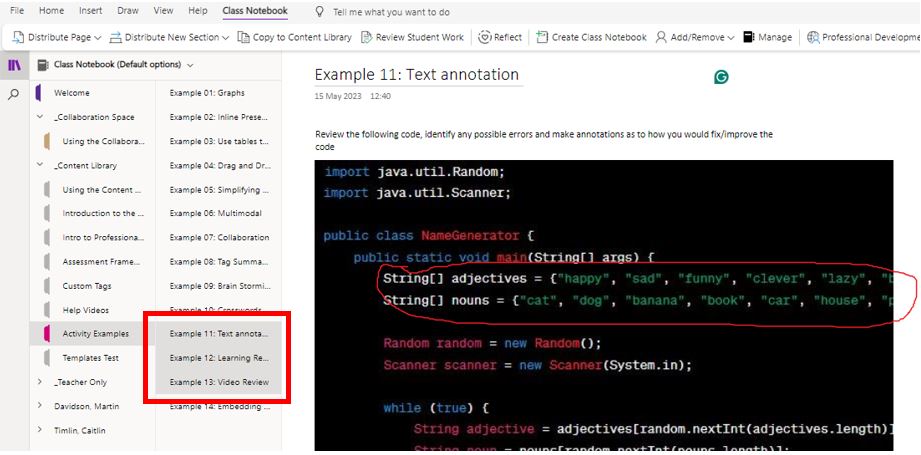
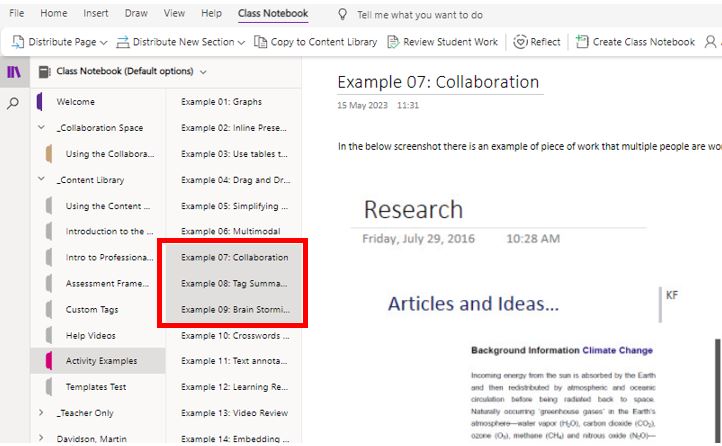
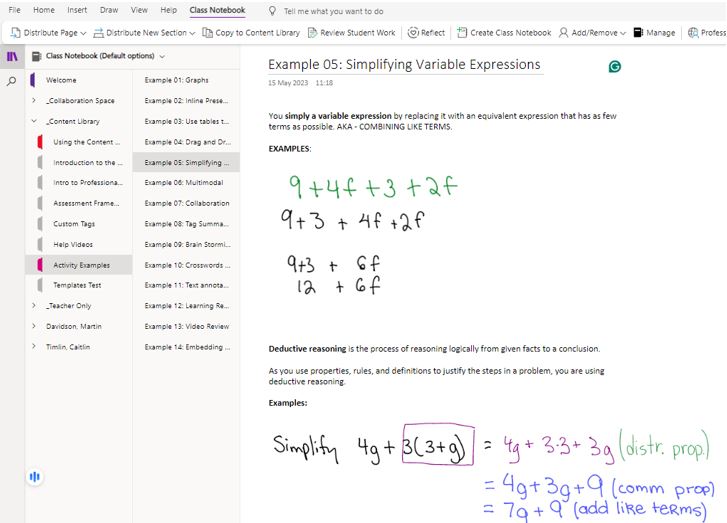
- Open the Class Notebook you’d like to distribute from in OneNote and select the page(s) you want to distribute from your notebook’s Content Library or Collaboration Space. To select multiple pages, hold down the Ctrl key whilst clicking on pages.
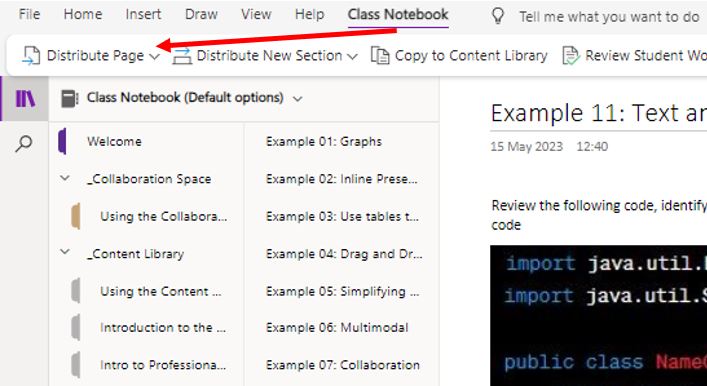
- Select the Class Notebook tab, then select Distribute Page.
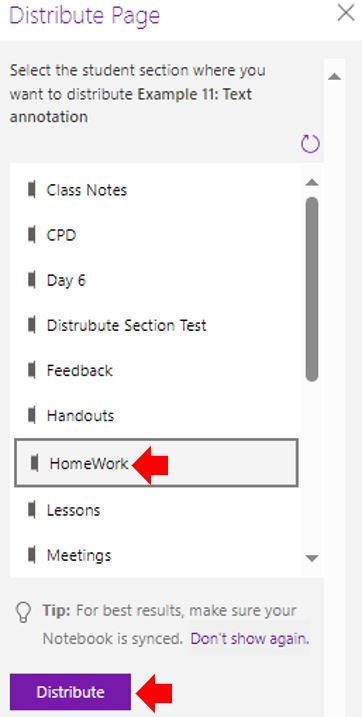
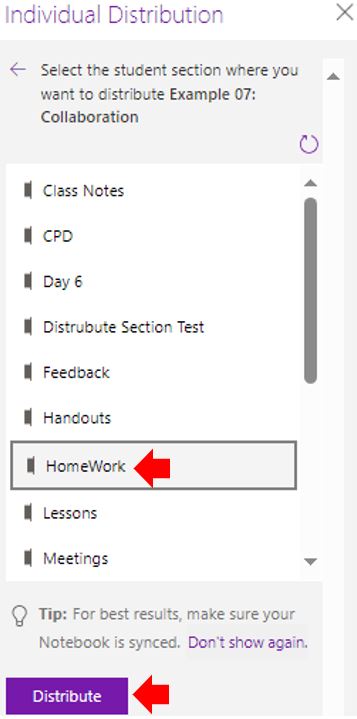
- Choose the Notebook section you’d like the page(s) copied into. For example: Homework. All students will get a copy of the page in their notebook’s Homework section.
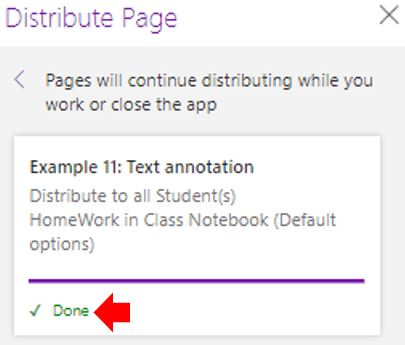
*Note: Select View distributed pages to view status updates on pages you’ve distributed to students. You can close the distribution window at any time and pages will continue distributing in the background. The example below shows the 4 pages that have been copied to the student’s ‘Homework’ section.
Distribute a page(s) to individual students
- Open your Class Notebook and navigate to the page you’d like to distribute (multiple pages can be selected by holding down the Ctrl key).
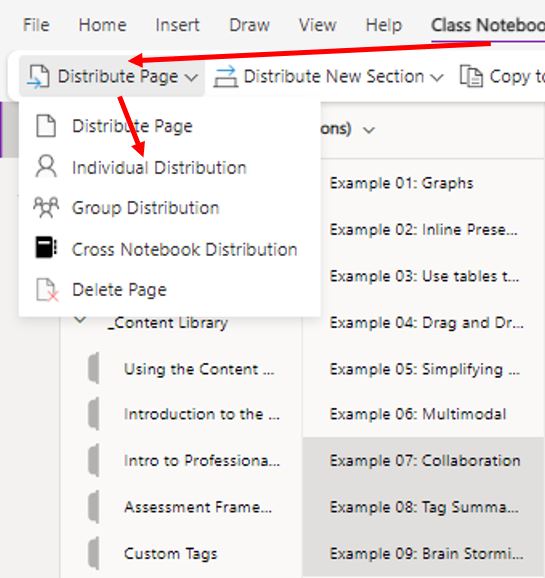
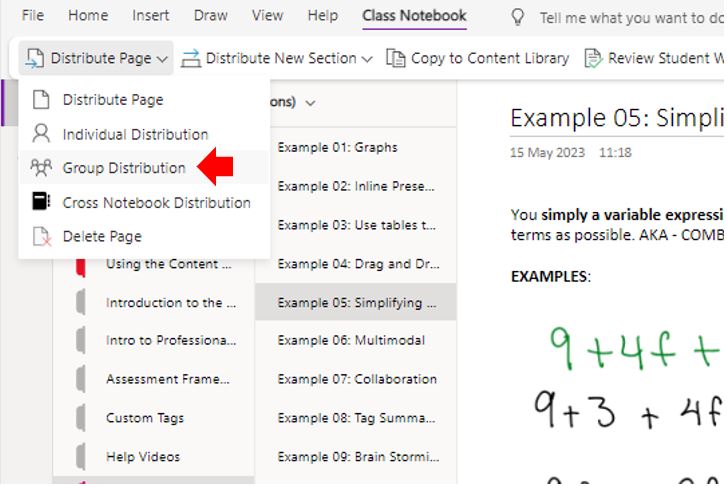
- Select the Class Notebook tab, then Distribute Page > Individual Distribution.
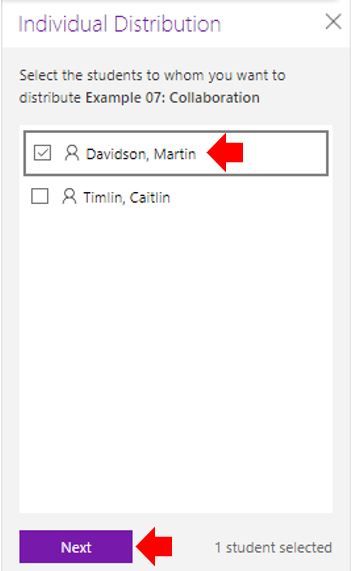
- Select the students to distribute the page(s) to using the checkboxes next to their names and click the Next
- and select the section of the student’s notebook where you want the page to show-up. For example, ‘HomeWork’. Click Copy.
*Note: In the web-based OneNote, select View distributed pages to view status updates on pages you’ve distributed to students. You can close the distribution window at any time and pages will continue distributing in the background.
Distribute pages to groups of students
By creating and saving groups of students this allows different content to be distributed based on learner needs or small group projects.
- Open the Class Notebook and navigate to the page you’d like to distribute.
- Select the Class Notebook tab, then Distribute Page > Group Distribution.
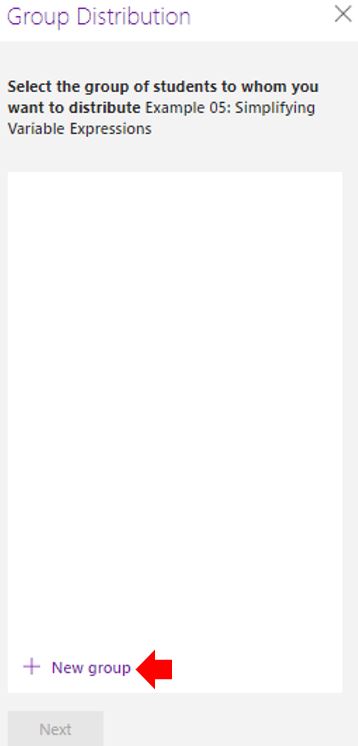
- If the required group has not yet been created, select + New group in the Group Distribution
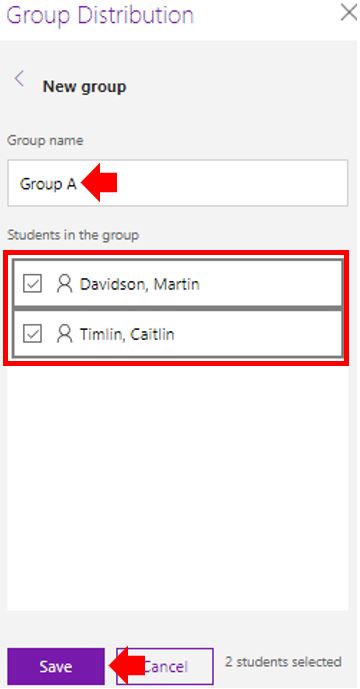
- Enter a name for your group, choose students using the checkboxes next to their names and click Save.
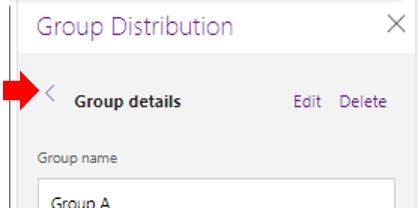
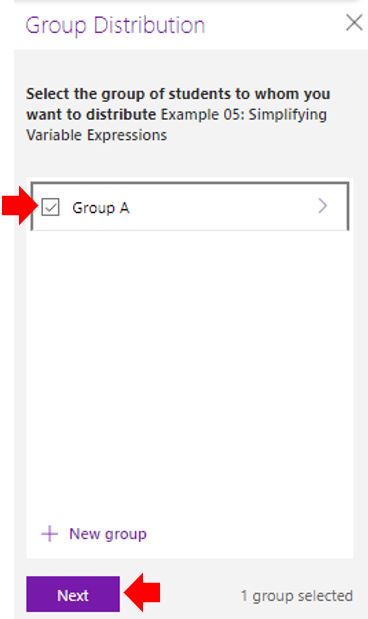
- Once the new group has been created, select the Go back arrow, select the checkbox next to the group, then Next.
- Select the checkbox next to the group and click the Next
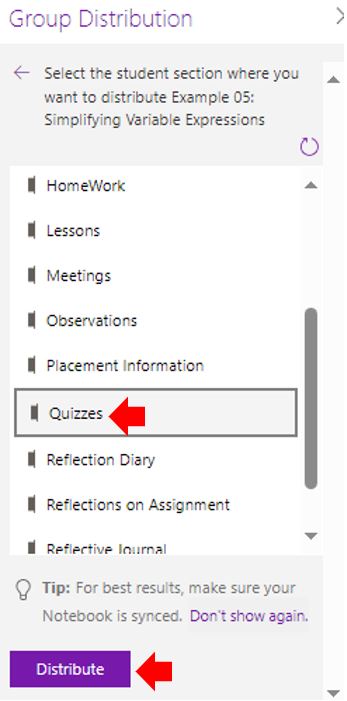
- Select the section of the students’ notebooks where the page is to be copied. For example, Quizzes and click the Distribute
*Note: Select View distributed pages to view status updates on pages that have been distributed to students. Closing the distribution window at any time as the pages will continue distributing in the background.
To create additional student groups, repeat the above steps 2-5 above. To edit a group’s name or members, select Distribute Page > Group Distribution. Select the arrow next to your group’s name, then Edit the group. Save your changes, or select Delete to delete the group.
Distribute pages from one Notebook to another
It is also possible to distribute a page from any OneNote Notebook to students in a Class Notebook. It is also possible to distribute the same page to multiple notebooks at the same time.
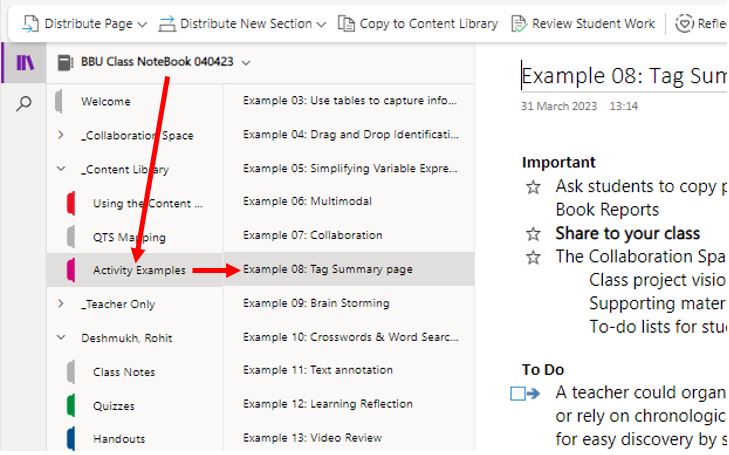
- Open any Notebook and navigate to the page you’d like to distribute.
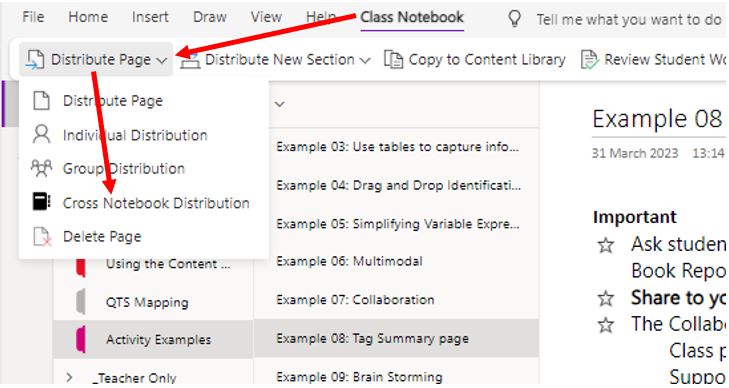
- Select the Class Notebook tab, then Distribute Page and finally Cross Notebook Distribution.
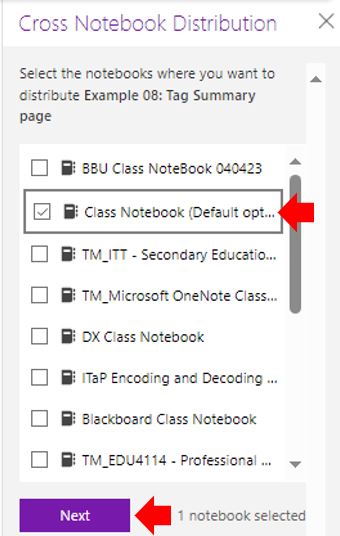
- Choose the notebooks you want to distribute this page to, then select Next.
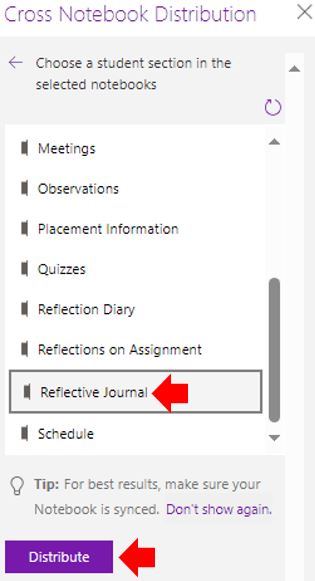
- Choose a student section to distribute the page(s) to, then click Distribute.
Note: Select View distributed pages to view status updates on pages you’ve distributed to students. You can close the distribution window at any time and pages will continue distributing in the background.
Distribute a Section
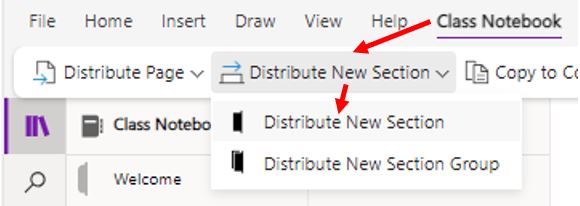
- Select the Class Notebook tab, then Select Distribute New Section > Distribute New Section.
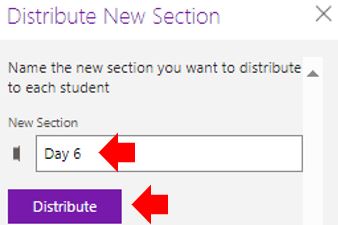
- Name your new section. For example: Day 6.
- Select Distribute. A new section will be created and distributed to each student in your Class Notebook.
Distribute a New Group Section
Section groups are a way to organise modules or topics with a lot of content. Use this workflow to create a new section group and organise it into sections at the same time, then distribute it to students.
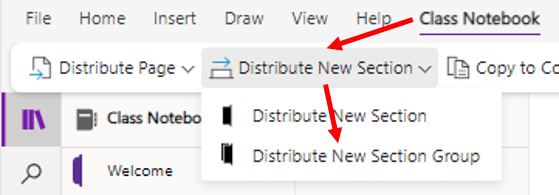
- Access the Class Notebook ribbon and then select Distribute New Section and then select Distribute New Section Group.
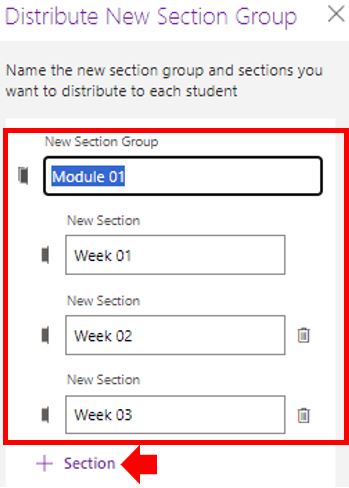
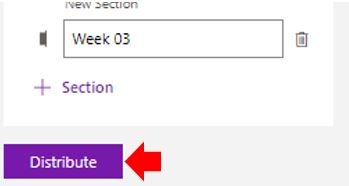
- Name the new section group and any sections required within it. Select + Section to add additional sections.
- Select Distribute. The blank section group and any sections in it will be created and pushed out to each student in the Class Notebook.
Immediate ‘Undo’ option for Page distribution (Desktop version only)
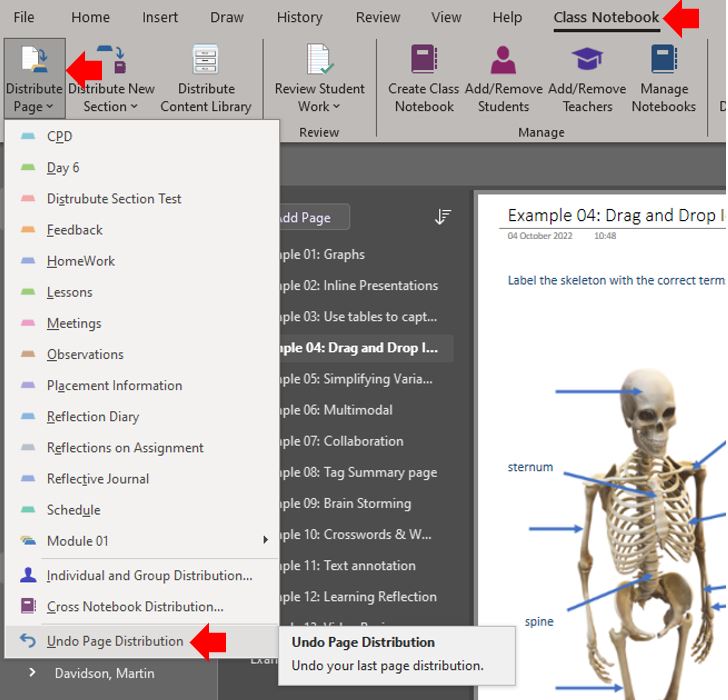
Access the Class Notebook ribbon, then select Distribute Page and click on Undo Page Distribution.
Delete previously distributed page (Only available via Web).
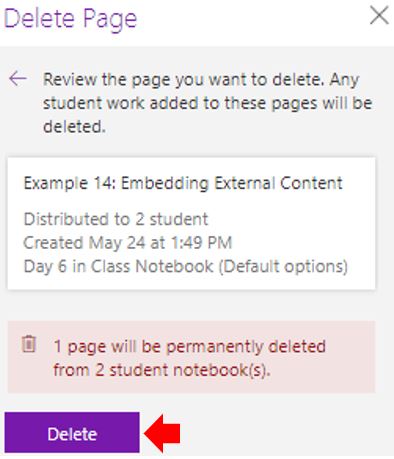
*IMPORTANT This option is only available when using the web-based version of Microsoft OneNote.Deleting a page you’ve previously distributed to students in your Class Notebook will remove the page from every student notebook where it’s been distributed.
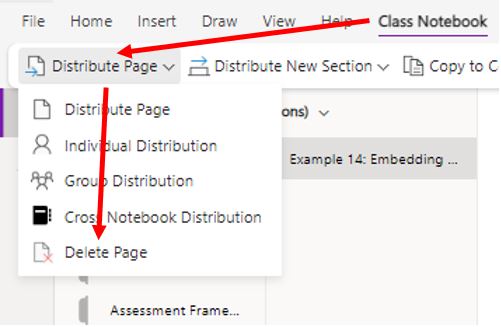
*WARNING If you delete a page you’ve distributed to student notebooks, any work a student has added to that page will also be deleted.- Open the Class Notebook, select the Class Notebook tab, then Distribute Page and finally Delete Page.
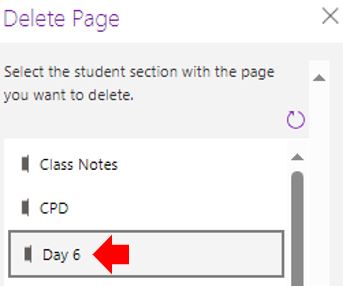
- Select the student section that contains the page to be deleted and click Next. In this example, the page to be deleted has been distributed to the ‘Day 6’ section.
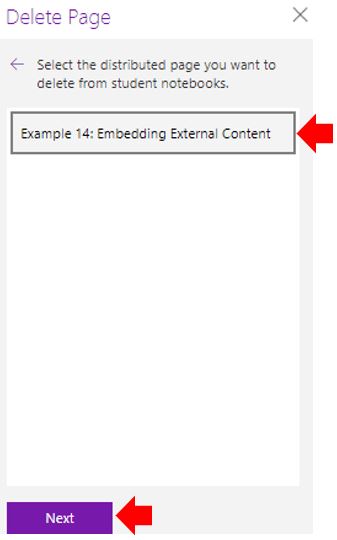
- Select the distributed page to be deleted from the student notebook and select Next. This example shows the Example 14 page being selected.
- Select Delete to confirm.

