
Introduction
Learn the basics of working with pages in Adobe InDesign, including how to navigate, create, and edit pages and master pages, set up column guides, and more.
Navigate pages in a document
Using Adobe InDesign, you can create documents like brochures, newsletters, magazines, books etc. To start working with multiple pages you will explore:
- The difference between facing and non-facing page documents
- How to navigate pages in a document using the pages panel
 To show the entirety of the first page document select the View menu and click Fit Page in Window. To zoom out further, so that you can see multiple pages within this document press Ctrl & –.
In this view, each page has something called paste boards associated with it. This is a grey area around it. Where you can put content that won’t print.
This document is currently set as a none-facing page document as it has single sided pages. Examples of none-facing page documents include double sided flyer, business card, letterhead etc. The new multipage document will look like the screenshot below.

Since this document has facing pages, the pages are next to each other. Each set of facing pages is referred to as a Spread in Adobe InDesign. This facing page document can become a magazine or a book for example. The first page you see if referred to as the Cover (therefore it is a single page to start). Facing page documents are usually meant to be bound, like a book or a magazine and pages face each other when you open or close the document, this means that there is a right-hand page and a left-hand page.
 In a multipage document it is useful to understand how to navigate pages, this can be achieved using the Hand tool to drag from one page to the next or use the scroll bar on the right. All the pages in a document can be seen in the Properties panel on the right, in the Page menu.
You can all access the A-Master page from this menu, the A-Master page is a template page that can be set up as a master template that any new pages that are created can be based on.
You can also click the Pages tab to open the Pages panel, in this panel you will see the Master pages (the template previously discussed) at the top half of the panel. In the bottom half of the panel are the pages in the document represented as thumbnails. To move between one page and another in this panel, double click the page in questions thumbnail. You can also navigate between pages via the bottom page combo box. There are also arrows that can navigate forwards and backwards whilst inside a document.
Create and edit pages
Add and edit pages in a document using the Pages panel and Properties panel. To start creating and editing multiple pages you will explore:
- Add a series of pages to the document using the Properties and Pages panel
- Change options such as page size
- Reorder pages in the document
 When you first setup a document you can enter any number of pages before creating it but you can also add and remove pages once the document has been created. To add another page to a document, click the Create new page button and a new page is added.
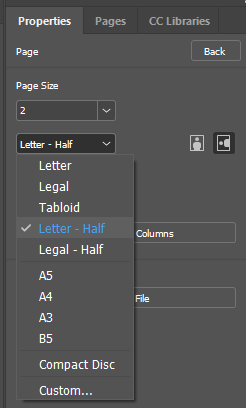 In InDesign pages that are in the same document can be set to different sizes. With page 2 selected click the Edit Page button. From the Page Properties panel, you can select a different page size or create a custom page size. Select Letter – Half and the page size of page 2 will update. Once you are happy with the page setup you can click the Back button to return to the Properties panel. In the pages panel you can create a copy of a page and you can make changes to that copy. Select page 1 and drag it down to the bottom of the Properties menu onto Create new page icon. Once on top of this icon you can release the mouse. The new copy of page 1 is placed at the end of the document.
Press Ctrl & – to show all pages in the document. Your document should now look like the screenshot below.

The new page copy now needs moving to be directly after the original, this can be achieved in the Pages panel by dragging the new copy up in the order and placing it after Page 1. A line will appear after page one signifying that this is where the new document will be placed.
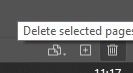 To delete a page such as the blank page 3 in this document, you can achieve this in the Properties panel or Pages panel. In the Pages panel, select the page to be deleted (the page 3 thumbnail) then at the bottom of the Properties menu, click the Delete selected pages button.
Use a Master Page
In Adobe InDesign, if you need to have consistent elements on your pages like page numbers, footer content, a logo or even place holder frames, you can add that content to the default master page. In this section you will explore:
- What master pages are
- How useful they can be
In this example you will add a few elements to this page, instead of creating that content on each page by, for example, copying and pasting it. You can paste it on a master page. In the Properties panel, under the Page section, navigate to the pages dropdown menu and select A-Master. Remember that this is a default that comes with every Adobe InDesign document and is blank to start. This is the default master page that is applied by default every time you add a new page. Content placed on this master page will appear on all new pages that are created in the document. There is the option to create additional master pages if you intend to create multiple types of reoccurring pages in the same document.
To add and edit content on a master page, select A-master to open it in the document window. In this example a Project title will be added to display on every page.
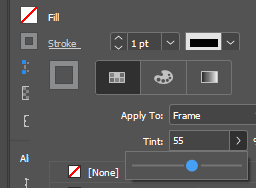 Open the A-Master page into the document Window. Select the Line tool righthand menu and add a line in the bottom left corner of the document. Drag the line from this left edge of the page and drag to the right. You can hold down the Shift key whilst dragging out the line shape to fix it to a 45° angle. The length of the pointer should be around 0.75 inches. With the line still selected several appearance changes can be made. From the Properties panel, change the Stroke value to 1pt and ensure the swatch Colour is set to black. You can also set a Tint value by moving the Tint Slider slightly to the left or by entering a specific value such as 55.
To zoom in on this shape object, with the object selected press Ctrl & + a few times. To add some text, click on the Text tool, starting above the line on the left drag out a frame from the edge of the page to the length of the line you have just drawn. The guidelines will help to align this object with the end of the page margins. Before typing, change the font size and enter some text, this should fit within the text frame area that was dragged previously dragged out. The text can be aligned to the right using the Paragraph Alignment option.
Use the Selection tool to select both the line and text and then using the grouping button, to group these objects. Now zoom back out to see the entire page (View menu and then Fit Page in Window option). Now navigate to page 2 to see that the A-Master content has been automatically added to this page as well. If you click on this grouped content on page 2, content that comes from a master page is identified by having a dotted border.
You will also be unable to use the Selection tool to select this master content. Master content is locked by default, to make changes to master content, changes will need to be made on the master page. Changes made to the master page will be reflected to all of the pages that the master is applied to. Master page content is also stacked behind any content added directly to normal pages.
By using master pages, you can work faster and smarter in Adobe InDesign.
Set Margins and Columns
When laying out your pages in Adobe InDesign, if you want to create columns of text, you can setup several none printing column guides in your document. In this section you will explore:
Adding several column guides to a document to create a page layout more easily
In this file the content is going to be arranged in several columns, text in one column on the left and graphics in another column on the right. There are several techniques that can be used to achieve this:
- Drag and resize the content on the page into two distinct column sized shapes
- Create several page guides
- Change the margin and column guides
With a document open you most likely will see some pink and purple lines. These are either margin guides or are used to frame the content and determine the space between the content and the edge of the page. They are there for different reasons such as to act as a reminder to keep content away from the edge of the page if you are going to print this document once complete on a printer that cannot print to the edge of the page (like most printers cannot).
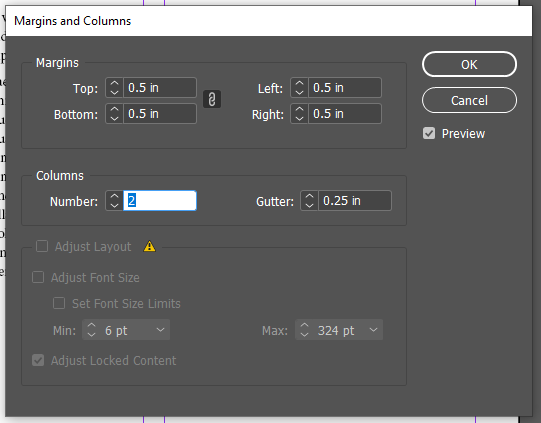 To set the Margin and Column Guides open the Layout menu and select the Margins and Columns… option. A dialogue box appears and any changes that are applied here will only have an affect the current page in question. To apply these changes to all pages within a document you should follow these steps but apply them to a master page (as discussed above).
You can adjust the margins on your page independently by turning off the Make all settings the same option. By default, all margins in this document are set to 0.5in. You might choose to do this to leave a larger margin at the top of the page to account for including a header in the document.
For the page in question, two columns will be used, therefore the column number should be changed to 2. You can also click on the Preview button to see a previous of how the proposed changes will impact the document before committing to those changes. By default, the text frame will not automatically move/change after setting the columns. Columns should be configured before adding content such as text.
Gutter value is the distance between the columns and can be a way to add additional spacing between the column guides. Set the Gutter value to 0.25 and click Ok.
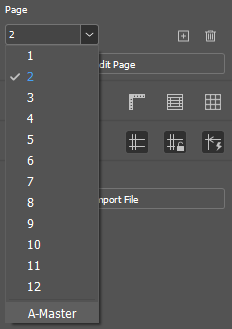
Using the selection tool, click the text to select the text frame. Drag the lower right point of the frame to match that on the bottom right column frame.
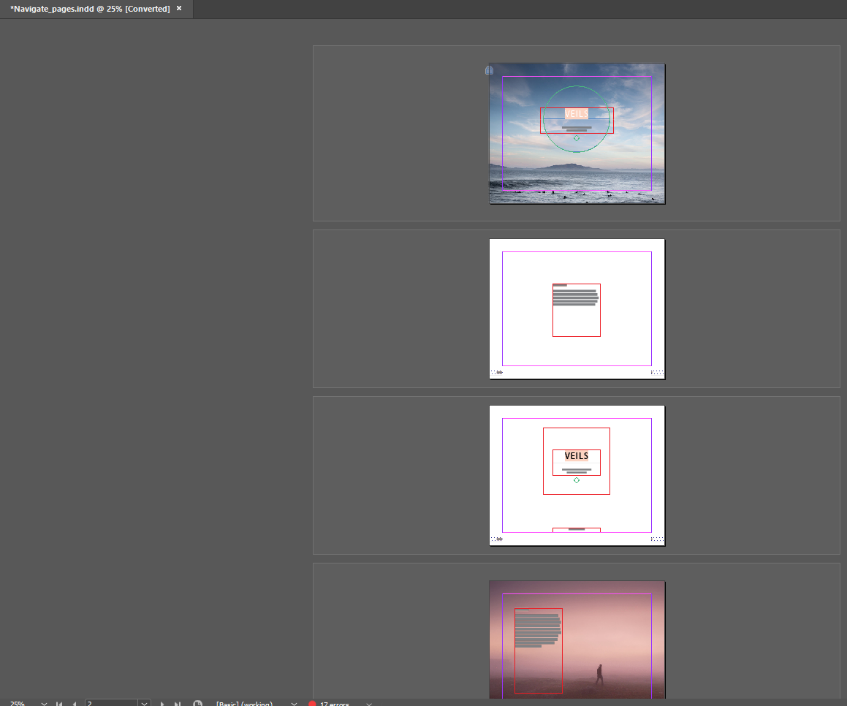
With the righthand side of the page now empty, try dragging an image into the top of the second column.
In the text column, using the top anchor, drag the text down to the turquois guideline, as the bottom of the text may no longer fit on the page. Therefore, it will need to be flowed onto the second column.

 A frame that has more text than can be viewed will show a red square with a plus sign. Clicking on this plus will allow you then select a frame to flow this text into.
Click on the left edge of the frame in question to flow the outstanding text into this frame.