
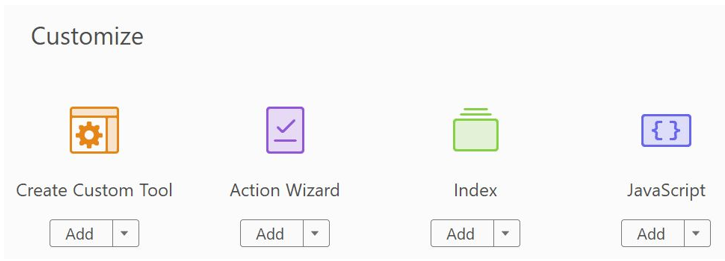
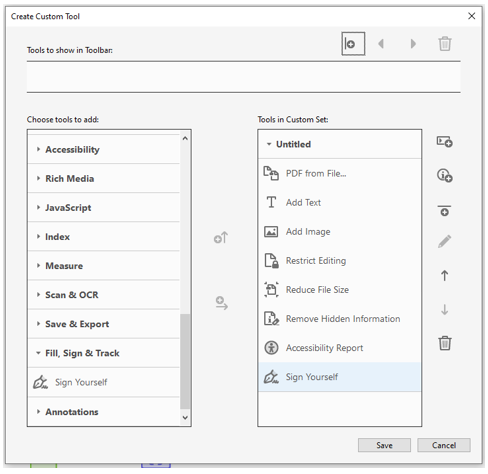
Create Custom Tool:
This option allows you to create a custom tool pallet in which you can select various tools from the different section of Adobe Acrobat. For example, you can combine all of your most frequently used tools into one easy to access Tool. In the example below, tools from a number of different areas have been added together into a single tool set.
Action Wizard:
When you apply one or more routine sets of commands to your files, you can save time and keystrokes by using an action, a defined series of commands with specific settings and in a specific order that you apply in a single step. You can apply an action to a single document, to several documents, or to an entire collection of documents. You can even scan documents and combine several documents into a single PDF before running an action.
Acrobat provides some predefined actions. You can also create your own actions. You can access and manage the actions by clicking Tools > Action Wizard. Adobe Acrobat also lets you export and import actions and commands so that you can share them with others.
Run an action
Acrobat includes several simple predefined actions that you can use to streamline your work. These actions represent common tasks that you routinely perform to prepare files for distribution. You do not have to open any of the PDF files before you begin to run these actions.
* Note: You can avoid password prompts when you run a sequence on PDFs that require passwords. Automate password entry or specify a security method for these files in the Action Wizard panel of the Preferences dialog box. If you select Do Not Ask for Password, PDFs that require passwords are not processed.
- Choose Tools > Action Wizard. A list of available actions is displayed under the Actions List in the right-hand pane.
- Choose the action from the list. The right-hand pane changes to display each task included in the action, as well as any instructions provided by the author of the action.
- Under Files To Be Processed, click Add Files to select the files that you want to run the action on. You can run the action on the currently opened file, or add more files, folders, or email attachments.
- When all the files you want to process are listed, click Start.
- If Acrobat prompts you, provide additional information, such as output location and settings.
A progress indicator displays the status of the currently running process or task. A check mark identifies completed actions or tasks. On successful completion of all tasks, Completed status is shown in the panel.
Create a custom action
To make your action easier to follow, you can group steps into panels, add divider lines, and include instructions. You can limit the action to specific files, apply it to all files within a folder, or let the user choose a file from various sources such as a scanner, web page, or Clipboard.
- Choose Tools> Action Wizard. (The Action Wizard toolset is displayed in the secondary toolbar.)
- In the secondary toolbar, click New Action. (The Create New Action dialog box is displayed.)
- To apply the action to a specific file or to all files within a folder, click the Fileor Folder under Files To Be Processed (on the right). Navigate to the file or folder and click Open.
- In the Choose Tools To Add pane, expand the panels, and double-click a task to add it. You can add multiple tasks. The tasks are executed in the order in which they appear in the Action Steps To Show list on the right.
- To predefine options for a task, click Specify Settings.
- To have the action prompt the user to select options, click the Prompt Usercheck box.
- Add other tasks as required.
- Fine-tune the action using the buttons on the right. Add a new panel grouping, instructions, or a divider line, or move or delete items in the list.
- Creates a new panel grouping at the bottom of the current set of tasks. When prompted, type the name of the panel, and click Save.
- Adds instructions below the currently selected task. When prompted, type the instructions, and click Save.
- Adds a divider line below the currently selected task.
- Moves the currently selected item up the list. You can move a task, instructions, a divider line, or an entire panel grouping.
- Moves the currently selected item down in the list. You can move a task, instructions, a divider line, or an entire panel grouping.
- Deletes the currently selected item. Be careful what you select. You can delete an entire panel grouping.
- Click Save.
- In the Save Action dialog box, enter a name and a description for the action and click Save.
Automate password entry for actions
- Open the Preferences dialog box.
- Choose Signatures in the Categories on the left.
- For Identities & Trusted Certificates, click More.
- On the left, open Digital IDs and select Digital ID Files.
- In the list on the right, select an ID and then select the following commands from the top bar:
- Login: Logs in using the specified digital ID. Type the password and click OK.
- Logout: Logs out using the specified digital ID when you have finished running an action
For more information click here.
Index:
You can reduce the time required to search a long PDF by embedding an index of the words in the document. Acrobat can search the index much faster than it can search the document. The embedded index is included in distributed or shared copies of the PDF. Users search PDFs with embedded indexes exactly as they search those without embedded indexes; no extra steps are required.
Add an index to a PDF
- With the document open in Acrobat, choose Tools > Index. (The Index toolset is displayed in the secondary toolbar.)
- In the secondary toolbar, click Manage Embedded Index.
- In the Manage Embedded Index dialog box, click Embed Index.
- Read the messages that appear and click OK.
Create an index for a collection (Acrobat Pro)
When you build a new index, Acrobat creates a file with the .pdx extension and a new support folder, which contains one or more files with .idx extensions. The IDX files contain the index entries. All these files must be available to users who want to search the index.
- Choose Tools > Index. (The Index toolset is displayed in the secondary toolbar.)
- In the secondary toolbar, click Full Text Index With Catalogue. (The Catalogue dialog box is displayed.)
- In the Catalogue dialog box, click New Index. (The New Index Definition dialog box is displayed.)
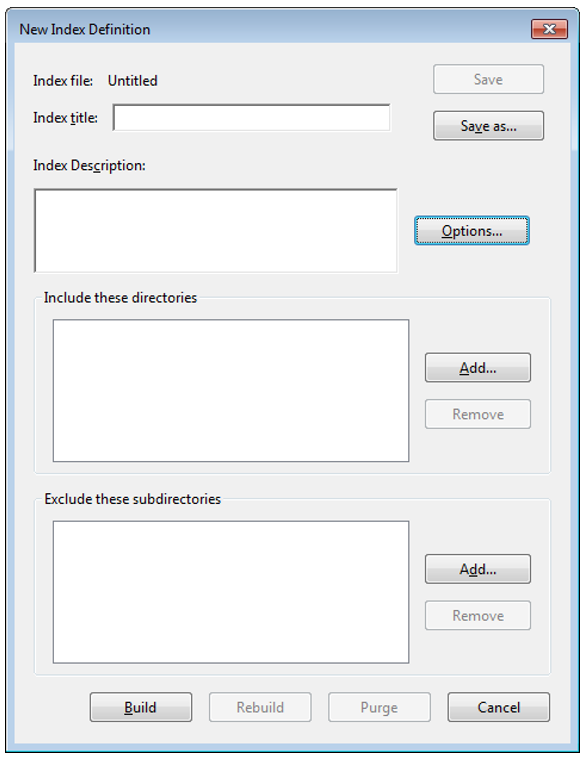
- In Index Title, type a name for the index file.
- In Index Description, type a few words about the type of index or its purpose.
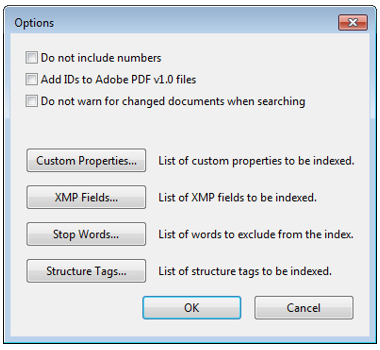
- Click Options, select any advanced options you want to apply to your index, and click OK.
- Under Include These Directories, click Add, select a folder containing some or all of the PDF files to be indexed, and click OK. To add more folders, repeat this step.
Note: Any folder nested under an included folder will also be included in the indexing process. You can add folders from multiple servers or disk drives, if you do not plan to move the index or any items in the document collection.
- Under Exclude These Subdirectories, click Add, and select any nested folder that contains PDF files you do not want to be indexed. Click OK and repeat, as needed.
- Review your selections. To edit the list of folders to be included or excluded, select the folder you want to change and click Remove.
- Click Build, and then specify the location for the index file. Click Save, and then:
- Click Close when the indexing finishes.
- Click Stop to cancel the indexing process.
For more information click here.
JavaScript:
One of the easiest and most powerful ways to customize PDF files is by using JavaScript. JavaScript in Adobe Acrobat software implements objects, methods, and properties that enable you to manipulate PDF files, produce database-driven PDF files, modify the appearance of PDF files, and much more. You can tie Acrobat JavaScript code to a specific PDF document, a page, field, or button within that document, or a field or button within the PDF file, and even to a user action. JavaScript is useful for XML forms. JavaScript enables automated forms handling, Web and database communication, commenting, and user-interface capabilities. PDF files created with Acrobat and Adobe LiveCycle tools allow data to be extracted as XML into custom schemas. Applications written in Java and other languages easily integrate Acrobat with web services using Simple Object Access Protocol (SOAP).